tasty tales kitchen

  • Home
  • Recipes
    • Desserts
    • Appetizers
    • Drinks
    • Dinner
  • Contact
  • About
  • Privacy Policy
menu icon
go to homepage
  • Home
  • Recipes
    • Desserts
    • Appetizers
    • Drinks
    • Dinner
  • Contact
  • About
  • Privacy Policy
search icon
Homepage link
  • Home
  • Recipes
    • Desserts
    • Appetizers
    • Drinks
    • Dinner
  • Contact
  • About
  • Privacy Policy
×

Modern Homepage

  • Dinner
  • Appetizers
  • Desserts
  • Drinks

Top 10 Recipes

  • - 2 large boneless, skinless chicken breasts - 1 cup cherry tomatoes, halved - 1 cup fresh mozzarella balls, halved - ¼ cup fresh basil leaves, finely chopped - 2 tablespoons balsamic glaze - 2 tablespoons extra virgin olive oil - 2 cloves garlic, finely minced - 1 teaspoon Italian seasoning - Salt and freshly ground black pepper to taste - Toothpicks or kitchen twine for securing The main star of this dish is the boneless skinless chicken breasts. They are easy to handle and cook evenly. The cherry tomatoes add a bright pop of flavor. Fresh mozzarella brings a creamy texture that melts beautifully. Fresh basil leaves give your dish a lovely aroma and taste. You’ll also want balsamic glaze. It adds a sweet tanginess that pairs well with the chicken. Extra virgin olive oil is key for cooking and adds richness. Garlic enhances the overall flavor with its bold presence. Italian seasoning blends the herbs and spices for a warm note. Season with salt and freshly ground black pepper to enhance all the flavors. Finally, toothpicks or kitchen twine will help keep the stuffing inside the chicken as it cooks. This combination of ingredients makes for a flavorful dinner delight that is both satisfying and easy to prepare. {{ingredient_image_2}} - Preheat your oven to 375°F (190°C). This helps cook the chicken just right. - Place the chicken breasts on a cutting board. Carefully slice each one horizontally to make a pocket. Don't cut all the way through. Leave the base intact. - In a bowl, mix together the halved cherry tomatoes, mozzarella balls, chopped basil, balsamic glaze, minced garlic, salt, and pepper. Stir until everything is well combined. - Spoon the tomato and mozzarella mixture into the pockets of each chicken breast. Make sure each pocket is filled well. This adds great flavor. - Close the openings gently. Use toothpicks or kitchen twine to secure them. This stops the stuffing from spilling out when cooking. - Heat olive oil in a large, oven-safe skillet over medium-high heat. - Add the stuffed chicken breasts to the hot skillet. Sear each side for 3-4 minutes until they turn golden brown. - After browning, sprinkle Italian seasoning over the chicken. - Carefully transfer the skillet to your preheated oven. Bake for 20-25 minutes or until chicken reaches 165°F (74°C). - Once done, take the skillet out and let the chicken rest for 5 minutes. Remove toothpicks or twine carefully. - For serving, drizzle any juices over the chicken slices. Add fresh basil leaves for color and taste. To ensure your chicken cooks through, check the internal temperature. It should reach 165°F (74°C). Use a meat thermometer for accuracy. If you cut into the chicken, juices should run clear, not pink. For a perfect sear, heat your skillet well before adding the chicken. Use medium-high heat and add oil once the pan is hot. Sear for about 3-4 minutes on each side until golden brown. This step adds great flavor and texture. For a stunning plate, serve the chicken on a large platter. Surround it with fresh basil leaves for a burst of color. You can drizzle balsamic glaze around the chicken for a nice touch. When serving, slice the chicken to show off the vibrant filling. Drizzle any remaining juices over the top. This adds moisture and enhances the flavor. Marinating your chicken can take the taste to another level. A simple mix of olive oil, garlic, and Italian herbs works wonders. Let the chicken soak in this blend for at least 30 minutes before cooking. Great sides to serve with Caprese Stuffed Chicken include a fresh salad or roasted vegetables. Garlic bread also complements this dish nicely. Consider adding a light pasta dish for a complete meal. Pro Tips Use Fresh Ingredients: Always opt for fresh mozzarella and ripe cherry tomatoes for the best flavor in your Caprese stuffed chicken. Don’t Overstuff: While it may be tempting to add lots of filling, be careful not to overstuff the chicken to avoid spillage during cooking. Let It Rest: Allowing the chicken to rest for a few minutes after baking helps the juices redistribute, ensuring a moist and tender result. Experiment with Seasoning: Feel free to add your favorite herbs or spices to the filling for a personalized touch that enhances the flavor profile. {{image_4}} You can change the cheese and tomatoes in this dish. Try burrata instead of mozzarella. It adds creaminess. For a twist, use sun-dried tomatoes instead of fresh ones. They give a rich flavor. Herbs can also change the taste. Instead of basil, use parsley or thyme. These herbs bring a new taste to your dish. A mix of herbs can also work well. You can grill or bake the chicken. Grilling gives a smoky flavor. Bake it in the oven for a juicy result. Both methods cook the chicken well. If you prefer, use a slow cooker or Instant Pot. These methods keep the chicken tender and flavorful. Just adjust the cooking time. Slow cooker may take longer, while the Instant Pot cooks quickly. For gluten-free meals, this recipe works well. All the ingredients are gluten-free. Just check labels on your balsamic glaze. You can make it low-carb by skipping the glaze. Serve it with a salad instead of bread. If you're looking for vegan options, replace the chicken. Use large mushrooms or eggplant slices. Stuff them with the same filling for a tasty dish. To keep your Caprese stuffed chicken fresh, use airtight containers. Glass or plastic containers work well. Let the chicken cool to room temperature first. Store it in the fridge for up to three days. Label your containers with the date for easy tracking. For the best taste, reheat the chicken in the oven. Preheat the oven to 350°F (175°C). Place the chicken in a baking dish. Cover it with foil to keep it moist. Heat for about 15-20 minutes. You can also use a microwave, but the oven keeps it juicier. You can freeze the stuffed chicken before or after cooking. If freezing before cooking, wrap each piece tightly in plastic wrap. Place them in a freezer-safe bag. They will last for up to three months. If freezing after cooking, let it cool first. Then, follow the same wrapping steps. Always label with the date. Cook Caprese stuffed chicken breast at 375°F (190°C) for 20-25 minutes. This time ensures the chicken cooks through. You want it to reach 165°F (74°C) inside. Use a meat thermometer for the best results. Cooking times may vary by oven, so check for doneness. A golden-brown crust will also show it’s ready. Yes, you can prepare Caprese stuffed chicken ahead of time. Stuff the chicken and cover it. Store it in the fridge for up to 24 hours. This method saves time on busy nights. Just remember to take it out 30 minutes before cooking. This helps the chicken cook evenly. Pair Caprese stuffed chicken with fresh salads or roasted veggies. A light arugula salad adds a nice crunch. Garlic bread is also a great option. You might enjoy pairing it with pasta tossed in olive oil. A side of rice can soak up the delicious juices too. Make your meal colorful and balanced! Caprese stuffed chicken is a simple yet flavorful dish. We explored its key ingredients, like chicken, mozzarella, and basil. I shared step-by-step cooking instructions and tips for a perfect meal. Variations allow you to customize flavors and methods. Proper storage keeps leftovers fresh, and I answered common questions to guide you. Enjoy this delicious dish and make it your own!
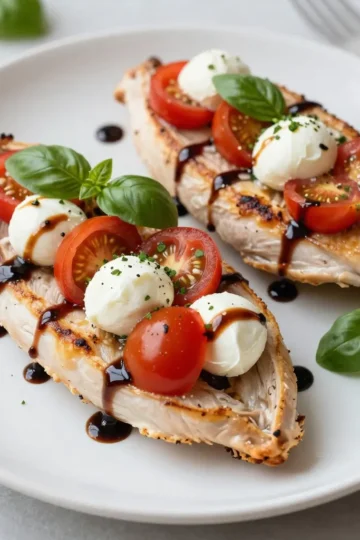
    Caprese Stuffed Chicken Breast Flavorful Dinner Delight
  • - 4 large yellow onions - Butter and olive oil - 1 teaspoon granulated sugar - 4 cups low-sodium beef broth - 1 cup vegetable broth - 2 cloves garlic, finely minced - 1 tablespoon fresh thyme leaves - 1 bay leaf - Salt and black pepper to taste - 8 slices of crusty baguette, toasted - 1 ½ cups freshly grated Gruyère cheese - ½ cup freshly grated Parmesan cheese The heart of French onion soup lies in its simple, yet rich ingredients. You start with yellow onions, which are key for that sweet, caramelized flavor. You need butter and olive oil to sauté the onions, creating a base that is both rich and savory. Adding granulated sugar helps these onions caramelize nicely. This step is crucial; it brings out their natural sweetness. For the broth, you will want a mix of beef broth and vegetable broth. This combination gives depth to your soup. Aromatics like garlic, thyme, and a bay leaf infuse the soup with wonderful flavor. Don't forget to season with salt and black pepper to enhance all those tastes. Finally, the finishing touches are the baguette, Gruyère, and Parmesan cheese. The toasted baguette acts as a base, while the cheeses melt beautifully on top, creating that iconic cheesy crust. Each ingredient plays a vital role in making this dish comforting and flavorful. {{ingredient_image_2}} First, I melt the butter and olive oil in a large pot over medium heat. The mix adds a nice depth of flavor. Then, I slice the onions thinly. I add them to the pot along with the granulated sugar. The sugar helps the onions caramelize well. I sauté the onions for about 30 to 40 minutes. I stir them often to ensure even cooking. The goal is to turn them a rich, golden brown. This caramelization adds a sweet, deep flavor to the soup. Once the onions look perfect, I stir in minced garlic. I let it cook for about 2 minutes. This step brings out the garlic's nice aroma. Next, I pour in the beef and vegetable broth. I also add fresh thyme, a bay leaf, salt, and black pepper. I bring this mixture to a gentle simmer. I let it cook for about 20 minutes. This time allows the flavors to meld together, creating a rich soup. While the soup simmers, I preheat the oven to the broil setting. After 20 minutes, I remove the bay leaf. Then, I ladle the soup into oven-safe bowls. I fill each bowl generously. I place a toasted baguette slice on top of each bowl. Then, I sprinkle Gruyère and Parmesan cheese over the bread. I want the cheese to be melty and gooey. I place the bowls under the broiler for about 3 to 5 minutes. I keep an eye on them to ensure the cheese bubbles and turns golden brown. Using oven mitts, I carefully take the bowls out of the oven. I let them cool slightly before serving to avoid burns. To caramelize onions well, timing and heat matter a lot. Start with medium heat. This helps the onions cook slowly and evenly. Stir them often to avoid burning. Aim for about 30 to 40 minutes of cooking. The goal is a rich, golden brown color. Common mistakes include cooking on high heat. This can lead to burnt edges and raw centers. Also, don’t rush the process. Good caramelization takes time. If you add salt early, it can draw out moisture. This can slow down caramelization. Wait until the onions are soft before seasoning. For the best cheese melting, Gruyère is my top choice. It melts beautifully and adds a nutty flavor. Mixing in Parmesan gives a nice sharpness. Together, they create a rich layer on top of the soup. When broiling, keep an eye on the cheese. Place the bowls under the broiler for just 3 to 5 minutes. If you leave them too long, the cheese might burn. Look for a bubbly, golden finish. If you want extra flavor, sprinkle some fresh herbs on top before serving. Pro Tips Caramelization is Key: Take your time when caramelizing the onions. The deeper the color, the richer the flavor. Stir occasionally to prevent burning. Broth Balance: Combining beef and vegetable broth provides a depth of flavor without being overly rich. Feel free to adjust ratios based on your preference! Cheese Choices: Gruyère is traditional, but mixing in other cheeses like Emmental can add a unique flavor. Experiment with your favorites! Serving Style: For a stylish presentation, use oven-safe crocks or ramekins. This not only looks appealing but keeps the soup warm longer! {{image_4}} You can easily make a vegetarian version of French onion soup. Just swap out the beef broth for more vegetable broth. This keeps the soup rich and tasty. You might also want to add some extra flavor enhancers. A splash of white wine can add depth. You can also use soy sauce or miso for a savory boost. Toppings can really change the game! Instead of just using toasted baguette, try some other creative options. You can use a slice of garlic bread for a twist. Or, add croutons made from your favorite bread. For garnishes, consider fresh herbs like parsley or chives. A sprinkle of crushed red pepper can also add some heat. To keep your French onion soup fresh, store it in an airtight container. Allow the soup to cool before sealing it. This method helps maintain its rich flavor and aroma. The soup lasts about 3 to 4 days in the fridge. For best results, reheat the soup on the stove over medium heat. Stir it gently to avoid burning. If the texture seems off, add a splash of broth or water. This keeps it creamy and delicious. You can freeze French onion soup for later enjoyment. First, let it cool completely. Then, pour the soup into freezer-safe containers. Leave some space at the top for expansion. Seal tightly and label with the date. To thaw, move the soup to the fridge for a day. Then, heat it on the stove over low heat. Stir often until it's hot. If needed, add some broth to restore the original texture. Enjoy your soup as if it were freshly made! French onion soup is a classic dish made with simple ingredients. The main stars are: - 4 large yellow onions - 3 tablespoons unsalted butter - 1 tablespoon extra virgin olive oil - 4 cups low-sodium beef broth - 1 cup vegetable broth - 2 cloves garlic - Fresh thyme leaves - Bay leaf - Crusty baguette - Gruyère cheese - Parmesan cheese These ingredients work together to create a rich, savory flavor. The onions caramelize to bring out their sweetness. Then, the broths add depth, while the cheese gives a creamy finish. To make your soup thicker, try these tips: - Cook the onions longer. This helps to concentrate their flavor and thicken the soup. - Add a bit of flour. Mix a tablespoon of flour with butter, then stir it into the onions before adding the broth. - Use less broth. Start with less liquid and add more only if needed. - Let it simmer longer. This will help reduce the liquid and improve thickness. These methods will give you a heartier soup that clings to the bread. Yes, you can prepare French onion soup in advance. Here are some tips: - Make the soup base a day before. Store it in the fridge to let the flavors meld. - Reheat the soup gently on the stove before serving. - Prepare the cheese and bread just before broiling. This keeps the bread crisp and the cheese fresh. By prepping ahead, you save time without losing taste! You now know how to make a great French onion soup. We covered the key ingredients, like onions, broths, and cheese. I shared steps to prepare the soup and tips for perfect caramelization. You can even create variations or store leftovers easily. With these insights, you can enjoy this classic dish at home. Remember, practice makes perfect, so don't hesitate to try your own spin on it. Happy cooking!
    Classic French Onion Soup Comforting and Flavorful Dish
  • - 4 large bell peppers (any vibrant color) - 1 cup quinoa, thoroughly rinsed - 2 cups vegetable broth - 1 cup canned black beans, drained and rinsed - 1 cup corn (freshly cooked or frozen) - 1 cup diced tomatoes (canned or freshly chopped) - 1 teaspoon ground cumin - 1 teaspoon smoked paprika - 1 teaspoon garlic powder - 1 teaspoon onion powder - Salt and pepper to taste - 1 cup shredded cheese (choose between cheddar and mozzarella) - Fresh cilantro for garnish - Lime wedges for serving When I create quinoa stuffed peppers, I focus on fresh and vibrant colors. The bell peppers serve as natural bowls, perfect for holding a tasty filling. You can choose any color you like—red, yellow, green, or orange. Each adds a unique flavor and enhances the dish's visual appeal. I always rinse the quinoa well before cooking. This step removes the bitter coating called saponin. Cooking quinoa in vegetable broth instead of water gives it a richer flavor. You can also use chicken broth if you prefer. For the filling, I mix canned black beans, which are a great source of protein, with corn and tomatoes. These ingredients add texture and sweetness. I love adding spices like ground cumin and smoked paprika. They bring warmth and depth to the dish. Garlic powder and onion powder add a savory note that ties all the flavors together. You can top the stuffed peppers with shredded cheese. I often use cheddar or mozzarella. The cheese melts beautifully and creates a delicious, gooey top. Fresh cilantro adds brightness, while lime wedges offer a zesty kick. This combination makes the peppers not just a meal but a colorful feast for the eyes. {{ingredient_image_2}} - Set to 375°F (190°C). This will ensure your peppers bake evenly and become tender. - Slice the tops off and remove seeds and membranes. This step makes room for the tasty filling. - Boil vegetable broth in a medium saucepan. Once boiling, add the rinsed quinoa. Cover the pot and reduce the heat to low. Let it simmer for about 15 minutes. The quinoa is done when the liquid is absorbed and it fluffs up nicely. - In a large bowl, combine the cooked quinoa with black beans, corn, diced tomatoes, and spices. Stir until everything is mixed well. Season generously with salt and pepper. - Take each pepper and fill it with the quinoa mixture. Press down gently to pack it in well, but don’t overflow. Arrange the stuffed peppers upright in a baking dish. - Cover the dish with aluminum foil. Bake in the preheated oven for 25 minutes. After 25 minutes, remove the foil and sprinkle cheese over the top of each pepper. Return to the oven for another 10 minutes, until the cheese melts and bubbles. - Once done, take the dish out of the oven. Allow the stuffed peppers to cool for 5 minutes before serving. This wait helps flavors settle and keeps you from burning your mouth! - Plate the stuffed peppers and garnish with freshly chopped cilantro. Serve with lime wedges on the side for a zesty touch. Squeeze lime juice on top to enhance the flavors. Enjoy your colorful and healthy dish! To make your quinoa stuffed peppers even tastier, you can add some fun spices. Try these: - Chili powder: For a bit of heat. - Oregano: Adds a nice earthiness. - Cilantro lime: Mix in fresh cilantro and lime juice for zest. You can also add some diced onions or bell peppers to the filling. This will boost the flavor and add texture. Experiment with different herbs for a unique twist! Cooking quinoa is simple. Follow these steps for the best results: 1. Rinse the quinoa well under cold water. This removes bitterness. 2. Boil vegetable broth. Use two cups of broth per cup of quinoa. 3. Once boiling, add the quinoa and cover. Simmer on low for 15 minutes. For baking peppers, preheat your oven to 375°F (190°C). Cover the baking dish with foil to keep the peppers moist while they cook. Bake for 25 minutes, then add cheese and bake for another 10 minutes. Pair your stuffed peppers with tasty sides to create a complete meal. Some great options include: - Rice: A fluffy bed of rice works well. - Salad: A fresh green salad adds crunch. - Salsa: A scoop of salsa brings extra flavor. You can also drizzle some avocado crema on top for creaminess. Don’t forget those lime wedges for a zesty kick! Enjoy your meal! Pro Tips Use Colorful Peppers: Choose a variety of bell pepper colors to create a visually appealing dish that excites the palate. Flavor Enhancements: Consider adding diced jalapeños or a splash of hot sauce to the quinoa mixture for an extra kick of flavor. Cheese Variations: Experiment with different types of cheese like feta or pepper jack for unique flavor profiles that complement the filling. Meal Prep Friendly: These stuffed peppers can be prepared ahead of time and stored in the fridge for quick weeknight meals—just reheat before serving! {{image_4}} You can change the protein in quinoa stuffed peppers easily. If you want a meat option, try ground chicken or beef. Both add a hearty texture. For a plant-based choice, tofu works well. Just crumble it and mix it with the filling. This way, you can cater to everyone's tastes. Cheese can change the flavor of these stuffed peppers. Cheddar gives a sharp taste. Mozzarella melts nicely and adds creaminess. You could also try feta for a tangy kick. Or use goat cheese for a rich, smooth texture. Each cheese brings its own flair to your dish. Making this dish vegetarian or vegan is simple. To keep it plant-based, just skip the cheese or use vegan cheese. You can also add nuts or seeds for crunch. These changes make the meal both tasty and healthy. You can enjoy quinoa stuffed peppers with any dietary needs in mind. To store leftovers, let the stuffed peppers cool. Place them in an airtight container. Make sure to cover them well. They will stay fresh for about 3 to 5 days in the fridge. If you want to keep them longer, consider freezing. The best way to reheat stuffed peppers is in the oven. Preheat your oven to 350°F (175°C). Place the peppers in a baking dish. Cover with foil to keep them moist. Heat for about 20 minutes or until warm. You can also use a microwave. Put the peppers on a microwave-safe plate. Heat for 2 to 3 minutes, checking often. To freeze, wrap each pepper tightly in plastic wrap. Place them in a freezer-safe bag or container. They can last up to 3 months in the freezer. When you want to eat them, take the peppers out. Let them thaw in the fridge overnight. Then, reheat as described above. This keeps the flavors intact for your next meal. Quinoa stuffed peppers can last about three to five days in the fridge. Store them in an airtight container to keep them fresh. Make sure the peppers are fully cooled before you put them away. This helps prevent moisture and keeps them tasty. Yes, you can make stuffed peppers ahead of time! Prepare the filling and stuff the peppers. Cover them and store in the fridge for one to two days. When you are ready to cook, just bake them as normal. This makes meal prep easy and saves time. If you want to swap out quinoa, try using brown rice or couscous. Both options provide a great base. For a gluten-free choice, use rice or cauliflower rice. These options still give you a tasty and filling meal. Yes, quinoa stuffed peppers are gluten-free. Quinoa itself is naturally gluten-free, making it a safe choice for anyone with gluten issues. Just make sure all your other ingredients, like broth and beans, are also gluten-free to stay safe. This article shows how to make tasty quinoa stuffed peppers. You learned about the ingredients needed, from colorful bell peppers to cheese. I shared simple steps for preparing and cooking, plus tips for extra flavor. You can customize the recipe with different proteins and cheeses. It's easy to store and reheat leftovers. Quinoa stuffed peppers are a fun, healthy meal anyone can enjoy. Try them out, and feel free to experiment with your favorite flavors!
    Quinoa Stuffed Peppers Tasty and Nutritious Meal
  • - 1 ripe mango, peeled and diced - 1 cup fresh pineapple chunks - 1 banana, sliced - 1 cup coconut milk (or any milk of your choice) - 1 tablespoon honey or maple syrup (optional) - 1 tablespoon chia seeds (optional) - 1 cup ice cubes To make a tasty Mango Pineapple Smoothie, you need fresh fruit. Each fruit adds a special flavor. Start with a ripe mango. It should feel soft when you press it gently. Diced mango gives sweetness. Fresh pineapple chunks add a tangy kick. Always choose ripe pineapple for the best taste. Next, add a banana. Bananas provide creaminess and natural sweetness. You can use any milk you like. Coconut milk adds a tropical vibe. If you want it sweeter, add honey or maple syrup. For extra nutrition, toss in chia seeds. They have a good crunch and healthy fats. Finally, ice cubes make your smoothie cold and refreshing. - Fresh pineapple slice - Sprig of mint - Toasted coconut flakes - Mixed berries Garnishes can make your drink look and taste even better. A fresh pineapple slice on the rim looks pretty. A sprig of mint adds a pop of green. You can sprinkle toasted coconut flakes on top for crunch. Mixed berries are also great for color and flavor. These little touches make your smoothie feel special. {{ingredient_image_2}} How to dice a mango To dice a ripe mango, first peel it. Use a sharp knife to cut the mango around the pit. Slice the fruit into long strips. Then, make crosswise cuts to create cubes. Finally, scoop out the cubes with a spoon. Chopping pineapple and banana For the pineapple, cut off the top and bottom. Stand it upright and slice the skin off. Cut the fruit into chunks. For the banana, simply peel it and slice it into small pieces. Both fruits will add great flavor to your smoothie. Order of ingredients in the blender Start by placing the diced mango in the blender. Next, add the pineapple chunks and banana slices. Pour in the coconut milk for creaminess. If you want a sweeter taste, add honey or maple syrup now. Don't forget to sprinkle in the chia seeds for nutrition. Finish with the ice cubes for a refreshing chill. Optimal blending time for a smooth consistency Blend on high for about 30 seconds. Stop and check the mixture. If you see any chunks, blend for another 10 seconds. You want a smooth and creamy texture. Once done, taste it. Add more sweetness if you like before serving. Serving in chilled glasses Pour the smoothie into tall, chilled glasses. This keeps it cold and refreshing. It looks great, too! Garnishing ideas for visual appeal To make your smoothie pop, add a slice of fresh pineapple on the rim. You can also use a sprig of mint for a touch of green. For an extra fun look, sprinkle some toasted coconut on top. It enhances both the taste and the beauty of your drink. To make your Mango Pineapple Smoothie sweet, adjust the honey or maple syrup. If you want less sugar, use ripe fruits instead. They add natural sweetness. You can also try agave syrup or stevia as alternatives. These options work well and keep it healthy. Do you like a thicker smoothie? Add more fruit or less milk. For a thinner smoothie, add more milk or ice. Ice gives it a refreshing chill. Start with one cup and add more if needed. Blend until smooth, ensuring no chunks remain. Adding superfoods can enhance your smoothie. Try adding spinach for vitamins or protein powder for extra fuel. Chia seeds are great too! They add fiber and omega-3s. Just one tablespoon packs a punch. Mixing these in helps boost your health and keeps you full longer. Pro Tips Choose Ripe Fruits: Ensure your mango and pineapple are ripe for the best flavor and sweetness. A ripe mango should yield slightly to pressure and have a sweet aroma. Chill Your Ingredients: For an extra frosty smoothie, chill your fruits and coconut milk beforehand. This will enhance the refreshing quality of your drink. Blend in Stages: If your blender isn’t powerful, blend the fruits first, then add the liquids and ice. This helps achieve a smoother consistency. Experiment with Add-ins: Feel free to customize your smoothie by adding spinach for greens, protein powder for a boost, or even a splash of lime juice for a zesty kick. {{image_4}} You can change up your mango pineapple smoothie with other fruits. Try adding passion fruit for a tangy twist. You can also mix in some papaya for a sweet touch. Using different types of milk can also change the flavor. Almond milk brings a nutty taste, while oat milk adds creaminess. Coconut milk is great for a tropical vibe. If you want to keep it vegan, use plant-based milk. Almond milk or soy milk works well. You can also try oat milk for a smooth texture. If you want sweetness without honey, use maple syrup or agave. These options keep your smoothie tasty and healthy. You can easily make a green version of this smoothie. Just add a handful of spinach or kale. This boosts the nutrients without changing the flavor much. Greens add vitamins and minerals that are great for your health. They also help you feel full longer. You can keep your mango pineapple smoothie in the fridge for up to two days. After blending, pour it into an airtight container. This helps keep it fresh. If you notice separation, just give it a good shake before drinking. To enjoy later, store any extra smoothie in smaller jars. This makes it easy to grab a quick snack. Freezing your smoothie is a great way to save it for later. Pour the smoothie into ice cube trays or silicone molds. Once frozen, pop out the cubes and store them in a freezer bag. When you want to enjoy it again, just blend the frozen cubes with a bit of coconut milk. This will give you a creamy, icy treat. If it's too thick, add more milk to get your desired consistency. This smoothie recipe makes two servings. Each serving is perfect for a refreshing drink. You can share with a friend or enjoy both yourself! Yes, you can use frozen fruit! Frozen mango and pineapple are great options. They add a thick, creamy texture. You may need to add a bit more liquid since frozen fruit can be drier. Just blend it well until smooth. A mango pineapple smoothie is packed with nutrients. Mangos are rich in vitamins A and C. They support your immune system and skin health. Pineapples contain bromelain, which helps with digestion. Bananas add potassium, which is good for your heart. Coconut milk provides healthy fats, making this smoothie a nutritious choice. You can prepare the ingredients in advance. Chop the mango, pineapple, and banana and store them in the fridge. Blend the smoothie when you are ready to drink. If you want to keep it fresh, store it in an airtight container in the fridge for up to one day. Enjoying a mango pineapple smoothie is simple and fun. You learned about essential ingredients and how to blend them. I shared tips for sweetening, thickening, and adding nutrition. Explore variations to suit your taste, and store leftovers wisely. This smoothie is a tasty way to boost your health. Try it out and refresh your routine!
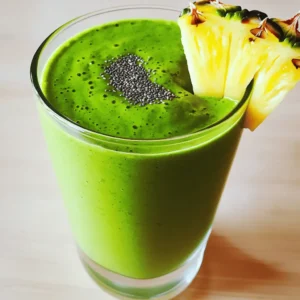
    Mango Pineapple Smoothie Refreshing and Nutritious Drink
  • - 4 boneless, skinless chicken breasts - 2 tablespoons olive oil - 1 tablespoon unsalted butter - 4 cloves garlic, finely minced - 1 cup cherry tomatoes, halved - 1 cup fresh spinach leaves, packed - 1 cup heavy cream - ½ cup freshly grated Parmesan cheese - 1 teaspoon dried Italian herbs (oregano, basil, thyme mix) - Salt and freshly cracked black pepper to taste - Fresh basil leaves for garnish (optional) When cooking, you want to be precise with your measurements. Here are the units you'll use: - Tablespoons (tbsp) for liquids and fats - Cups for solid and liquid ingredients - Teaspoons (tsp) for smaller amounts like herbs and spices You can swap ingredients to fit your needs. Here are some ideas: - Chicken: Use turkey or even firm tofu for a plant-based option. - Olive oil: Vegetable oil or avocado oil works well too. - Heavy cream: Coconut cream or half-and-half can replace heavy cream. - Parmesan cheese: Use Pecorino Romano or nutritional yeast for a dairy-free option. - Spinach: Kale or Swiss chard can be good substitutes for spinach. These swaps maintain flavor while catering to dietary needs. Enjoy experimenting! {{ingredient_image_2}} Start by taking the chicken breasts. Season both sides with salt and pepper. This step adds flavor to the chicken. If you skip this, the chicken may taste plain. Make sure to cover all areas well. Set the chicken aside while you heat the pan. Next, heat a large skillet over medium-high heat. Add the olive oil and butter once it's hot. The butter will melt and bubble. This is your cue to add the chicken. Sear each breast for about 5 to 7 minutes. Look for a nice brown color. Check the internal temperature; it should read 165°F. Once cooked, take the chicken out and place it on a plate. In the same skillet, lower the heat a bit. Add the minced garlic next. Sauté for about 30 seconds. Stir constantly to keep it from burning. Then, toss in the cherry tomatoes. Cook these for 2 to 3 minutes until they get soft. This adds a sweet and tangy flavor. Now, add the fresh spinach. Cook until it wilts, about 1 to 2 minutes. Reduce heat to low now. Pour in the heavy cream, stirring well. The cream will mix with the tomatoes and spinach. Gradually add the Parmesan cheese and Italian herbs. Keep stirring until the sauce is smooth and creamy. Finally, return the chicken to the skillet. Make sure each piece is well coated. Let it simmer for an extra 2 to 3 minutes. This helps the flavors blend beautifully. Taste the sauce. Adjust seasoning if needed. You can add more salt, pepper, or herbs based on your liking. For juicy chicken, cook each breast for 5-7 minutes per side. Use a meat thermometer to check for doneness. The internal temperature should reach 165°F. Let the chicken rest for a few minutes after cooking. This keeps it moist and flavorful. Start by sautéing garlic until fragrant. Be careful not to brown it, as that can make it bitter. After adding the cherry tomatoes, let them soften before mixing in the cream. This step helps build rich flavors. Gradually add Parmesan cheese until the sauce is smooth. Stir constantly for the best texture. Season your chicken well with salt and freshly cracked pepper. Use dried Italian herbs in the sauce for a burst of flavor. Taste the sauce and add more salt, pepper, or herbs as needed. Fresh basil can also elevate the dish. Always adjust to your personal taste for the best result. Pro Tips Rest the Chicken: Allow the chicken to rest for a few minutes after cooking. This helps the juices redistribute, ensuring a moist and tender chicken. Customize the Herbs: Feel free to use fresh herbs instead of dried for a more vibrant flavor. Fresh basil, parsley, or thyme can elevate the dish even more. Thicken the Sauce: If you prefer a thicker sauce, let it simmer a bit longer on low heat, or mix in a cornstarch slurry (1 tablespoon cornstarch mixed with 2 tablespoons water) until the desired consistency is reached. Pairing Suggestions: This creamy garlic Tuscan chicken pairs beautifully with a light salad or roasted vegetables, making for a well-rounded meal. {{image_4}} You can enhance the dish by adding mushrooms or peppers. Both options add great flavor and texture. If you choose mushrooms, slice them and sauté them with garlic. For peppers, chop them into strips and cook them with the tomatoes. This adds color and nutrition to your meal. To make this dish gluten-free, use a gluten-free pasta or serve it without pasta. Ensure that the chicken broth, if used, is gluten-free as well. The other ingredients in this recipe are naturally gluten-free. So, you can enjoy this creamy garlic Tuscan chicken worry-free. If you're looking for a vegetarian option, replace chicken with firm tofu or mushrooms. Press and cube the tofu, then sauté it until golden. For a heartier dish, use both mushrooms and spinach. Keep the creamy sauce and enjoy a rich, flavorful meal that everyone will love. You can store leftover Creamy Garlic Tuscan Chicken in the fridge. Place it in an airtight container. Make sure it cools down first. It will stay fresh for about 3 to 4 days. When you want to eat it again, grab it from the fridge and enjoy! If you want to keep it longer, you can freeze it. First, let the chicken cool completely. Then, wrap it tightly in plastic wrap. Place it in a freezer-safe bag or container. It will last about 2 to 3 months in the freezer. Just remember to label it with the date! When you're ready to eat, reheating is easy. For best results, thaw it overnight in the fridge. Then, heat it in a skillet over low heat. Stir gently until it's warm. You can also use the microwave, but be careful not to overcook it. Enjoy your tasty meal! You can serve this dish with many sides. I love pairing it with pasta. It soaks up the creamy sauce well. You might also try rice or quinoa for a healthy option. If you want something lighter, a fresh salad works great too. Garlic bread is another delicious choice. It adds a nice crunch and flavor. Yes, you can! If you want a stronger flavor, try using feta cheese. Goat cheese also adds a tangy taste. If you prefer something milder, mozzarella is a good choice. Just remember that different cheeses melt differently. This can change the sauce's texture. To make this dish dairy-free, swap the heavy cream with coconut milk. It gives a rich feel without dairy. Use nutritional yeast instead of Parmesan for a cheesy flavor. You can also use a dairy-free cheese. Just check the label for any hidden dairy. This way, you can enjoy the dish without dairy! This article covered the key ingredients for creamy garlic Tuscan chicken, along with cooking methods. We looked at how to prepare and sear the chicken, and how to make a smooth cream sauce. I shared tips for cooking it perfectly, as well as variations you can try based on your needs. Lastly, I provided storage info and answered common questions. Now you can confidently cook and enjoy this dish in many ways. Happy cooking!
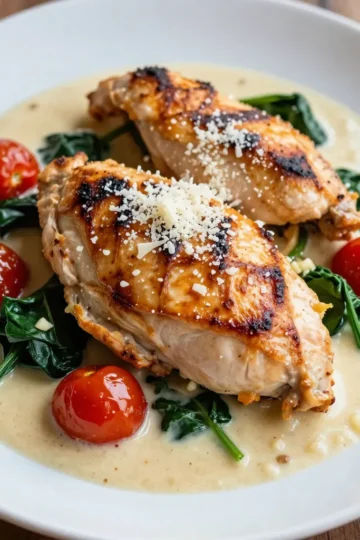
    Creamy Garlic Tuscan Chicken Easy and Flavorful Dish
  • - 4 boneless, skinless chicken thighs - 2 cups cherry tomatoes, halved - 1 zucchini, sliced into half-moons - 1 red bell pepper, sliced into strips - 1 red onion, cut into thick wedges - 1 cup Kalamata olives, pitted and roughly chopped - 3 cloves garlic, minced In this dish, the chicken thighs are juicy and full of flavor. The cherry tomatoes burst with sweetness, while zucchini adds a nice crunch. The red bell pepper brings a touch of sweetness, and the red onion gives a rich taste. Kalamata olives add a briny punch, and garlic fills the dish with warmth. - 2 tablespoons extra virgin olive oil - 2 teaspoons dried oregano - 1 teaspoon dried thyme - Salt and freshly ground black pepper to taste Extra virgin olive oil is key for moisture and depth. Dried oregano and thyme give that classic Greek flavor. Salt and pepper bring everything together and enhance the taste of each ingredient. - 1 lemon, thinly sliced - Fresh parsley, finely chopped (for garnish) Lemon slices add a bright zing. Fresh parsley gives a pop of color and freshness. To serve, place the dish on a large platter or keep it on the baking sheet for a rustic look. Pair it with warm pita bread and tzatziki for a full Mediterranean feast. {{ingredient_image_2}} - Preheat your oven to 425°F (220°C). - Get your chicken thighs and veggies ready. Slice the zucchini, bell pepper, and onion. Halve the cherry tomatoes and chop the olives. - In a large bowl, mix the chicken and veggies. - Add minced garlic, olive oil, oregano, thyme, salt, and pepper. Use your hands to toss everything well. Make sure each piece is coated nicely. - Line a large baking sheet with parchment paper. - Spread the chicken and veggies evenly on the sheet. Make sure they are not crowded. This helps them cook well. - Place thin lemon slices over the chicken and around the veggies. This adds a fresh taste as they cook. - Slide the baking sheet into the oven. Bake for 25 to 30 minutes. - Check that the chicken reaches 165°F (75°C). The veggies should be tender and a bit caramelized. - Once done, take the sheet pan out and let it rest for 5 minutes. This helps the juices settle in the chicken. - Just before serving, sprinkle fresh parsley on top for color. To get juicy chicken, start with bone-in thighs. The bones help keep the meat moist. If you use skinless thighs, marinate them well in olive oil and herbs. This adds flavor and keeps them tender. Cook the chicken at 425°F for 25-30 minutes. For gas ovens, check the chicken a bit early. They can cook faster than electric ones. For great caramelization, cut your veggies into even pieces. This helps them cook at the same rate. Use a mix of cherry tomatoes, zucchini, and bell peppers. They roast well together. You can also try carrots or asparagus if you want a change. Just keep them similar in size for even cooking. Serve the chicken and veggies right from the pan. It looks rustic and inviting. You can also transfer it to a platter for a fancier look. Pair it with warm pita bread and tzatziki sauce. This adds a nice touch and rounds out the meal. Garnish with fresh parsley for color. Pro Tips Marinate for More Flavor: If time allows, marinate the chicken in the seasoning for at least 30 minutes or overnight in the refrigerator. This will enhance the flavor and tenderness of the chicken. Use Fresh Herbs: For a fresher taste, substitute dried oregano and thyme with fresh herbs. Use three times the amount of fresh herbs for a vibrant flavor boost. Don’t Crowd the Pan: Ensure there is enough space between the chicken and vegetables on the baking sheet to promote even cooking and caramelization. If necessary, use two pans. Serve with Sides: Enhance the meal by serving with warm pita bread and tzatziki sauce. A simple side salad with feta cheese and olives works wonderfully too! {{image_4}} You can easily swap chicken thighs for chicken breasts. Breasts cook faster, so check them sooner. If you prefer a vegetarian dish, try chickpeas or tofu. These options still soak up all the tasty flavors. Adding herbs can change the dish's taste. Try fresh basil or dill for a different twist. You can also add feta cheese. It gives a creamy texture and salty flavor. Different olives, like green olives, can also add a new layer of taste. Using what's in season makes this meal even better. In summer, use fresh zucchini and ripe tomatoes. In winter, consider root vegetables like carrots or sweet potatoes. These choices ensure you enjoy fresh flavors year-round. To keep your Greek chicken sheet pan dinner fresh, follow these steps: - Let the dish cool down before storing. - Place leftovers in an airtight container. - Store in the fridge for up to four days. This helps maintain flavor and texture. Use glass containers for better storage. They are safe and durable. When you’re ready to enjoy leftovers, consider these methods: - Use the oven at 350°F (175°C) for about 15 minutes. - You can also use a microwave on medium power for 2-3 minutes. To add flavor, drizzle a little olive oil or squeeze fresh lemon juice before reheating. This keeps the meal moist and tasty. If you want to save some for later, here’s how to freeze: - Place portions in freezer-safe bags. - Remove as much air as possible before sealing. This way, your meal stays fresh for up to three months. To thaw, move it to the fridge overnight. You can also use the microwave on defrost mode. This method is quick and safe. You can serve this dish with many tasty sides. Here are a few ideas: - Warm pita bread - Tzatziki sauce - Greek salad with feta and olives - Rice or quinoa with herbs - Roasted potatoes seasoned with lemon These sides add flavor and balance to your meal. Check the chicken's internal temperature with a meat thermometer. It should reach 165°F (75°C). If you don’t have a thermometer, cut into the chicken. The juices should run clear, not pink. Yes! You can prep the chicken and veggies a day before. Just store them in the fridge. When ready to cook, simply follow the baking steps. This saves time on busy nights. Absolutely! This recipe is naturally gluten-free. Just avoid adding any gluten-containing sides. Pita bread can be swapped for a gluten-free option to keep the meal safe. To add heat, try these options: - Add red pepper flakes to the seasoning mix - Use spicy olives, like those with chili - Mix in a dash of hot sauce before serving These tweaks will give your dish a nice kick! This blog post covered a delicious Greek Chicken Sheet Pan Dinner. You learned about the key ingredients like chicken, veggies, and seasoning. I shared easy steps for prepping, baking, and serving. You also discovered tips for perfecting your dish and creative variations. In the end, this meal is simple, tasty, and great for any occasion. Enjoy making this dish your own!
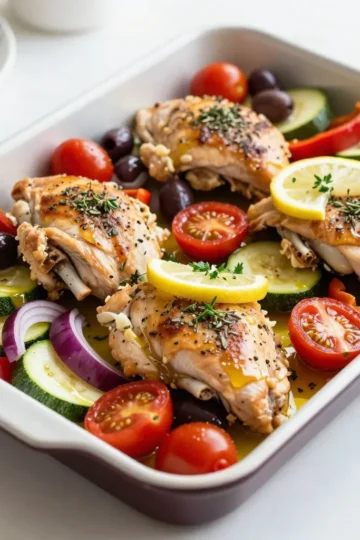
    Greek Chicken Sheet Pan Dinner Flavorful and Easy Recipe
  • To make honey garlic roasted carrots, gather these simple ingredients: - 1 lb (450g) baby carrots, peeled - 3 tablespoons honey - 3 cloves garlic, minced - 2 tablespoons extra virgin olive oil - 1 teaspoon fresh thyme, finely chopped (or ½ teaspoon dried thyme) - Salt and black pepper, to taste - Optional: 1 tablespoon toasted sesame seeds for garnish You can swap some ingredients if needed. If you don't have baby carrots, use regular carrots cut into sticks. Maple syrup can replace honey for a vegan option. If you are out of garlic, garlic powder works, but use less. For olive oil, you can use vegetable oil or melted butter. Using fresh thyme gives a bright flavor. It brings a lovely aroma that dried thyme might not match. If you use dried thyme, remember it is stronger. Use less than the fresh amount. A half teaspoon of dried thyme is perfect for this recipe. Fresh or dried, thyme adds a nice touch to these carrots. {{ingredient_image_2}} First, I preheat the oven to 425°F (220°C). A hot oven helps the carrots caramelize. Next, I take 1 pound of baby carrots and peel them. This step makes them tender and sweet. In a big bowl, I combine three tablespoons of honey, three minced garlic cloves, and two tablespoons of olive oil. I add one teaspoon of fresh thyme and a pinch of salt and black pepper. I whisk the mix until it is smooth. This glaze gives the carrots a sweet and savory flavor. I toss the peeled carrots in the honey garlic mix. Each carrot should be well-coated. Next, I line a baking sheet with parchment paper. This keeps the carrots from sticking. I spread the carrots in a single layer. Then, I place the baking sheet in the oven. I roast the carrots for 20 to 25 minutes. Halfway through, I toss them for even cooking. They will be tender and caramelized when done. After roasting, I take them out and sprinkle toasted sesame seeds on top if I want. To roast carrots perfectly, follow a few easy tips. First, ensure your oven is at 425°F (220°C). This high heat helps caramelize the natural sugars in the carrots. Use baby carrots for a sweet and tender result. If you're using larger carrots, cut them into even pieces to cook evenly. Spread the carrots in a single layer on the baking sheet. This allows them to roast, not steam. Toss the carrots halfway for even cooking and color. You can add more flavor to your honey garlic roasted carrots. A splash of balsamic vinegar gives a tangy taste. You can also mix in a pinch of cayenne pepper for a spicy kick. Fresh herbs like parsley or dill can add freshness. For a nutty crunch, sprinkle toasted sesame seeds on top after roasting. These extras can elevate the dish and impress your guests. Serve your honey garlic roasted carrots warm for the best taste. Arrange them on a platter and drizzle with the leftover honey garlic mix for added gloss. You can garnish with fresh herbs or extra sesame seeds for a beautiful touch. These carrots pair well with grilled meats, fish, or even as part of a veggie platter. They also make a great side for a holiday meal or a casual dinner. Pro Tips Choose Fresh Carrots: Opt for small, firm baby carrots for the best texture and sweetness. Fresh carrots will caramelize beautifully and enhance the overall flavor of the dish. Experiment with Herbs: Feel free to mix and match herbs like rosemary or parsley along with thyme for added complexity in flavor. Fresh herbs can elevate the dish to a new level. Check for Doneness: Roasting times may vary based on the size of the carrots. Start checking for tenderness around the 20-minute mark to prevent overcooking. Serve with a Twist: For an extra flavor punch, drizzle a bit of balsamic reduction over the roasted carrots before serving. It adds a delightful tang that complements the sweetness. {{image_4}} You can easily switch up the carrots for other veggies. Try using baby potatoes for a hearty dish. Brussels sprouts also work well; they get nice and crispy. You can even use sweet potatoes for a sweeter taste. Each veggie brings its own flavor, adding fun to your meals. If you want a kick, add red pepper flakes to the honey garlic mix. For a savory twist, try adding soy sauce or balsamic vinegar. These changes give the dish a different feel. You can also mix in ginger for a zesty touch. Experiment and find what you love best! For a casual lunch, serve these carrots with a simple sandwich. They make a great side for a family dinner, too. If you're hosting a party, arrange them on a platter with a drizzle of extra honey mixture. Garnish with fresh herbs or sesame seeds for a pretty look. These carrots fit any occasion! After enjoying your honey garlic roasted carrots, you might have some left. To store them, let the carrots cool to room temperature. Then, place them in an airtight container. They will stay fresh in the fridge for up to four days. Make sure to keep the glaze on them; it adds flavor! When you are ready to eat the leftovers, reheating is simple. Preheat your oven to 350°F (175°C). Spread the carrots on a baking sheet. Cover them with foil to keep moisture in. Heat for about 10-15 minutes. This way, they stay soft and tasty. You can also microwave them for about two minutes, but the oven method gives better results. You can freeze honey garlic roasted carrots if you want to save them longer. First, let them cool completely. Then, place them in a freezer-safe bag or container. Remove as much air as possible to prevent freezer burn. They can last up to three months in the freezer. When you are ready to eat, thaw them overnight in the fridge before reheating. Roast the carrots for 20-25 minutes at 425°F (220°C). Halfway through, toss them. This helps them cook evenly. You want them tender and caramelized. Check them at 20 minutes for doneness. Yes, you can use regular carrots! Just cut them into sticks or coins. Aim for similar sizes for even cooking. They will still taste great with the honey and garlic. These carrots go well with many dishes! They pair nicely with grilled chicken or fish. Try them with rice or quinoa for a hearty meal. They also work well in salads, adding a sweet touch. In this post, we covered the key ingredients for honey garlic roasted carrots, tips for perfect roasting, and fun variations. You learned how to make a tasty glaze and the best practices for cooking. There’s also storage info to keep leftovers fresh. Roasting carrots can be simple and rewarding. With these tips, you can impress anyone at your table. Enjoy your delicious carrots, and don’t be afraid to experiment with flavors!
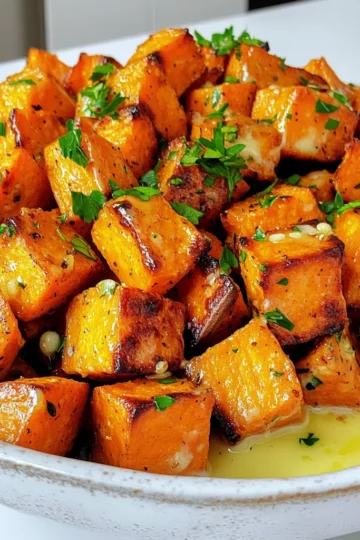
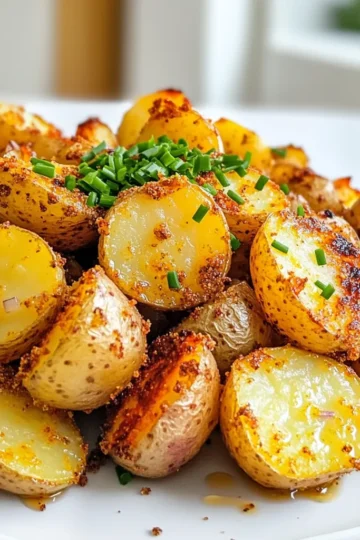
    Honey Garlic Roasted Carrots Tasty and Simple Dish
  • - Chicken and Marinade Components - 2 chicken breasts, cut into strips - 2 tablespoons extra virgin olive oil - 3 cloves of garlic, finely minced - 1 teaspoon dried oregano - 1 teaspoon smoked paprika - Sea salt and freshly cracked pepper to taste - Quinoa and Vegetable Ingredients - 1 cup quinoa, thoroughly rinsed and drained - 2 cups vegetable broth (or water) - 1 cup cherry tomatoes, halved - 1 cucumber, diced into small pieces - ½ red onion, thinly sliced - Toppings and Garnishes - 1 cup feta cheese, crumbled - ¼ cup fresh parsley, roughly chopped - Zest and juice of 1 lemon - Creamy tzatziki sauce for drizzling Gathering these ingredients is key to a tasty Greek Chicken Gyro Bowl. Each item plays a role in flavor and texture. The chicken is marinated to soak up those rich flavors. Quinoa serves as a hearty base. Fresh veggies add crunch and color. Finally, toppings like feta and tzatziki make your dish shine. Trust me, these bowls will impress! {{ingredient_image_2}} To start, I mix the chicken strips with olive oil, minced garlic, dried oregano, smoked paprika, sea salt, and pepper in a medium bowl. I ensure all the chicken gets coated well. This marinade gives the chicken a burst of flavor. Cover the bowl and refrigerate for at least 30 minutes. This helps the chicken absorb all the tasty spices. I bring 2 cups of vegetable broth to a boil in a medium saucepan. Once it bubbles, I add 1 cup of rinsed quinoa. Lower the heat to a gentle simmer and cover it. I let it cook for about 15 minutes until all the liquid is gone. After it’s done, I fluff the quinoa with a fork. This makes it light and fluffy, perfect for the bowl. In a large skillet, I heat it over medium-high heat and add the marinated chicken. I cook it for 6-8 minutes, stirring often. I want to see a nice golden brown color on the chicken. This shows it’s cooked through and ready to enjoy. While the chicken cooks, I chop the fresh toppings. I slice the cherry tomatoes in half, dice the cucumber, and thinly slice the red onion. I keep these toppings fresh and colorful. They add crunch and flavor to my gyro bowls. Now, it’s time to layer the ingredients! In individual serving bowls, I start with a generous scoop of quinoa as the base. Next, I add the sautéed chicken on top. Then, I pile on the diced cucumber, halved cherry tomatoes, sliced red onion, crumbled feta cheese, and a sprinkle of fresh parsley. This makes the bowl look bright and inviting. For the finishing touch, I drizzle fresh lemon juice over each bowl. Then, I swirl on some creamy tzatziki sauce. To brighten the flavors even more, I sprinkle lemon zest on top. This adds a refreshing burst to every bite. Recommended Marinade Time for Best Flavor For the best taste, marinate the chicken for at least 30 minutes. This allows the flavors to seep in. If you have more time, marinate for up to 2 hours. Longer marination adds extra depth to your dish. Alternative Ingredients for Customization You can change the marinade to fit your taste. Try adding lemon zest or switching smoked paprika for sweet paprika. If you like heat, add a pinch of cayenne pepper. Experiment with fresh herbs like thyme or rosemary for a unique twist. Avoiding Undercooked or Overcooked Quinoa To cook quinoa perfectly, use a 1:2 ratio of quinoa to liquid. If you use 1 cup of quinoa, add 2 cups of vegetable broth. Bring it to a boil, then reduce to simmer for 15 minutes. Don’t lift the lid while it cooks! This keeps the steam in for fluffy quinoa. Best Practices for Rinse and Drain Always rinse quinoa before cooking. Place it in a fine mesh strainer and rinse under cold water. This removes bitter saponins and improves the taste. Drain it well to avoid excess water in your dish. Knowing When the Chicken Is Fully Cooked Cook chicken until it reaches an internal temperature of 165°F. Use a meat thermometer for accuracy. The chicken should be golden brown on the outside and no longer pink inside. Tips for Keeping Chicken Moist To keep chicken juicy, avoid overcooking. Let it rest for a few minutes after cooking. This allows the juices to redistribute throughout the meat, making each bite tender and flavorful. Pro Tips Marinate Longer for Flavor: For an even richer flavor, consider marinating the chicken for 1-2 hours or even overnight. This allows the spices and olive oil to penetrate the meat more deeply. Quinoa Cooking Tip: Always rinse quinoa before cooking to remove its natural coating, called saponin, which can impart a bitter taste. This step is crucial for achieving a pleasant flavor. Fresh Ingredients Matter: Use the freshest vegetables and herbs you can find to enhance the overall taste of your gyro bowls. Fresh ingredients provide vibrant colors and better textures. Tzatziki Twist: For a unique flavor, try adding a hint of dill or mint to your tzatziki sauce. This addition can elevate the taste profile and provide refreshing notes. {{image_4}} You can change the protein in your Greek chicken gyro bowls. Turkey works well instead of chicken. It has a light taste and cooks fast. You can also try tofu for a plant-based option. Tofu absorbs flavors well, making it a great choice. Quinoa is great, but other grains can work too. Brown rice adds a nutty flavor and is filling. Barley gives a chewy texture and is rich in fiber. If you want to cut carbs, try cauliflower rice. It cooks quickly and has a mild taste. Mix in extra veggies for a colorful bowl. Bell peppers, olives, or spinach are great options. You can also try different cheeses, like goat cheese or ricotta. For added flavor, sprinkle some spices like cumin or paprika. A drizzle of spicy harissa sauce adds a nice kick too! To keep your Greek chicken gyro bowls fresh, store them in airtight containers. This helps prevent moisture loss. Make sure the chicken, quinoa, and veggies cool down before sealing. If you have any tzatziki sauce left, store it separately to maintain its creamy texture. Use these recommended containers for best results: - Glass containers with tight lids - BPA-free plastic containers - Silicone bags for easy storage When it’s time to enjoy your leftovers, the best way to reheat chicken and quinoa is in the oven or on the stove. This keeps the chicken juicy and the quinoa fluffy. Use these methods for the best results: - Oven: Preheat to 350°F (175°C). Place the chicken and quinoa in an oven-safe dish. Cover with foil and heat for about 15-20 minutes. - Stove: In a skillet, add a splash of water or broth. Heat over medium-low heat, stirring occasionally, until warmed through. To avoid soggy vegetables, reheat the chicken and quinoa first. Then, add fresh veggies like cucumber and tomatoes just before serving. This keeps them crisp and colorful. To make Greek Chicken Gyro Bowls from scratch, follow these steps: 1. Marinate the Chicken: In a bowl, mix sliced chicken, olive oil, minced garlic, oregano, smoked paprika, sea salt, and pepper. Cover and chill for 30 minutes. 2. Cook the Quinoa: Bring vegetable broth to a boil in a saucepan. Add rinsed quinoa and lower the heat. Cover and simmer until liquid is absorbed, about 15 minutes. Fluff with a fork. 3. Sauté the Chicken: In a skillet, cook the marinated chicken over medium-high heat for 6-8 minutes until golden brown. 4. Prepare Fresh Toppings: Chop cherry tomatoes, dice cucumber, and slice red onion. Set aside. 5. Assemble the Bowls: Layer quinoa, then add chicken, cucumber, tomatoes, onion, feta cheese, and parsley. 6. Finish with Flavor: Drizzle lemon juice and tzatziki sauce over the top. Add lemon zest for more flavor. Yes, you can prepare gyro bowls ahead of time. Here are some tips for meal prep: - Cook the Chicken and Quinoa: You can grill or sauté the chicken and prepare quinoa in advance. Store in airtight containers in the fridge. - Chop Fresh Veggies: Pre-chop the vegetables. Keep them in separate containers to stay fresh. - Tzatziki Sauce: Make tzatziki sauce a day before. Store it in the fridge for the best taste. - Assemble Before Serving: When you’re ready to eat, just assemble the bowls and drizzle with sauce. If you need alternatives for tzatziki sauce, consider these options: - Greek Yogurt: Use plain Greek yogurt with lemon juice, garlic, and herbs for a quick dip. - Hummus: Swap tzatziki for hummus for a creamy and flavorful option. - Avocado Dressing: Blend ripe avocado with lime juice and garlic for a fresh twist. - Dairy-Free Options: Use a cashew or almond yogurt mixed with herbs for a dairy-free tzatziki. To make quinoa fluffier, follow these tips: - Rinse the Quinoa: Always rinse quinoa thoroughly to remove its bitter coating. - Use the Right Water Ratio: Use a 2:1 ratio of liquid to quinoa for perfect texture. - Let It Sit: After cooking, let the quinoa sit for 5 minutes before fluffing. This helps the grains separate. - Fluff with a Fork: Use a fork to gently fluff the quinoa. This aerates it and makes it light. You now have a complete guide to making Greek chicken gyro bowls. We covered each ingredient, marinating techniques, cooking tips, and assembly. Remember to choose fresh ingredients and customize your bowls to fit your taste. Try different proteins or grains for variety. Properly storing and reheating your leftovers will help keep them fresh. Enjoy experimenting with flavors and textures. This dish is not only tasty but also a fun way to eat healthy! Get started and share your delicious creations.
    Greek Chicken Gyro Bowls Simple and Flavorful Recipe

Desserts

  • To make Almond Cranberry Energy Bites, gather these key ingredients: - 1 cup rolled oats - ½ cup almond butter - ⅓ cup honey or maple syrup - ½ cup dried cranberries, roughly chopped - ½ cup raw almonds, roughly chopped - ¼ cup chia seeds - 1 teaspoon pure vanilla extract - A pinch of sea salt Each ingredient plays a role in creating a tasty snack. Rolled oats give a hearty base, while almond butter adds creaminess. Honey or maple syrup brings natural sweetness. Dried cranberries add a chewy burst of flavor. Chopped raw almonds provide crunch, and chia seeds boost nutrition. Lastly, vanilla extract and sea salt enhance all the flavors. Feel free to mix and match some of these ingredients for a personal touch. You can swap almond butter for another nut butter if you like. Use different dried fruits or nuts as well. These small changes can make the bites uniquely yours! {{ingredient_image_2}} Start by mixing the dry ingredients. In a large bowl, combine: - 1 cup rolled oats - ½ cup dried cranberries, roughly chopped - ½ cup raw almonds, roughly chopped - ¼ cup chia seeds - A pinch of sea salt Stir these ingredients together well. Make sure they are evenly mixed. This step ensures a good balance of flavors in each bite. Next, prepare the wet mixture. In a smaller bowl, whisk together: - ½ cup almond butter - ⅓ cup honey or maple syrup (your choice) - 1 teaspoon pure vanilla extract Mix until it is smooth. This creamy blend will help bind the dry ingredients together. Now, it’s time to combine everything. Pour the wet mixture over the dry mix. Stir with a spatula or spoon. Make sure every piece gets coated. To form the energy bites, use slightly damp hands. Scoop a tablespoon of the mix and compress it into a ball. If it feels sticky, dampen your hands again. Shape all the mixture into small balls. You should make about 12-15 bites, depending on how big you want them. Finally, chill the bites on a parchment-lined tray. Space them out well. Place them in the fridge for at least 30 minutes. This step helps them hold their shape. Enjoy them immediately or store in an airtight container for later! - Overmixing the ingredients: Mix just until combined. Overmixing can make the bites tough. You want a nice, soft texture. - Not chilling them long enough: Chilling is key. If you skip this step, the bites may fall apart. Aim for at least 30 minutes in the fridge. - Adding spices or extra ingredients: Spice things up! Consider adding a dash of cinnamon or nutmeg for warmth. You can also mix in some shredded coconut or seeds for crunch. - Adjusting sweetness to taste: Not all of us enjoy the same level of sweetness. Start with the recommended honey or maple syrup. Taste, then add more if you prefer a sweeter bite. - Ideas for plating and garnishing: Make your energy bites pop! Use a colorful plate to display them. Sprinkle extra chia seeds or chopped almonds on top for a fun look. Arrange them in a circle or stack them for height. Serve them as a snack or after workouts! Pro Tips Use Fresh Ingredients: Always opt for fresh cranberries and raw almonds for the best flavor and nutritional benefits in your energy bites. Customize Your Sweetener: Feel free to experiment with different sweeteners like agave nectar or coconut syrup to suit your taste preferences. Mix-in Variations: Add other ingredients like dark chocolate chips, shredded coconut, or pumpkin seeds to give your energy bites a unique twist. Perfect Storage: Store your energy bites in the fridge in an airtight container to maintain their freshness and chewy texture longer. {{image_4}} You can easily swap some ingredients to fit your needs. - Nut butter alternatives: If you can't use almond butter, try peanut or sunflower seed butter. Both add great flavor. - Dried fruit options: Instead of cranberries, use raisins, apricots, or cherries for a different taste and texture. - Sweetener alternatives: If you want to skip honey, maple syrup works well. You can also use agave nectar for a lighter option. Get creative with flavors to make these bites your own. - Chocolate chips: Add dark or milk chocolate chips for a sweet twist. They melt in your mouth and pair well with nuts. - Coconut flakes: Mix in unsweetened coconut flakes for a tropical vibe. They add chewiness and a hint of sweetness. You can modify this recipe to meet specific dietary needs. - Gluten-free modifications: Use gluten-free oats to keep your energy bites safe for those with gluten sensitivities. - Vegan options: Replace honey with maple syrup to make these bites vegan. It’s a simple switch that still tastes great. Store your almond cranberry energy bites in airtight containers. This keeps them fresh and tasty. Make sure to use a container that seals well. It helps prevent moisture from getting in. For best results, put the container in the fridge. The cool air will help keep them firm. If they sit out too long, they may get soft. These energy bites last about one week in the fridge. After that, they may lose their flavor and texture. You can also freeze them for longer storage. Just place them in a freezer-safe bag or container. They can stay frozen for up to three months. When you’re ready to eat, let them thaw in the fridge overnight. This way, they stay tasty and fresh! Yes, you can make these energy bites nut-free. Use seed butter like sunflower seed butter or pumpkin seed butter. These options are delicious and still pack a good amount of protein and healthy fats. You can also swap out the chopped almonds for seeds, like pumpkin or sunflower seeds. I suggest eating two to three energy bites as a snack. Each bite gives you a good mix of energy and nutrients. If you need a post-workout boost, you can have a few more. Listen to your body and adjust based on your hunger. Yes, you can add protein powder to boost nutrition. Use one to two tablespoons of your favorite protein powder. Mix it in with the dry ingredients to ensure even distribution. This will help keep the texture nice while adding protein. Adjust the liquid slightly if you notice it becomes too dry. This post covered how to make delicious energy bites using simple ingredients. We looked at the full list, prep steps, and ways to enhance flavor and texture. I shared tips on storing and freezing these treats, ensuring they stay fresh. In closing, you can enjoy these energy bites in many ways. Make them your own by adjusting flavors or ingredients. They are both healthy and fun!
    Almond Cranberry Energy Bites Healthy Snack Recipe
  • For this treat, you need just a few simple ingredients: - 12 oz dark chocolate (70% cocoa or higher), chopped into small pieces - 1 cup mixed nuts (almonds, walnuts, and pecans), roughly chopped - ½ cup dried cranberries or cherries, chopped if large - ¼ cup unsweetened coconut flakes - 1 teaspoon flaky sea salt (plus extra for an additional sprinkle) Each ingredient plays a vital role in the flavor and texture of the bark. The dark chocolate brings rich flavor and a hint of bitterness. The mixed nuts add crunch and healthy fats. Dried fruit gives a sweet contrast, while coconut offers a tropical twist. Finally, flaky sea salt enhances every bite with a savory touch. - Dark Chocolate: This ingredient is high in antioxidants. It may lower blood pressure and improve heart health. - Mixed Nuts: Nuts are a great source of protein and healthy fats. They provide energy and support brain health. - Dried Cranberries or Cherries: These fruits are packed with vitamins and fiber. They can help with digestion and may boost immunity. - Coconut Flakes: Coconut adds healthy fats and fiber. It can help keep you full and satisfied. - Flaky Sea Salt: While salt is often seen as bad, a little can enhance flavor and balance sweetness. For the best taste, I recommend using high-quality dark chocolate. Look for brands like Ghirardelli or Lindt. They offer great options with at least 70% cocoa. For sea salt, try Maldon or Fleur de Sel. These brands provide a flaky texture that melts into the chocolate and adds a lovely crunch. Quality ingredients make a big difference in your final treat! {{ingredient_image_2}} Start by grabbing a baking sheet. Use one that is about 8x10 inches. Line it with parchment paper. Make sure the paper covers the whole surface. This helps with easy removal later. It also makes cleanup quick and simple. Next, take 12 ounces of dark chocolate. Chop it into small pieces. Place the chocolate in a microwave-safe bowl. Heat it in the microwave for 30 seconds. After that, take it out and stir well. Repeat this every 30 seconds until the chocolate is smooth. It should have no lumps. Be careful not to overheat it. Once the chocolate is melted, it’s time to mix. Add in 1 cup of mixed nuts. You can use almonds, walnuts, and pecans. Next, toss in ½ cup of dried cranberries or cherries. If the fruit is large, chop it first. Finally, add ¼ cup of unsweetened coconut flakes. Stir everything together until all ingredients are well coated in chocolate. Now, carefully pour the chocolate mixture onto the lined baking sheet. Use a spatula to spread it out evenly. Aim for a thickness of about ¼ inch. Make sure to reach the edges of the baking sheet. An even layer helps it set nicely. While the chocolate is still warm, grab your flaky sea salt. Sprinkle it evenly over the top. If you love a stronger salty taste, feel free to add more. This adds a great sweet and salty balance. Now, place the baking sheet in the refrigerator. Let it chill for 1 to 2 hours. This helps the chocolate set and become firm. Once it’s hard, carefully peel it from the parchment paper. Use your hands or a knife to break it into pieces. You can make them any size you want. Store the bark in an airtight container. It keeps well at room temperature or in the fridge for about two weeks. To get smooth melted chocolate, I use a microwave-safe bowl. Start with 30 seconds on high power. Stir the chocolate well. Repeat this in 30-second bursts until it melts completely. This method helps avoid scorched chocolate. If you don't have a microwave, you can use a double boiler. Just simmer water in a pot and place a bowl on top. Make sure the bowl does not touch the water. Stir until melted. To keep your dark chocolate sea salt bark fresh, store it in an airtight container. You can keep it at room temperature or in the fridge. If stored correctly, it will last up to two weeks. If you live in a warm area, I suggest using the fridge to prevent melting. Always separate layers with parchment paper to prevent sticking. To make your bark even more special, try adding spices. A pinch of cinnamon or a dash of chili powder can add a kick. You can also swap out nuts for your favorites. Try cashews or pistachios for a new taste. Adding a sprinkle of flaky sea salt on top boosts flavor. If you like a bit of crunch, consider using toasted coconut flakes. Each adjustment can create a unique twist on this simple treat. Pro Tips Use Quality Chocolate: Choose high-quality dark chocolate with at least 70% cocoa for the best flavor and texture. The better the chocolate, the more decadent your bark will be. Customize Your Toppings: Feel free to experiment with different nuts, dried fruits, or even spices. This bark can be tailored to your taste preferences or seasonal ingredients. Chill Before Cutting: Allow the chocolate to set completely in the refrigerator. This makes it easier to break into clean pieces without crumbling. Presentation Matters: For a stunning presentation, arrange the bark on a decorative platter and sprinkle a few extra flakes of sea salt on top right before serving. {{image_4}} You can switch up the nuts and dried fruits in your bark. Try using cashews, macadamia nuts, or hazelnuts for a new flavor. For dried fruits, consider raisins, apricots, or even figs. Each choice adds its unique taste and texture. This makes your dark chocolate sea salt bark even more fun and exciting. Adding spices can change the whole vibe of your bark. A sprinkle of cinnamon or a dash of cayenne pepper gives it a warm kick. You can also try adding a few drops of vanilla extract or orange zest for a fresh twist. These added flavors enhance the chocolate and make it truly special. Making this bark fit your diet is easy. For a vegan version, just use dairy-free dark chocolate. If you need a nut-free bark, replace the nuts with seeds like pumpkin or sunflower seeds. You can keep the other ingredients the same. This way, everyone can enjoy this tasty treat without worry. To keep your dark chocolate sea salt bark fresh, store it in an airtight container. You can keep it at room temperature or in the fridge. If you choose room temperature, make sure it's in a cool, dry place away from sunlight. If you prefer to chill it, the fridge will help it stay firm. Both methods work well, but I find the fridge best for longer storage. When stored properly, your bark can last up to two weeks. If you store it at room temperature, it may soften slightly but still tastes great. In the fridge, it holds its shape better. Just remember to check for any signs of melting or moisture, which can affect its quality. If your bark breaks or melts, don’t worry. You can remelt it gently in the microwave. Place the pieces in a microwave-safe bowl and heat in short bursts, stirring often. This will help you avoid burning the chocolate. Once it's smooth again, you can mix in any new toppings and let it set again on parchment paper. This way, you can enjoy your treat fresh, even if it needs a second chance! The best cocoa percentage for dark chocolate is 70% or higher. This gives you a rich flavor. Higher cocoa content means less sugar, making it less sweet. It also enhances the health benefits. Look for brands that specify their cocoa content. You can use milk chocolate, but it changes the taste. Milk chocolate is sweeter and creamier. This might not give you the same rich flavor. If you like sweeter treats, milk chocolate could work. Mix in some sea salt for balance. The bark takes about 1 to 2 hours to set in the fridge. It should be firm to the touch when ready. Don't rush this step. If you don't chill it long enough, the bark may not break well. Patience is key for the best results. Dark chocolate sea salt bark can be a healthy treat. Dark chocolate has antioxidants and can boost heart health. Mixed nuts offer healthy fats and protein. Dried fruits add vitamins and fiber. Just watch the portion size since it can be calorie-dense. You can find ready-made dark chocolate sea salt bark at gourmet shops. Many online stores also offer it. Check the ingredients to ensure quality. Some local bakeries may carry it too. Always look for brands that use high-quality chocolate. Dark chocolate sea salt bark is a fun and tasty treat. Using quality ingredients makes it both satisfying and nutritious. With simple steps, you can create this bark at home. Experiment with different nuts or spices to make it your own. Remember to store it well for maximum freshness. Make this treat for yourself or share it with friends. It's sure to be a hit! Enjoy making something delicious and healthy.
    Dark Chocolate Sea Salt Bark Simple and Delicious Treat
  • - 2 cups rolled oats - 1 cup creamy peanut butter - ⅓ cup honey or maple syrup - ½ cup brown sugar, packed - 1 teaspoon vanilla extract - ½ teaspoon salt - ½ cup mini chocolate chips - ¼ cup chopped nuts (almonds, walnuts, or your choice) - ¼ cup dried fruit (cranberries, raisins, or apricots) You might want to change some ingredients. If you can’t find creamy peanut butter, try almond butter or sunflower seed butter. For sweeteners, use agave syrup or coconut sugar. You can also swap out the nuts for seeds like pumpkin or sunflower seeds. If you want a fruity touch, use any dried fruit you love, such as figs or dates. Each bar has about 200 calories. They hold 9 grams of fat and 4 grams of protein. You also get 3 grams of fiber from the oats and dried fruit. This snack gives you energy without a sugar crash, making it a great choice for kids and adults alike. {{ingredient_image_2}} Start by preparing your 8x8 inch baking dish. Preheat your oven to 350°F (175°C). Line the dish with parchment paper, leaving some overhang. This will help you lift the bars out later. Next, gather all your ingredients. You will need rolled oats, creamy peanut butter, honey or maple syrup, brown sugar, vanilla extract, salt, mini chocolate chips, chopped nuts, and dried fruit. Make sure everything is ready for mixing. In a large mixing bowl, combine the rolled oats, chopped nuts, and dried fruit. Stir these dry ingredients well. This ensures even distribution. In a medium saucepan, mix the creamy peanut butter, honey or maple syrup, brown sugar, vanilla extract, and salt. Heat this mixture over low heat for 2-3 minutes. Stir it continuously until the peanut butter melts and the mixture is smooth. Make sure the sugar dissolves completely. Carefully pour the warm peanut butter mixture over the dry ingredients. Use a spatula to mix everything together. Make sure every oat, nut, and piece of dried fruit is well-coated. After this, let the mixture cool slightly. Fold in the mini chocolate chips gently. This helps to prevent them from melting into the mix. Now it's time to bake. Transfer the mixture into your prepared baking dish. Use the spatula to press it firmly into the pan. Make sure it is packed evenly, especially in the corners. Place the baking dish in the preheated oven. Bake for about 15-20 minutes. Watch closely until the edges turn lightly golden brown. Once baked, remove it from the oven and let it cool in the pan for at least 20 minutes. After cooling, use the parchment overhang to lift the granola block out of the pan and onto a cutting board. Cut it into bars or squares based on your serving size. Allow the bars to cool completely before storing them in an airtight container. When making granola bars, it’s vital to avoid common mistakes. Over-mixing can make your bars too crumbly. Mix just until all ingredients combine. Over-baking can dry them out. Bake until the edges are golden brown, about 15-20 minutes. Always keep an eye on them! To cut your bars, let them cool in the pan for 20 minutes. Use a sharp knife for clean edges. If you want even bars, score the mixture lightly before it cools. Store your bars in an airtight container at room temperature. This keeps them fresh and chewy for days. Granola bars are tasty on their own, but you can make them even better! Try topping them with yogurt or drizzling honey on top. Pair them with fresh fruit for a snack. You can also wrap them in parchment paper for a cute, portable treat. Pro Tips Choose Your Sweetener: Honey and maple syrup will give different flavors; experiment to find your favorite! Storage Tips: Store in an airtight container to maintain freshness; these bars can last up to a week. Customize Your Mix: Add your favorite ingredients such as chia seeds or coconut flakes for a unique twist. Cutting Technique: Use a sharp knife and cut when the bars are still slightly warm for cleaner edges. {{image_4}} You can change the taste of your granola bars easily. Try adding coconut for a tropical twist. Sunflower seeds give a nice crunch. You can also mix in chia seeds for extra fiber. Dried fruit like apricots or figs adds sweetness. The options are endless, so feel free to get creative! Making these bars fit your diet is simple. To make them gluten-free, use certified gluten-free oats. For a nut-free version, swap peanut butter with sunflower seed butter. If you want a vegan option, use maple syrup instead of honey. These small changes keep the bars delicious and accessible for everyone. Seasonal flavors can make your granola bars exciting. In fall, add pumpkin spice for warmth. For summer, mix in fresh berries or a hint of lemon. Around the holidays, try adding cinnamon and nutmeg. These changes not only taste great but also make your treats festive! To keep your Peanut Butter Chocolate Chip Granola Bars fresh, store them in an airtight container. This keeps moisture out and helps maintain their chewy texture. You can place parchment paper between layers to prevent sticking. Keep the container in a cool, dry place away from direct sunlight. If you want to freeze them, first cut the bars into squares. Wrap each square in plastic wrap or foil. Then, place them in a freezer-safe bag or container. This protects them from freezer burn. To thaw, simply take out a bar and let it sit at room temperature for about 30 minutes. You can also microwave it for 10-15 seconds for a quick thaw. Homemade granola bars can last up to one week at room temperature. If you store them in the fridge, they can last up to two weeks. Frozen bars can stay fresh for up to three months. Always check for any signs of spoilage before eating, like an off smell or unusual texture. Yes, you can use other nut butters. Almond butter works well and has a nice flavor. Sunflower seed butter is a great option for nut-free diets. Both will give you a tasty granola bar. Just remember, each type of nut butter may change the texture a bit. To make your granola bars gluten-free, use gluten-free oats. Check the package to ensure they are certified gluten-free. You can also swap regular flour for almond flour or coconut flour in some recipes. These simple changes keep your bars safe for those who need gluten-free options. You can cut down on sugar, but the bars may change a bit. Try using ripe bananas or applesauce for sweetness. These options add flavor without the extra sugar. If you want to keep some sweetness, use less honey or maple syrup. Just remember, each change may alter the final taste slightly. In this post, I shared how to make tasty granola bars. I covered ingredients, including oats and peanut butter, and gave you options for substitutions. You learned the steps for preparing, mixing, and baking the bars. I also shared tips for cutting, storing, and serving. Finally, don't be afraid to experiment with flavors and dietary needs. Your homemade bars can be both healthy and delicious! Enjoy your baking journey and feel free to customize these recipes to fit your taste!
    Peanut Butter Chocolate Chip Granola Bars Delightful Treat
  • To make Chocolate Coconut Snowball Truffles, you need: - 1 cup desiccated coconut (plus extra for coating) - ½ cup almond flour - ½ cup unsweetened cocoa powder - ¼ cup maple syrup - 2 tablespoons coconut oil, melted - 1 teaspoon vanilla extract - A pinch of salt - ½ cup dark chocolate chips (ensure dairy-free if necessary) These ingredients blend well to create a rich and tasty treat. You can play with the recipe by adding some optional ingredients: - A dash of cinnamon for warmth - Chopped nuts for crunch - Dried fruit for sweetness - A splash of coffee for depth These small changes can really boost the flavor. If you need to swap ingredients, here are some ideas: - Use shredded coconut instead of desiccated coconut for a different texture. - Swap almond flour with oat flour or regular flour if needed. - Replace maple syrup with honey or agave syrup for sweetness. - Use coconut butter instead of coconut oil for a creamier taste. These substitutions help you make the truffles work for your needs. {{ingredient_image_2}} First, gather your ingredients. In a large bowl, combine the desiccated coconut, almond flour, cocoa powder, maple syrup, melted coconut oil, vanilla extract, and a pinch of salt. Use a spatula or your hands to mix everything together. You want the dough to be sticky and well combined. This step is key for great flavor and texture. Now it's time to shape the truffles. Take small portions of the dough and roll them into balls. Aim for about 1 inch in diameter. Place each ball on a baking sheet lined with parchment paper. Make sure to leave space between them. This helps them keep their shape as they chill. While the truffles chill in the freezer, let’s melt the dark chocolate chips. Use a microwave-safe bowl for this. Heat the chocolate in 30-second intervals. Stir well after each interval until it’s fully melted and smooth. Be patient! This step is important for a nice, glossy finish on your truffles. To get the right texture, make sure to mix your ingredients well. Use your hands or a spatula to combine the coconut, almond flour, cocoa powder, maple syrup, melted coconut oil, vanilla, and salt. You want a sticky dough that holds together. If it feels too dry, add a tiny bit more syrup or coconut oil. If it's too wet, a bit more almond flour will help. When melting chocolate, use a microwave-safe bowl. Heat the chocolate in 30-second bursts. Stir it well after each round. This method helps prevent burning. If you don't have a microwave, you can melt chocolate on the stove using a double boiler. Just be careful not to let water touch the chocolate. For a beautiful presentation, serve your truffles in small cups or on a pretty platter. You can sprinkle additional coconut flakes around them for a decorative touch. Use colorful plates to make the truffles pop. They look great at parties or as gifts. Don’t forget, the first bite is always the best! Pro Tips Use Fresh Coconut: If possible, use fresh coconut instead of desiccated for a more intense flavor and better texture. Chill the Chocolate: Ensure the melted chocolate is not too hot, as it can cause the truffle balls to melt when dipped. Customize Flavors: Experiment with different extracts like almond or orange to create unique flavor profiles for your truffles. Store Properly: Keep the truffles in an airtight container in the refrigerator to maintain their freshness and texture. {{image_4}} You can easily change the taste of your Chocolate Coconut Snowball Truffles. Try adding a few drops of peppermint extract for a minty twist. You can also mix in citrus zest, like orange or lemon, for a refreshing flavor. Want a nutty touch? Add chopped nuts or nut butter into the dough. Each addition can give you a new flavor experience. Making these truffles vegan or dairy-free is simple. First, use dairy-free dark chocolate chips. They taste just as rich and chocolatey. Replace maple syrup with agave syrup to keep it vegan. You can also use coconut cream instead of regular cream if you want a different texture. This way, everyone can enjoy these tasty treats. The fun doesn't stop with just coconut coating. You can roll your truffles in crushed nuts, like almonds or hazelnuts, for added crunch. If you want something sweeter, try using sprinkles or ground graham crackers. For a more indulgent experience, you can dip them in white chocolate before coating them. Each coating changes the look and taste of your truffles, making them unique every time. To keep your Chocolate Coconut Snowball Truffles fresh, place them in an airtight container. You can layer them with parchment paper to avoid sticking. Store the container in the fridge for the best taste and texture. If you want to share these treats, a sealed box works well for gifting. You can freeze the truffles if you want to save some for later. First, place the truffles on a baking sheet in a single layer. Freeze them for about an hour until firm. Once frozen, transfer them to an airtight container or freezer bag. They can last up to three months in the freezer. When ready to enjoy, thaw them in the fridge overnight. Chocolate Coconut Snowball Truffles can last up to one week in the fridge. If you store them correctly, they will taste fresh and delicious. However, for the best flavor, try to eat them within the first few days. Enjoying them soon after making them is always the best option! Yes, you can make these truffles ahead of time. They store well in the fridge for up to one week. Just keep them in an airtight container. If you want them to last longer, you can freeze them. This way, you can enjoy them anytime. Just thaw in the fridge before serving. The best way to melt chocolate is by using a microwave. Place the dark chocolate chips in a microwave-safe bowl. Heat them in 30-second bursts. Stir well between each burst. This helps to avoid burning the chocolate. You can also melt chocolate on the stove with a double boiler. Just be sure to keep the heat low and stir often. To make these truffles healthier, consider these swaps: - Use unsweetened cocoa powder instead of sweetened ones. - You can replace maple syrup with a lower-calorie sweetener like stevia. - Try using coconut flour instead of almond flour for fewer carbs. - Add nuts or seeds for extra crunch and nutrition. These changes can help cut calories while keeping the flavor. In this guide, we explored the ingredients and steps to make chocolate coconut snowball truffles. We discussed mixing and shaping the dough, along with melting chocolate perfectly. You learned useful tips for texture and presentation. We also shared variations for flavor and storage tips to keep your treats fresh. These truffles are fun to make and share with friends. Enjoy trying different flavors and coatings to find your favorite!
    Chocolate Coconut Snowball Truffles Sweet and Easy Treat
See more Desserts →

Dinner

  • - 1 lb boneless chicken thighs, cut into 1-inch pieces - 2 tablespoons extra virgin olive oil - Juice and zest of 2 fresh lemons - 3 cloves garlic, finely minced - 1 teaspoon dried oregano - 1 teaspoon dried thyme - 1 teaspoon smoked paprika - Salt and black pepper to taste For the main dish, I love using chicken thighs. They stay juicy and tender when cooked. The extra virgin olive oil brings a rich flavor, while the fresh lemons add brightness. Garlic adds depth, and the spices give that classic Greek touch. - 1 red bell pepper, cut into 1-inch pieces - 1 yellow bell pepper, cut into 1-inch pieces - 1 medium red onion, cut into wedges - Fresh parsley, chopped, for garnish I like to add colorful vegetables. The red and yellow bell peppers add sweetness and crunch. The red onion gives a nice bite and flavor. Don't forget the fresh parsley; it brightens the dish and makes it look pretty! - Skewers - Grill or grill pan - Mixing bowl You will need skewers to hold everything together. Wooden skewers work well, but soak them in water first to prevent burning. A grill or grill pan is best for cooking these kebabs. A good mixing bowl helps to blend the marinade perfectly. {{ingredient_image_2}} 1. First, I prepare the marinade. In a large bowl, I mix: - 2 tablespoons extra virgin olive oil - Juice and zest of 2 lemons - 3 cloves garlic, finely minced - 1 teaspoon dried oregano - 1 teaspoon dried thyme - 1 teaspoon smoked paprika - Salt and black pepper to taste I whisk it all together until it smells amazing. 2. Next, I add 1 pound of cut chicken thighs to the marinade. I make sure each piece is well coated. Then, I cover the bowl with plastic wrap. I place it in the fridge for at least an hour. For the best flavor, I recommend marinating for 2 to 3 hours. 1. While the chicken marinates, I prepare the skewers. I use wooden skewers, soaking them in water for 30 minutes to stop burning. 2. I take the marinated chicken and start threading it onto the skewers. I alternate with: - 1 red bell pepper, cut into 1-inch pieces - 1 yellow bell pepper, cut into 1-inch pieces - 1 medium red onion, cut into wedges I leave small gaps between each item. This helps them cook evenly. 1. Now, I preheat my grill to medium-high heat. It’s important to let it get hot before cooking. 2. Once the grill is ready, I place the skewers on the grates. I cook them for about 8 to 10 minutes. I rotate them often. This gives the kebabs nice grill marks and helps them cook evenly. 3. I check the chicken’s temperature. It should reach 165°F (74°C) for safe eating. 4. After grilling, I carefully remove the kebabs from the grill. I let them rest for a few minutes. This helps keep the chicken juicy. 5. Just before serving, I sprinkle fresh parsley on top and add lemon wedges for extra zest. Marinating the chicken is key for great flavor. It helps the chicken soak up all the tasty herbs and spices. I recommend marinating for at least one hour. For the best taste, let it sit for two to three hours. This extra time makes a huge difference. Adjust the seasoning to your liking. If you enjoy a bit more heat, add a pinch of cayenne pepper. Don't be afraid to experiment and find what works for you! When grilling, choose between gas and charcoal. Gas grills heat up fast and are easy to control. Charcoal grills give a smoky flavor but take longer to set up. Whichever you choose, preheat your grill to medium-high heat. This helps cook the chicken evenly. Always check that the chicken is fully cooked. Use a meat thermometer to ensure it reaches 165°F (74°C). This keeps everyone safe and the chicken juicy. Plating is just as important as cooking. Serve your kebabs on a large, colorful platter. Add a mix of fresh parsley and lemon wedges around them. This makes the dish pop with color. For a complete meal, pair the kebabs with tzatziki sauce or a Greek salad. These sides add flavor and freshness, making your meal even better. Pro Tips Marination Time: Allow the chicken to marinate for at least 2-3 hours for the best flavor absorption. Grill Temperature: Make sure your grill is preheated to medium-high for optimal cooking and to achieve perfect grill marks. Resting the Kebabs: Let the kebabs rest for a few minutes after grilling to ensure the juices redistribute and keep the chicken moist. Vegetable Variety: Feel free to add other vegetables like zucchini or cherry tomatoes for a colorful and nutritious addition to your kebabs. {{image_4}} You can use different proteins for your kebabs. Chicken thighs are great, but chicken breast works too. Chicken breast gives a leaner option, but it can dry out if overcooked. If you prefer seafood, shrimp is a tasty choice. Just make sure to marinate them for less time, about 30 minutes. For a vegetarian option, you can skip the meat entirely. Use firm tofu or halloumi cheese in your kebabs. Both soak up flavors well and grill nicely. Add mushrooms or zucchini for extra taste and texture. Mediterranean flavors shine in these kebabs. You can add more spices to change the taste. Try cumin or coriander for a twist. Fresh herbs like basil or mint can also enhance the flavor. Mix in different vegetables for variety. Cherry tomatoes add sweetness, while asparagus gives a nice crunch. Use what you have on hand. This makes your dish unique every time you grill. Pair your kebabs with great sides. Greek salad is a classic choice. The fresh veggies and tangy dressing balance the rich flavors of the chicken. Don't forget about tzatziki sauce! This creamy cucumber dip is perfect for dipping. It cools the heat and adds a zesty kick. You can also serve warm pita bread or rice to round out the meal. Enjoy your flavorful feast! To keep your Greek lemon chicken kebabs fresh, place them in an airtight container. Store them in the fridge. They will stay good for up to three days. If you want to save them longer, you can freeze them. Wrap each kebab in plastic wrap, then place them in a freezer bag. They can last up to three months in the freezer. When you reheat your kebabs, use the oven or a skillet. This keeps the flavor and moisture. Preheat the oven to 350°F (175°C) and place the kebabs on a baking sheet. Heat for about 10-15 minutes. If using a skillet, add a touch of olive oil and cook on medium heat, turning gently. Avoid the microwave if you can. It can make the chicken dry and tough. Greek lemon chicken kebabs last about three days in the fridge. Check for signs of spoilage before eating. If the chicken has a bad smell or changes color, it’s best to throw it away. Always trust your senses. If it looks or smells off, don’t eat it. Enjoy this tasty dish safely! You should marinate the chicken for at least 1 hour. For the best flavor, aim for 2-3 hours. The longer you marinate, the more the chicken absorbs the lemon and herb flavors. This time helps tenderize the meat and makes it juicy when grilled. Yes, you can use wooden skewers, but soak them in water for at least 30 minutes. This step helps prevent burning on the grill. If you skip this, the skewers may catch fire. Metal skewers are also an option if you want to avoid this step. Serve these kebabs with fresh tzatziki sauce for dipping. A Greek salad makes a great side, too. You can also add warm pita bread or grilled vegetables. For a complete meal, consider pairing with rice or quinoa. In this post, we explored making Greek lemon chicken kebabs, focusing on key ingredients like chicken thighs, fresh herbs, and vegetables. We covered marinating methods, skewering tips, and grilling techniques. Plus, we shared storage and reheating advice to keep leftovers fresh. Grilling kebabs is easy and fun. You can mix flavors and use different proteins to suit your taste. Enjoy your kebabs with sides or sauces for a perfect meal. Remember, great food starts with good ingredients and a little love.
    Greek Lemon Chicken Kebabs for Flavorful Grilling
  • - 1 pound large shrimp, peeled and deveined - 4 cloves garlic, minced - 3 tablespoons extra-virgin olive oil - Zest and juice of 2 lemons - 1 teaspoon smoked paprika - 1 teaspoon red pepper flakes - Sea salt and black pepper - Fresh parsley for garnish The first key to this recipe is the shrimp. Large, peeled, and deveined shrimp work best. They soak up the flavor well and cook quickly. Garlic is next. I use four cloves because it gives a strong, tasty punch. The olive oil adds richness and helps the seasoning stick. Lemon is a must. The zest and juice brighten the dish and add freshness. Smoked paprika brings a warm, smoky flavor. Red pepper flakes add heat, so adjust them to your taste. Don’t forget sea salt and black pepper for seasoning. Finally, fresh parsley adds color and a hint of earthiness. - Calories per serving: About 220 - Breakdown of macronutrients: - Protein: 24g - Fat: 12g - Carbohydrates: 3g Each serving provides a good balance of protein and healthy fats, making this dish a great choice for a light meal. - Alternative oils: You can use avocado oil or grapeseed oil instead of olive oil. - Different types of shrimp: Feel free to use smaller shrimp or even shrimp with the shell on for added flavor. - Citrus variations: For a twist, try using lime or orange juice instead of lemon juice. These substitutions let you play with flavors while keeping the dish delicious and fun! {{ingredient_image_2}} Preheating your oven to 400°F (200°C) is key. This temperature ensures even cooking. If the oven is not hot enough, the shrimp will not roast well. They may turn rubbery or mushy. Always start with a preheated oven for the best results. In a large mixing bowl, combine the following: - 4 cloves garlic, minced - 3 tablespoons extra-virgin olive oil - Zest and juice of 2 lemons - 1 teaspoon smoked paprika - 1 teaspoon red pepper flakes - Sea salt and freshly cracked black pepper Whisk these ingredients until well mixed. This marinade adds a ton of flavor. The garlic and lemon blend perfectly, creating a zesty mix. The smoked paprika enhances the taste with depth. Next, add the shrimp to the bowl. Ensure that each shrimp is fully coated in the marinade. Let them sit for about 15 minutes at room temperature. This time allows the flavors to soak in. If you have more time, you can marinate longer. Just don’t go overboard; too long can make the shrimp mushy. Line a baking sheet with parchment paper. Spread the marinated shrimp in a single layer. This gives them enough space to cook evenly. Place the baking sheet in the preheated oven. Roast the shrimp for 8-10 minutes. Keep an eye on them. The shrimp are done when they are pink and opaque. Overcooking can make them tough. To check for doneness, cut one in half. If it is still translucent, give it a bit more time. Once cooked, take them out and sprinkle with fresh parsley. This adds a nice touch and extra flavor. Enjoy your meal! To know when shrimp are done, watch for color change. They should look pink and opaque. This usually takes about 8-10 minutes at 400°F. If overcooked, shrimp become tough. To avoid this, check them a minute early. You want them just cooked, not chewy. Add herbs and spices for more flavor. Fresh herbs like parsley or basil brighten the dish. Use smoked paprika for a deeper taste. Fresh ingredients usually taste better than dried ones. However, if dried is all you have, it still works. Pair your shrimp with sides like rice or quinoa. Both soak up flavors well. For a pop, serve on a colorful plate. Drizzle extra lemon juice over the shrimp for brightness. Garnish with lemon wedges and parsley to make the dish look fresh and inviting. Pro Tips Perfect Shrimp Size: Use large shrimp for this recipe, as they hold up better during roasting and have a satisfying texture. Marinating Time: Allow the shrimp to marinate at room temperature for no more than 15 minutes to prevent them from becoming overly salty. Watch the Cook Time: Shrimp cook quickly; keep an eye on them to ensure they don’t overcook and turn rubbery. Serving Suggestions: Pair the shrimp with a side of crusty bread or a fresh salad to complement the zesty flavors. {{image_4}} To spice things up, add more red pepper flakes. Start with the 1 teaspoon from the recipe. If you like heat, sprinkle in more. Taste the mix before you add the shrimp. Adjust to your heat level. This gives you control over the flavor. A little spice adds excitement to every bite. For summer fun, use skewers. Thread the marinated shrimp onto wooden or metal skewers. This makes grilling easier and adds a nice char. Grill them for about 2-3 minutes on each side. Keep an eye on them, as they cook fast. Serve these skewers at parties for a tasty treat. Roasting veggies with shrimp adds color and flavor. Try bell peppers, zucchini, or asparagus. They pair well with the lemon garlic taste. Cut the veggies into similar sizes as the shrimp. Toss them in the same marinade. Spread them on the baking sheet with the shrimp. This creates a complete meal on one tray. To keep your lemon garlic roasted shrimp fresh, place them in an airtight container. Make sure the shrimp cool down completely before sealing. This helps prevent sogginess. Store the container in the fridge. It’s best to eat leftovers within two days for optimal taste. To reheat shrimp, use a skillet over low heat. Add a splash of olive oil to prevent sticking. Heat gently, stirring often. This method keeps shrimp from getting rubbery. You can also use the microwave. Place shrimp on a plate, cover, and heat in short bursts. Check every 30 seconds to avoid overcooking. If you want to save shrimp for later, freezing is a great option. First, let shrimp cool completely. Then, place them in a freezer-safe bag. Remove as much air as possible before sealing. Label the bag with the date. You can freeze shrimp for up to three months. When ready to use, thaw in the fridge overnight. This keeps them juicy and tasty. It takes about 8 to 10 minutes to cook shrimp in the oven. The best way to tell if they are done is by checking their color. Cooked shrimp turn pink and opaque. Make sure not to overcook them; otherwise, they will become tough. Keep an eye on them while they roast. Yes, you can use frozen shrimp for this recipe. Frozen shrimp are often easier to find and can be more affordable. Just remember to thaw them first. You can thaw shrimp in cold water for 15 to 20 minutes. The downside is that frozen shrimp may have less flavor. Fresh shrimp often taste better, but frozen shrimp work well too. Lemon garlic roasted shrimp pairs nicely with many sides. Here are some ideas: - Fluffy quinoa - Fragrant rice - Steamed broccoli - Roasted asparagus - Mixed green salad These sides enhance the meal and add color to your plate. Enjoy experimenting to find your favorite pairings! This blog post explored how to prepare delicious lemon garlic roasted shrimp. You learned about the key ingredients, cooking methods, and helpful tips to achieve perfect results. I also shared some tasty variations and storage options for leftovers. This dish is simple yet packed with flavor, making it a great choice for any meal. Enjoy your cooking journey, and don't hesitate to experiment with different ingredients. You can create your own shrimp masterpiece!
    Lemon Garlic Roasted Shrimp Flavorful and Simple Recipe
  • When making Minute Teriyaki Shrimp Fried Rice, you need fresh and vibrant ingredients. Here is what you will need: - 2 cups cooked jasmine rice (preferably chilled) - 1 pound large shrimp, peeled and deveined - 2 tablespoons teriyaki sauce - 1 cup mixed vegetables (such as carrots, peas, and bell peppers) - 2 green onions, chopped (set aside some for garnish) - 2 cloves garlic, minced - 1 tablespoon ginger, minced - 2 tablespoons soy sauce - 1 tablespoon sesame oil - 1 tablespoon vegetable oil - Salt and pepper to taste - Sesame seeds for garnish Using chilled jasmine rice is key. It makes your fried rice fluffy and helps it fry up nicely. Fresh shrimp adds a sweet taste and tender texture. The mixed vegetables bring color and crunch to the dish. The garlic and ginger add a warm, spicy kick. Teriyaki and soy sauce blend together for a rich flavor. The sesame oil gives a nutty aroma that ties it all together. Make sure to gather all your ingredients before starting. Having everything ready helps you cook quickly and easily. Now you are set to make a delicious meal! - Heating the Skillet Start by heating 1 tablespoon of vegetable oil in a large skillet over medium-high heat. You want the oil to shimmer before adding any ingredients. This helps create a nice stir-fry. - Sautéing Garlic and Ginger Once the oil is hot, add 2 cloves of minced garlic and 1 tablespoon of minced ginger. Stir them for about 30 seconds. You want to smell their wonderful aroma. - Cooking the Shrimp Next, add 1 pound of peeled and deveined shrimp to the skillet. Cook them for about 2-3 minutes. Flip them once until they turn pink and opaque. After that, remove the shrimp and set them aside to keep warm. - Stir-Frying Mixed Vegetables In the same skillet, toss in 1 cup of mixed vegetables like carrots, peas, and bell peppers. Stir-fry these for 2-3 minutes. They should be tender but still crisp. This will add great texture. - Mixing in the Rice and Sauces Now, push the veggies to one side of the skillet. Add 2 cups of chilled jasmine rice to the clear space. Break apart any clumps with your spatula. Drizzle 2 tablespoons of teriyaki sauce and 2 tablespoons of soy sauce over the rice. Toss everything together so the rice soaks up the flavors. - Final Stir-Fry with Shrimp and Green Onions Finally, return the cooked shrimp to the skillet along with 2 chopped green onions. Drizzle 1 tablespoon of sesame oil over the mix. Stir-fry everything for an additional 2-3 minutes until heated through. Taste and season with salt and pepper as you like. Your Minute Teriyaki Shrimp Fried Rice is now ready to enjoy! - Using Chilled Rice for Best Results Chilled rice is key for fried rice. Freshly cooked rice has too much moisture. This makes it sticky and clumpy. Use rice that has been cooked and cooled. You can make it ahead of time. Store it in the fridge for at least an hour. - Keeping Vegetables Crisp To keep your vegetables crisp, don’t overcook them. Sauté them just until tender. This usually takes 2-3 minutes. It helps maintain their bright color and crunch. Stir-fry them quickly over high heat. This method locks in their flavor and nutrients. - Ensuring Shrimp are Cooked Perfectly Cook shrimp until they turn pink and opaque. This should take about 2-3 minutes. Don't overcrowd the pan; cook in batches if needed. Overcooked shrimp can become rubbery. So, watch them closely and remove them from the heat as soon as they are done. - Garnishing Ideas Garnish your dish for a pop of color and flavor. Use chopped green onions and a sprinkle of sesame seeds. This adds a nice crunch and visual appeal. You can also add a dash of extra teriyaki sauce on top for more flavor. - Ideal Pairings Pair this dish with a simple side salad or steamed broccoli. Both add freshness and balance to the meal. If you want more protein, serve it with a side of edamame. This makes a complete, satisfying dinner. {{image_4}} You can switch up the mixed vegetables to fit your taste. Instead of peas and carrots, try: - Broccoli florets - Corn - Snap peas These options add color and crunch. You can also use frozen mixed veggies for ease. For protein, shrimp is great, but other choices work well too. Try: - Chicken, diced and cooked - Tofu, cubed and sautéed Each protein brings its own flavor. This lets you customize the dish to your liking. To boost the flavor, add spices or sauces. Consider: - Red pepper flakes for heat - A splash of sriracha for a kick These additions can change the taste while keeping it simple. You can also add more veggies for nutrition. Try adding: - Bell peppers, sliced thin - Baby spinach, wilted in the pan These veggies add vitamins and make your dish even more colorful. To store your Minute Teriyaki Shrimp Fried Rice, let it cool first. Use an airtight container. This keeps it fresh for up to three days. Always label the container with the date. If you want to avoid sogginess, do not let it sit out too long. Keeping it chilled helps maintain the best taste and texture. Reheating this dish is easy and quick. You can use several methods: - Microwave: Place the rice in a microwave-safe dish. Add a splash of water. Cover it with a damp paper towel. Heat in short bursts, stirring in between, until warm. - Skillet: Heat a little oil in a skillet over medium heat. Add the rice and stir-fry for about five minutes. This method brings back some crispness. - Oven: Preheat your oven to 350°F (175°C). Spread the rice in a baking dish. Cover it with foil and heat for about 15 minutes. Choose the method that suits you best. Each option keeps the flavors intact and delicious. Yes, you can use frozen shrimp and vegetables. Just thaw them first. For shrimp, run them under cold water until they are soft. For veggies, microwave them for a minute or two. This will help them cook faster in the pan. To keep the rice from getting mushy, use chilled jasmine rice. The cold rice helps each grain stay separate. Also, avoid overcooking the rice in the pan. Stir-fry it just enough to heat it through. You can serve Teriyaki Shrimp Fried Rice with a side of steamed broccoli or a fresh salad. A simple cucumber salad adds a nice crunch too. You could also enjoy this dish with some crispy spring rolls for extra flavor. To make this dish gluten-free, use gluten-free soy sauce, like tamari. Check the teriyaki sauce label to ensure it is gluten-free as well. Using these swaps will keep the dish tasty while meeting your gluten-free needs. This blog post covered how to make Teriyaki Shrimp Fried Rice. We discussed the key ingredients, including shrimp, jasmine rice, and mixed vegetables. I shared step-by-step instructions to ensure your meal turns out tasty and satisfying. You found tips to keep the rice fluffy and the shrimp perfectly cooked. Lastly, we explored variations, storage, and answers to common questions. Now, you can create your own delicious dish, making it your own. Enjoy making this recipe!
    Minute Teriyaki Shrimp Fried Rice Easy Dinner Idea
  • - 3 medium sweet potatoes - 4 tablespoons unsalted butter - 4 cloves garlic - 1 teaspoon dried thyme - 1 teaspoon smoked paprika - Sea salt and black pepper - Fresh parsley for garnish Gathering the right ingredients is key for great flavor. Start with sweet potatoes. I like using medium-sized ones. Their sweetness shines when roasted. You need unsalted butter to create a rich, buttery taste. Garlic brings a bold flavor that pairs well with sweet potatoes. Use fresh garlic, not powder for the best taste. Dried thyme adds a nice herbal note. Smoked paprika gives a warm, smoky flavor that enhances the dish. Don’t forget sea salt and black pepper to elevate all the tastes. Lastly, fresh parsley adds color and a fresh touch when you serve. These ingredients come together to make a side dish that’s both simple and delicious. Each bite is a mix of sweet, savory, and aromatic flavors. Set your oven temperature to 425°F (220°C). This hot heat makes the sweet potatoes crisp and tasty. Melt 4 tablespoons of unsalted butter in a small pan over low heat. Once it melts, add 4 cloves of finely minced garlic. Cook it for 1-2 minutes until it smells great. Be careful not to let the garlic brown. Brown garlic can taste bitter. Take 3 medium sweet potatoes, peel them, and cut them into 1-inch cubes. In a large bowl, mix the sweet potatoes with the melted garlic butter. Add 1 teaspoon of dried thyme, 1 teaspoon of smoked paprika, and a good pinch of sea salt and black pepper. Toss everything well, so each piece gets coated with the flavor. Line a baking sheet with parchment paper for easy cleanup. Spread the sweet potato mix on the sheet in a single layer. This helps them roast evenly. Put the baking sheet in the preheated oven. Roast the sweet potatoes for 25-30 minutes. Flip them halfway through cooking. They should be fork-tender and golden brown when ready. When done, take the baking sheet out of the oven. Let the sweet potatoes cool for a few minutes. Before serving, sprinkle fresh parsley on top for color and freshness. Set your oven to 425°F (220°C). This high temperature helps caramelize the sweet potatoes. They will turn golden and taste great! Do not let the garlic brown. Browned garlic can taste bitter. Sauté the minced garlic gently for just 1-2 minutes until it smells nice. This keeps the garlic sweet and flavorful. To get fork-tender sweet potatoes, cut them into 1-inch cubes. This size cooks evenly. Flip them halfway through roasting. This ensures they cook all sides and become soft and delicious. {{image_4}} You can change the flavor by adding different herbs. Rosemary and sage work well. Just chop them fresh and mix them in. Try using one tablespoon of fresh herbs for each sweet potato. This will give your dish a new twist and make it more fragrant. Want a little heat? Try adding cayenne or chili powder. Just a pinch can bring a nice kick. You can start with ¼ teaspoon and adjust to your taste. These spices add depth and warmth to the sweet potatoes, making them more exciting. For a sweeter touch, add maple syrup or brown sugar. Drizzle one tablespoon of maple syrup over the sweet potatoes before roasting. If you prefer brown sugar, sprinkle one tablespoon over them. This creates a nice caramelized finish that balances the savory garlic and butter perfectly. To store leftovers, let the sweet potatoes cool first. Place them in an airtight container. Keep them in the fridge for up to three days. This helps maintain their flavor and texture. If you want to freeze the roasted sweet potatoes, first cool them completely. Spread them out in a single layer on a baking sheet. Freeze for about one hour. Once frozen, transfer them to a freezer-safe bag. They can stay in the freezer for up to three months. When you're ready to enjoy the sweet potatoes again, preheat your oven to 375°F (190°C). Place the sweet potatoes on a baking sheet. Bake them for about 15-20 minutes, or until heated through. You can also reheat them in a microwave for quick results. Just be sure to use a microwave-safe dish. Yes, you can swap sweet potatoes with other types. Use regular potatoes, Yukon Gold, or red potatoes. Each type will give a different taste and texture. However, adjust cooking time if needed. Regular potatoes may cook faster. Garlic Butter Roasted Sweet Potatoes last up to four days in the fridge. Keep them in an airtight container. For best flavor, eat them fresh. They may lose some texture when stored. You can easily make this dish vegan. Replace the butter with plant-based butter or olive oil. Use garlic-infused oil for added flavor. The dish will still be tasty and satisfying without dairy. These sweet potatoes pair well with many meals. Try serving them with grilled chicken or fish. They also work great with a green salad. For a vegetarian option, serve with quinoa or lentils. Garlic Butter Roasted Sweet Potatoes are easy to make and full of flavor. We covered the ingredients, steps, and tips for perfecting this dish. You learned about tasty variations and how to store leftovers. Remember, roasting at the right temperature and avoiding burnt garlic is key. With these simple tips, you can enjoy sweet, savory, and tender bites every time. Happy cooking!
    Garlic Butter Roasted Sweet Potatoes Flavorful Side
See more Dinner →

Appetizers

  • To make garlic herb focaccia bread, you need a few key ingredients. Each one plays an important role in creating that fluffy and flavorful delight. Here’s what you will need: - 4 cups all-purpose flour - 1 tablespoon instant yeast - 2 teaspoons salt - 1 tablespoon sugar - 1 ½ cups warm water (around 110°F) - ¼ cup extra virgin olive oil (plus more for drizzling) - 6 cloves garlic, finely minced - 2 teaspoons dried oregano - 2 teaspoons dried rosemary - Freshly cracked black pepper (to taste) - Coarse sea salt for topping - Fresh rosemary sprigs for garnish These ingredients come together to create a focaccia that is soft on the inside and crispy on the outside. The all-purpose flour gives structure, while the instant yeast helps it rise. Sugar feeds the yeast, making it bubbly and light. Warm water activates the yeast, ensuring it works well. Adding olive oil keeps the dough moist and flavorful. The garlic, oregano, and rosemary bring in that classic herb taste. Finally, coarse sea salt enhances all the flavors and gives a nice crunch on top. Using fresh rosemary sprigs for garnish adds a lovely touch. This focaccia is perfect for sharing or enjoying on your own. You can dip it in balsamic vinegar or serve it on a rustic board. The simple ingredients make it easy, but the taste is gourmet! {{ingredient_image_2}} To start, you need to activate the yeast mixture. In a large bowl, mix warm water, sugar, and instant yeast. Let it sit for about 5 minutes. You want it to get frothy and bubbly. This means the yeast is ready to work. Next, combine the dough ingredients. Add all-purpose flour, salt, and olive oil to your frothy yeast mix. Use a wooden spoon or your hands to mix until a shaggy dough forms. It should pull away from the bowl edges. Now, knead the dough. Turn it out onto a lightly floured surface. Knead it for about 5-7 minutes. You want the dough to feel smooth and elastic. This step is key for a fluffy focaccia. For the first rise, find a warm area. This helps the dough grow. Cover the bowl with a kitchen towel or plastic wrap. Let it rise for about 1 hour, or until it doubles in size. You'll know it’s ready when it feels light and puffy. After the first rise, gently push down the center to deflate the dough. Transfer it to a greased baking sheet. Use your fingers to stretch and press the dough into the pan. Aim for about 1 inch thick. Cover the dough again with a kitchen towel. Let it rise for another 30 minutes. This second rise makes the focaccia soft and airy. Once it has risen, create dimples all over the dough with your fingers. This step gives focaccia its unique texture. Drizzle olive oil over it, then sprinkle the garlic, oregano, rosemary, and black pepper mix on top. Finish with coarse sea salt for extra flavor. Preheat your oven to 425°F (220°C). This step is crucial for a crispy crust. Once the oven is hot, place the focaccia inside. Bake for 20-25 minutes. It should turn golden brown and smell amazing. When done, take it out and let it cool slightly. Move it to a wire rack. Garnish with fresh rosemary sprigs for a nice touch. Enjoy your garlic herb focaccia! Kneading is key to great focaccia. You should knead the dough for about 5 to 7 minutes. The dough needs to feel smooth and elastic. This texture shows that the gluten has formed well. If the dough sticks too much, add a bit of flour. Avoid over-kneading; this can make the bread tough. Dimples are important! They help the focaccia hold oil and flavor. After your first rise, gently press your fingers into the dough to create deep dimples. Let the dough rise again for about 30 minutes. This second rise helps the bread become fluffy and light. Herbs and spices make focaccia special. Use fresh or dried herbs like rosemary and oregano. Minced garlic adds a punch of flavor. When topping the focaccia, sprinkle coarse sea salt evenly. This will bring out the best in the herbs. Too much salt can overwhelm the bread, so go light. Pro Tips Use Fresh Herbs: Fresh herbs can elevate the flavor of your focaccia. Consider adding fresh rosemary or thyme to the topping for a burst of freshness. Experiment with Toppings: Don’t hesitate to customize your focaccia with other toppings such as olives, sun-dried tomatoes, or cheese for added flavor and texture. Proper Dough Temperature: Ensure your water is at the right temperature (around 110°F) for activating the yeast effectively. Too hot can kill the yeast; too cold will not activate it. Let It Rest: Allowing the dough to rest after shaping will help it become lighter and airier, leading to a fluffier focaccia. {{image_4}} You can change the flavor of your focaccia. Try cheese and herb focaccia. Mix shredded cheese, like mozzarella or parmesan, into the dough. This adds a rich taste. Another option is Mediterranean olive focaccia. Add chopped olives to the dough for a salty kick. You can even top it with sun-dried tomatoes or artichokes. These flavors transport you to a sunny Mediterranean beach. If you want a healthier option, use whole wheat flour instead of all-purpose flour. This gives a nutty flavor. It also adds more fiber. You might need to adjust the water amount. Whole wheat flour absorbs more liquid. For a vegan version, swap the extra virgin olive oil for a plant-based oil. Avocado oil or coconut oil work well. This keeps the focaccia tasty and suitable for everyone. Get creative with toppings! You can use cherry tomatoes, bell peppers, or even caramelized onions. These add color and flavor. Dips are also a great pairing. Serve focaccia with balsamic vinegar or a mix of olive oil and herbs. Hummus or pesto also taste great alongside. You can explore different flavors to match your meal or snack. To keep your focaccia fresh, you have two main options: room temperature and refrigeration. - Room Temperature: Place the focaccia in a paper bag. This keeps it moist but allows some air flow. Avoid plastic bags, as they can make it soggy. - Refrigeration: If you need to store it longer, wrap it tightly in plastic wrap. This reduces air exposure but can dry it out. Freezing is a great option for longer storage. Here’s how to do it right: 1. Cool Completely: Let the focaccia cool down fully after baking. 2. Slice Before Freezing: Cut it into squares or pieces. This makes it easier to thaw just what you need. 3. Wrap It Up: Use plastic wrap and then aluminum foil to keep air out. 4. Label and Date: Mark the bag with the date. It can last up to three months in the freezer. To thaw, just take it out and leave it at room temperature for a few hours. When it comes to reheating, you have two good choices: the oven and microwave. - Oven: Preheat to 350°F. Place focaccia directly on the rack or a baking sheet. Heat for about 10-15 minutes until warm. This keeps it crispy. - Microwave: For a quick method, use the microwave. Place a piece on a plate and cover with a damp paper towel. Heat for 15-30 seconds. This method is fast but may soften the crust. Choosing the right method can make your focaccia taste fresh and delicious again! Yes, you can make focaccia ahead of time! To prepare it overnight, follow these steps: - After the first rise, shape the dough and place it in the pan. - Cover the pan tightly with plastic wrap or a kitchen towel. - Place it in the fridge. This slows down the rise and adds flavor. - The next day, take it out of the fridge. Let it sit for about 30 minutes to warm up. - Then, create dimples and add toppings before baking. Focaccia pairs well with many dishes. Here are some ideas: - Serve it with olive oil and balsamic vinegar for dipping. - Pair it with soups like minestrone or tomato. - Enjoy it alongside salads, especially Caesar or Greek salad. - Use it as a sandwich base for meats or veggies. To check if your focaccia is done, look for these signs: - The crust should be golden brown and look crisp. - Tap the bottom of the bread; it should sound hollow. - The top should be fragrant and slightly springy to touch. - If you have an instant-read thermometer, the inside should read about 190°F. Garlic herb focaccia bread is simple and fun to make at home. We covered main ingredients, step-by-step instructions, and tips for perfect results. Don't forget to experiment with different flavors and toppings! Store your bread properly for the best taste, and enjoy it fresh or reheated. With this guide, you'll bake delicious focaccia every time. I hope you feel inspired to try it out. Happy baking!
    Garlic Herb Focaccia Bread Fluffy and Flavorful Delight
  • - Mini pretzels (16 oz bag) - Vegetable oil (½ cup) - Ranch dressing mix (1 packet) - Garlic powder (1 teaspoon) - Onion powder (1 teaspoon) - Cayenne pepper (1 teaspoon, adjust to taste) - Paprika (1 teaspoon) - Black pepper (¼ teaspoon) Start by preheating your oven to 250°F (120°C). This low heat helps the flavors sink into the pretzels. In a large bowl, add the vegetable oil, ranch dressing mix, garlic powder, onion powder, cayenne pepper, paprika, and black pepper. Whisk these items together until smooth. This mix is where the magic happens. Carefully add the mini pretzels into your bowl. Toss them gently to coat every pretzel with the spicy ranch mix. It’s key to make sure each pretzel gets a good layer of flavor. If you see some pretzels missing the mix, just toss them again. Next, line a baking sheet with parchment paper. This will make cleanup easy. Spread the coated pretzels in one single layer on the sheet. Avoid crowding them. Place the baking sheet in the preheated oven. Bake for 30 minutes, stirring every 10 minutes. This helps every pretzel get that nice, even crunch. When the timer goes off, take them out and let them cool. Cooling makes them crispier, and you want that perfect snack! To make sure each pretzel is coated well, toss them gently in the ranch mix. You want every pretzel to get that zesty flavor. If you like it hotter, adjust the cayenne pepper to your taste. You can add less for a milder snack or more for a spicy kick. After baking, let the pretzels cool completely. This step is key for that crunchy texture we love. If you skip this, they might stay soft. Once cooled, store the pretzels in an airtight container. This keeps them fresh and crunchy, perfect for snacking later. To keep your Spicy Ranch Pretzels fresh, store them in an airtight container. This helps to lock in the flavor and crunch. Place the container in a cool, dry place. Avoid spots with heat or moisture, as they can ruin the texture. These pretzels can stay fresh for up to two weeks. After that, they may start to lose their crunch. Look for signs of staleness, like a soft texture or loss of flavor. If they don’t taste right, it’s best to toss them out. {{image_4}} You now have a simple way to make tasty spicy ranch pretzels. You learned about the key ingredients, easy steps, and storage tips. Remember, you can adjust the spices to fit your taste. Feel free to explore different flavors or substitutions. With just a bit of effort, these snacks can be a hit. Enjoy your pretzel journey and let the crunch begin!
    Spicy Ranch Pretzels Crunchy and Flavorful Snack
  • To make Air Fryer Ranch Potato Bites, you need simple, fresh ingredients. Here’s the list you will need: - 1 pound baby potatoes, halved - 2 tablespoons extra virgin olive oil - 2 tablespoons ranch seasoning mix - 1 teaspoon garlic powder - 1 teaspoon onion powder - ½ teaspoon smoked paprika - Salt and pepper, to taste - Fresh chives or parsley, finely chopped (for garnish) These ingredients come together to create a tasty and crispy snack. The baby potatoes are key. They cook quickly and have a great texture. The olive oil helps them crisp up nicely in the air fryer. Ranch seasoning adds a bold flavor that pairs well with the garlic, onion, and paprika. When you choose your potatoes, look for firm ones without any blemishes. Fresh herbs like chives or parsley add a nice touch when you serve them. They make the dish look vibrant and add a fresh taste. Gather these ingredients, and you’re ready to start your cooking adventure! Start by preheating your air fryer to 400°F (200°C). This step takes about 5 minutes. Preheating helps cook the potatoes evenly and gives them that perfect crisp. Next, grab 1 pound of baby potatoes and cut them in half. Place the halved potatoes into a large mixing bowl. Pour 2 tablespoons of extra virgin olive oil over the potatoes. Toss them well so each half gets a nice coat of oil. Now it’s time to add flavor! Sprinkle 2 tablespoons of ranch seasoning mix, 1 teaspoon of garlic powder, 1 teaspoon of onion powder, and ½ teaspoon of smoked paprika over the potatoes. Add salt and pepper to taste. Mix everything together with a spatula or spoon. Make sure all the potato halves are coated in that tasty seasoning. Carefully place the seasoned potato halves in a single layer in the air fryer basket. Avoid overcrowding for the best results. Cook the bites for 15 to 20 minutes. At the halfway mark, gently shake the basket to ensure even cooking. You’ll know they are done when they turn golden brown and crispy outside, while staying tender inside. Once cooked, take the potato bites out of the air fryer. Let them cool for a moment to avoid burns. For a beautiful finish, sprinkle finely chopped fresh chives or parsley on top. This adds a lovely touch of color and freshness to your dish. Enjoy your crispy ranch potato bites! To get the best crisp on your ranch potato bites, start with dry potatoes. Pat them with a paper towel before cooking. This helps the oil stick better. Use enough oil, but don’t drown them. Two tablespoons is just right. The air fryer’s hot air needs space to move around the potatoes. I recommend setting your air fryer to 400°F (200°C). This high heat cooks the outside fast, making it crispy. Cook for 15 to 20 minutes. Check them at 10 minutes. Shake the basket gently to ensure even cooking. The perfect potato bites should be golden brown and tender inside. Crowding the basket can ruin your crispiness. It traps steam and makes the potatoes soggy. Arrange the potato halves in a single layer. If you have more, cook them in batches. This way, you’ll enjoy the best texture and flavor every time. {{image_4}} You can change the flavor of your ranch potato bites. Try different seasoning blends. For a spicy kick, use taco seasoning. For a zesty twist, mix in lemon pepper. Italian seasoning also adds great flavor. Just swap out the ranch mix for your chosen blend. This keeps things fun and fresh. Want to make your potato bites even better? Try adding veggies! Cut up bell peppers, zucchini, or carrots. Toss them in with the potatoes before cooking. This adds color, taste, and nutrients. These extra veggies cook well in the air fryer. They turn out crispy and delicious, just like the potatoes. For a cheesy treat, try cheese-stuffed potato bites. After halving the potatoes, scoop out a bit from the center. Fill each half with cheese, like cheddar or mozzarella. Then coat them with your seasoning mix. Air fry them until the cheese melts and the outside is golden. This adds a yummy surprise inside! After making Air Fryer Ranch Potato Bites, let them cool. Then, place the leftovers in an airtight container. They will stay fresh in the fridge for up to three days. If you want to keep them longer, consider freezing. To reheat your potato bites, use the air fryer again. Set it to 350°F (175°C) for about 5 to 7 minutes. This will help them regain their crispiness. If you don’t have an air fryer, a regular oven works too. Just preheat it to 375°F (190°C) and bake for about 10 minutes. If you want to freeze the potato bites, let them cool completely first. Place them in a single layer on a baking sheet. Freeze until solid, then transfer them to a freezer bag. They can last up to three months in the freezer. When you’re ready to eat, thaw them in the fridge overnight before reheating. This method keeps them tasty and crispy. Yes, you can use larger potatoes. However, you must cut them into smaller pieces. Aim for bite-sized chunks. This helps them cook evenly and get crispy. Larger pieces may take longer to cook and may not crisp up as well. Ranch seasoning is a tasty mix. It often includes dried herbs and spices. Common ingredients are dill, parsley, garlic, and onion powder. Some mixes may add buttermilk powder for creaminess. You can find ranch seasoning in stores or make your own at home. Frozen potato bites usually take about 10 to 15 minutes. Preheat your air fryer to 400°F (200°C) first. Shake the basket halfway through cooking. This will help them cook evenly and become crispy. Yes! You can bake these potato bites in an oven. Preheat your oven to 425°F (220°C). Spread the seasoned potatoes on a baking sheet in a single layer. Bake for 25 to 30 minutes, flipping once until they are golden and crispy. This blog post shares a simple way to make tasty air-fryer baby potatoes. We covered the key ingredients, step-by-step instructions, and tips for great results. I also shared variations for added flavor and how to store your leftovers properly. In conclusion, making delicious air-fryer potatoes is easy and fun. Embrace these ideas for tasty snacks or sides. Enjoy experimenting with the flavors that excite you.
    Air Fryer Ranch Potato Bites Crispy and Flavorful Snack
  • - 1 pound fresh broccoli florets - 3 tablespoons extra virgin olive oil - 4 cloves garlic, finely minced - ½ cup freshly grated Parmesan cheese - Optional: ¼ teaspoon red pepper flakes - Seasoning: sea salt and freshly cracked black pepper - Zest and juice of lemon for added flavor Garlic Parmesan Roasted Broccoli is a simple dish that shines with fresh ingredients. Start with one pound of broccoli florets. Look for bright green, firm florets for the best taste. Next, grab three tablespoons of extra virgin olive oil. This oil adds richness and helps the broccoli roast well. Then, you’ll need four cloves of garlic, minced finely. Garlic gives a strong, savory flavor that pairs perfectly with broccoli. For a cheesy touch, use half a cup of freshly grated Parmesan cheese. This cheese adds a creamy texture and rich taste. If you like a bit of heat, add a quarter teaspoon of red pepper flakes. This step is optional but can give your dish a nice kick. Don't forget to season with sea salt and freshly cracked black pepper. These spices bring out the flavors of your ingredients. Finally, the zest and juice of one lemon will brighten the dish. The lemon adds a fresh, zesty flavor that lifts the roasted broccoli. Each ingredient plays an important role in making this side dish a hit. 1. Preheat the oven to 425°F (220°C). This heat gives the broccoli crispy edges. 2. In a large mixing bowl, add 1 pound of fresh broccoli florets. This will be the star of your dish. 1. Pour in 3 tablespoons of extra virgin olive oil. Toss the broccoli to coat it well. 2. Add 4 cloves of finely minced garlic. This will add rich flavor. 3. Sprinkle in ½ cup of freshly grated Parmesan cheese. This makes everything cheesy and delicious. 4. If you want a spicy kick, add ¼ teaspoon of red pepper flakes. 5. Season with sea salt and freshly cracked black pepper to taste. Toss everything together well. 1. Spread the seasoned broccoli evenly on a lined baking sheet. Keep the florets in a single layer. 2. Roast in the oven for 20-25 minutes. Stir halfway through to ensure even cooking. You want fork-tender broccoli with browned edges. This method makes a simple yet flavorful side dish that pairs with many meals. To get crispy edges, spread the broccoli in a single layer on your baking sheet. This allows hot air to circulate around each floret. When the broccoli is crowded, it will steam instead of roast. Also, roast at a high temperature, like 425°F (220°C). Heat helps the broccoli brown and become crispy. After roasting, add lemon zest and juice. This brightens the taste and adds freshness. You can also try different cheeses, like pecorino or feta. Adding spices, like smoked paprika or cumin, can change the flavor too. Feel free to experiment and find your favorite mix! {{image_4}} You can change things up with different vegetables. Asparagus and Brussels sprouts are great options. They roast well and soak up flavors just like broccoli. You can also try cauliflower for a unique twist. If you want to switch cheeses, try pecorino. It has a sharp taste that pairs nicely with garlic. For a vegan option, use nutritional yeast. It gives a cheesy flavor without dairy. Garlic Parmesan roasted broccoli pairs well with many main dishes. Grilled chicken or fish complement its flavors nicely. You can serve it next to steak for a hearty meal, too. This dish also works well as a snack. Enjoy it hot or cold. You can dip it in your favorite sauce. Serve it with hummus or ranch for a tasty treat. To keep your Garlic Parmesan Roasted Broccoli fresh, store it in the fridge. Let it cool completely first. Then, place it in an airtight container. This helps keep moisture out. You can store it for up to three days. If you want to keep it longer, freeze it. Use a freezer-safe bag and squeeze out the air before sealing. When you reheat the broccoli, aim to keep it crispy. The best method is to use the oven. Preheat your oven to 350°F (175°C). Spread the broccoli on a baking sheet. Heat for about 10 minutes. This will restore some crunch. To refresh the flavors, add a splash of lemon juice before serving. You could also sprinkle a bit of new Parmesan cheese on top. This revives the taste and makes it tasty again. Can I make this recipe ahead of time? Yes, you can prep the broccoli ahead of time. Toss it with oil and seasonings. Store it in the fridge for up to 24 hours. When ready, just roast it for a fresh side dish. How can I make it spicier? To add heat, increase the red pepper flakes. You can also mix in some cayenne pepper or a dash of hot sauce. Adjust the spice to fit your taste. What is a good vegetarian main dish to pair with this side? Garlic Parmesan roasted broccoli goes great with quinoa or a hearty vegetable risotto. Grilled portobello mushrooms also make a tasty main dish. They complement the broccoli’s rich flavor well. Can I use frozen broccoli instead of fresh? You can use frozen broccoli, but fresh tastes better. If you use frozen, thaw and drain it first. Pat it dry to avoid sogginess. Adjust roasting time since frozen broccoli may cook faster. This post shared how to make Garlic Parmesan Roasted Broccoli. You learned about fresh ingredients and step-by-step instructions for roasting. Tips included how to get crispy edges and flavor boosts. I also suggested tasty variations and storage methods to keep leftovers fresh. Enjoy trying this easy recipe! Remember, using fresh ingredients and the right techniques makes all the difference. A healthy side can elevate any meal. Happy cooking!
    Garlic Parmesan Roasted Broccoli Flavorful Side Dish
See more Appetizers →

About Skylar, NRD

This is a fake profile! Tell your readers about your yourself and your experience and what kind of recipes they'll find here.

Learn more about me →

Recent Recipes

  • - Thick bread (6 slices, such as challah or brioche) - Eggs (3 large) - Whole milk (1 cup) - Heavy cream (½ cup) - Pure maple syrup (¼ cup) - Vanilla extract (1 teaspoon) - Ground cinnamon (1 teaspoon) - Ground nutmeg (½ teaspoon) - Apples (2 medium, preferably Granny Smith) - Chopped walnuts (½ cup, optional) - Unsalted butter (1 tablespoon for greasing) - Powdered sugar (for dusting) To make a great Apple Cinnamon French Toast Bake, gather these ingredients. Start with thick bread. I love using challah or brioche, as they soak up the custard well. You need three large eggs for a rich base. Whole milk and heavy cream add creaminess. Next, we need some flavor boosters. Pure maple syrup brings sweetness, while vanilla extract adds depth. Ground cinnamon and nutmeg give that warm, cozy taste. Don’t forget the apples! Two medium Granny Smith apples work best. Their tartness balances the sweet. If you like a little crunch, add chopped walnuts. Grease your baking dish with unsalted butter to prevent sticking. Lastly, keep some powdered sugar for dusting on top. This adds a lovely finish to your bake! {{ingredient_image_2}} - Preheat your oven to 350°F (175°C). - Grease a 9x13 inch baking dish with butter. - Tear the bread into rustic chunks. - Layer the bread in the baking dish with diced apples and walnuts. - In a bowl, whisk together the eggs, milk, cream, syrup, vanilla, cinnamon, and nutmeg. - Pour the custard over the bread and apples. - Cover the dish and let it sit for 30 minutes, or refrigerate overnight. - Bake covered for 30 minutes, then uncover and bake for another 15-20 minutes. - Use day-old bread for better texture. This gives the bake a nice crunch. - Experiment with different types of apples for varied taste. Try Granny Smith for tartness or Honeycrisp for sweetness. - Ensure custard is fully absorbed by pressing down on the bread. This helps the bread soak up all the flavors. - Opt for a longer refrigeration for deeper flavor melding. Letting it sit overnight makes a big difference. - Serve warm with maple syrup and fresh apple slices. This adds a pop of color and taste. - Add whipped cream for an indulgent finish. It makes each bite feel special. Pro Tips Choose the Right Bread: Using thick-sliced bread like challah or brioche will provide the best texture and flavor for your French toast bake. Let It Soak: Allowing the bread to absorb the custard mixture for at least 30 minutes (or overnight) enhances the flavor and ensures a moist bake. Variations: Feel free to experiment with different types of apples or add other fruits such as pears or berries for a unique twist! Serving Suggestions: Serve warm with extra maple syrup, fresh fruit, or even a scoop of vanilla ice cream for a decadent brunch treat. {{image_4}} To make this dish lighter, swap out whole milk for almond milk. This change keeps the creaminess while cutting calories. You can also use low-fat cream instead of heavy cream. This will help you enjoy the same great taste without all the fat. Adding dried fruits can make this dish even better. Try mixing in raisins or cranberries for extra sweetness. You can also enhance the flavor by adding spices like cardamom or ginger. These spices will give your bake a warm, cozy feel. If you want a nut-free dish, simply omit the walnuts. You can also replace them with sunflower seeds for a nice crunch. Using a nut-free bread variety is a good option too. This way, everyone can enjoy this tasty breakfast treat. After enjoying your Apple Cinnamon French Toast Bake, store any leftovers in an airtight container. Keep it in the refrigerator. This dish tastes best when eaten within 3-5 days. For longer storage, you can freeze your baked French toast bake in portions. This makes it easy to enjoy later. Just remember to thaw it overnight in the refrigerator before reheating. To get the best texture, reheat in the oven. Preheat the oven to 350°F (175°C) and warm it for about 10-15 minutes. If you need a quicker option, microwave individual servings for convenience. Yes, you can prepare this dish the night before. Just cover the baking dish tightly and place it in the fridge. Then, bake it fresh the next morning. This helps the flavors mix well and saves time. Thick breads work best for this dish. I recommend using challah or brioche. These breads soak up the custard well and give a nice texture. They also add a rich flavor that makes each bite special. To make this dish gluten-free, choose gluten-free bread. Make sure all your other ingredients, like milk and syrup, are also gluten-free. This way, you can enjoy the same great taste without the gluten. Yes, you can switch the apples for other fruits. Pears work great and add a sweet twist. You might even try berries or peaches for a fun change. Just remember to adjust the sweetness if needed. This blog post covered how to create a delicious French toast bake. We listed all the ingredients, shared step-by-step instructions, and provided helpful tips. You learned about variations to customize your dish and storage methods for leftovers. In conclusion, making a French toast bake is easy and fun. With simple ingredients and a bit of time, you can create a warm, tasty meal. Enjoy experimenting with flavors to find your favorite version. Cooking should always be a joyful adventure!
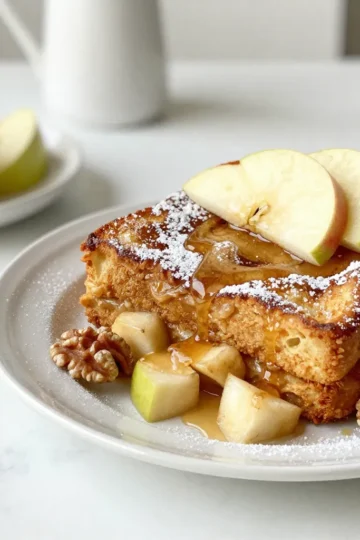
    Apple Cinnamon French Toast Bake Delicious Breakfast Treat
  • - Oreo cookies: 1 package (about 36 cookies), finely crushed - Unsalted butter: ½ cup, melted - Cream cheese: 8 oz, softened to room temperature - Powdered sugar: 1 cup - Whipped topping: 1 cup (like Cool Whip) - Instant chocolate pudding mix: 1 package (3.9 oz) - Cold milk: 2 cups - Additional whipped topping: 1 cup (for the final layer) - Garnish: Chocolate shavings or crushed Oreo cookies For the best flavor, use fresh cream cheese and high-quality whipped topping. If you want a fun twist, you can swap Oreo cookies for another chocolate cookie. This adds a unique taste while keeping it delicious. {{ingredient_image_2}} To start, grab a medium mixing bowl. Add 36 crushed Oreo cookies and ½ cup melted butter. Stir this mix until the crumbs are well-coated. Now, take your 9x13 inch baking dish and press the mixture firmly into the bottom. Make sure it’s even. This helps the crust hold together. You can use a flat-bottomed cup to pack it down. Once done, place the dish in the fridge. Let it chill while you prepare the next layers. Next, in a separate bowl, take 8 oz of softened cream cheese and 1 cup of powdered sugar. Beat them together using an electric mixer. Mix on medium speed until it’s creamy and smooth. Avoid over-mixing to keep it fluffy. Now, gently fold in 1 cup of whipped topping with a spatula. Be careful not to deflate the mix. Spread this cream cheese layer evenly on the chilled crust. This layer adds a rich, creamy taste. In another bowl, whisk together 1 package of instant chocolate pudding mix with 2 cups of cold milk. Whisk for 2-3 minutes until it thickens. This is key for a perfect pudding layer. Pour the thickened pudding over the cream cheese layer. Use a spatula to spread it evenly. This ensures every bite has that delightful chocolate flavor. Now, take the remaining 1 cup of whipped topping. Carefully spread it over the chocolate pudding layer. Use a spatula to smooth the top. A smooth finish looks great and makes serving easier. This layer adds a light, airy touch to your dessert. Cover your lasagna with plastic wrap and refrigerate for at least 4 hours. For the best flavor, chill it overnight. This helps the layers set properly. Before serving, add some fun garnishes! Sprinkle chocolate shavings or crushed Oreo cookies on top. This not only looks nice but adds a tasty crunch to the dessert. To make your Chocolate Oreo Lasagna look stunning, layering is key. Start with the crust. Press it evenly into the pan. This gives a solid base. Next, spread the cream cheese layer smoothly over it. Use a spatula for a nice finish. The pudding layer comes next. Pour it gently to keep layers separate. Finally, top it with whipped topping. Smooth it out for a clean look. To avoid sogginess, chill the crust before adding layers. A cold crust holds up better. Let the layers set well in the fridge. This helps them stay distinct when you cut the dessert. Use a sharp knife for clean slices. Chocolate Oreo Lasagna pairs well with coffee or milk. A scoop of vanilla ice cream adds a tasty touch. You can also serve it with fresh berries for a fruity contrast. For a fun twist, serve it in individual cups. Layer the ingredients in clear cups for a beautiful view. This makes it easy for guests to grab and enjoy. You could even use mini jars for a cute presentation. Encourage everyone to dig in and enjoy all the layers together. Pro Tips Chill for Best Results: Allow the lasagna to chill overnight for the flavors to meld and the texture to firm up, making it easier to cut into clean squares. Variations on Toppings: Experiment with different toppings such as crushed nuts, sprinkles, or even a drizzle of caramel sauce for added flavor and visual appeal. Use Quality Ingredients: For the best flavor, use high-quality cocoa powder and chocolate pudding mix. The better the ingredients, the better your dessert will taste. Serve with Ice Cream: Elevate your dessert by serving individual squares of chocolate lasagna with a scoop of vanilla ice cream or whipped cream on the side. {{image_4}} You can easily switch up the flavors in your Chocolate Oreo Lasagna. Here are some fun ideas: - Peanut Butter: Mix peanut butter into the cream cheese layer. This adds a rich, nutty taste. - Mint: Use mint-flavored Oreos for a fresh twist. You can also add mint extract to the cream cheese layer. - Coffee: Add instant coffee granules to the chocolate pudding for a tasty kick. For ingredient swaps, try different cookies. Use gluten-free cookies if you want a gluten-free option. You can also use flavored whipped toppings. This way, you can create your own signature lasagna. If you need a gluten-free version, look for gluten-free Oreo cookies. Many brands offer great alternatives. Just follow the same steps in the recipe. For a dairy-free option, choose dairy-free cream cheese and whipped topping. You can also use almond milk or oat milk for the pudding layer. These swaps let everyone enjoy this dessert without worry. To keep your Chocolate Oreo Lasagna fresh, refrigerate it promptly. Place it in an airtight container or cover it tightly with plastic wrap. This helps keep the layers intact and prevents drying out. If you plan to eat it later, you can freeze it. To freeze, cut the lasagna into squares. Wrap each piece in plastic wrap and place them in a freezer-safe bag. This method allows for easy thawing later. The lasagna stays fresh in the fridge for about 3 to 5 days. After that, the layers may start to lose their texture. If you freeze the lasagna, it can last up to 2 months. Always check for signs of spoilage before eating. If you notice any off smells, a change in color, or an unusual texture, it’s best to throw it away. Enjoying this dessert while it's fresh ensures you savor every layer of yum! Chocolate Oreo Lasagna is a layered dessert. It has a crust made of crushed Oreo cookies. The crust holds a creamy layer of cream cheese mixed with whipped topping. Then comes a rich layer of chocolate pudding. Finally, more whipped topping tops it all off. You can garnish it with chocolate shavings or crushed Oreos. This dessert is both tasty and fun to serve as a treat. Yes, you can make this dessert ahead of time! It needs at least four hours in the fridge to set. For best results, chill it overnight. This gives the layers time to blend. You can impress guests by making it a day earlier. Just keep it covered in the fridge until you are ready to serve. Yes, you can create a vegan chocolate lasagna! Use vegan Oreo cookies for the crust. For the cream cheese layer, swap regular cream cheese for a dairy-free version. You can use coconut cream or a vegan whipped topping. For the pudding, make sure to use a vegan chocolate pudding mix. This way, everyone can enjoy the dessert. Scaling this recipe is simple. If you want more servings, double the ingredients. Use a larger baking dish if needed. For fewer servings, halve the ingredients and use a smaller dish. Keep the ratios the same for each layer. This way, you will still have a delicious treat no matter the size! To sum up, we covered how to make a tasty Chocolate Oreo Lasagna. We looked at the key ingredients and their quality, then followed step-by-step instructions for each layer. I shared tips for beautiful layers and how to elevate your presentation. Don't forget the variations and storage tips to keep your dessert fresh. With what you learned, you can impress anyone with this treat. Enjoy making and sharing this delicious dessert!
    Chocolate Oreo Lasagna Decadent and Easy Delight
  • - 8 ounces dark chocolate (70% cacao), finely chopped - 1 cup heavy cream - Zest of 1 large orange - 1 tablespoon freshly squeezed orange juice - 1 teaspoon pure vanilla extract - 1 cup cocoa powder (for dusting) - ½ cup finely chopped unsalted nuts Dark chocolate gives the truffles their rich flavor. I prefer chocolate with 70% cacao for a deep taste. The heavy cream helps create a smooth texture that melts in your mouth. Orange zest adds bright, zesty notes that pair well with the chocolate. Freshly squeezed orange juice enhances the orange flavor, making it fresh and vibrant. Pure vanilla extract rounds out the flavors, bringing warmth to the mix. The cocoa powder adds a classic dusting, while the nuts provide a nice crunch. If you don’t have dark chocolate, you can use semi-sweet chocolate. It will be sweeter but still delicious. For a lighter option, try using light cream instead of heavy cream. If you can't use fresh orange juice, bottled juice works in a pinch, but fresh is best. You can replace vanilla extract with almond extract for a different flavor. Instead of cocoa powder, try using powdered sugar or crushed graham crackers for a unique twist. {{ingredient_image_2}} To make these chocolate orange truffles, follow these steps closely. First, grab a small saucepan. Pour in 1 cup of heavy cream. Heat the cream over medium heat until it simmers gently. Watch it closely to avoid boiling. Boiling can change how the truffles turn out. Next, remove the saucepan from the heat. Add 8 ounces of finely chopped dark chocolate to the hot cream. Stir it well until the chocolate melts fully. The mix should feel smooth and velvety. Now, it’s time to add flavor. Stir in the zest of 1 large orange, 1 tablespoon of fresh orange juice, and 1 teaspoon of vanilla extract. Mix it all together until the flavors blend nicely. Let the mixture cool down to room temperature. Once it’s cool, cover it with plastic wrap. Place it in the fridge for about 2 hours. This step is key to getting the right texture for the truffles. Melting chocolate can be tricky. Keep these tips in mind for a smooth result. Always use a heavy-bottomed saucepan. This helps distribute heat evenly. Stir constantly while the chocolate melts. This prevents it from burning. If you notice any lumps, keep stirring until it’s fully melted. You can also use a double boiler if you prefer. Just fill a pot with water and place another bowl on top. This gentle heat will melt the chocolate slowly and safely. Once the chocolate mix is firm, it’s time to shape your truffles. Use a small cookie scoop or your hands to take out small amounts. Aim for about 1 inch in diameter. Roll each piece gently into a ball. Now, for the fun part! You can roll the truffles in either cocoa powder or finely chopped nuts. This gives them a nice coating and adds extra flavor. Place the coated truffles on a parchment-lined tray. Chill them in the fridge for an additional 30 minutes. This helps them firm up before serving. Enjoy the rich taste of chocolate paired with a burst of orange! To boost the taste of your chocolate orange truffles, try these simple tips: - Use quality chocolate: A higher cacao content (70% or more) gives a rich flavor. - Fresh zest: Always use fresh orange zest. It adds bright notes that dried zest can't match. - Add a pinch of salt: Just a little salt can make the flavors pop. - Try liqueurs: A splash of orange liqueur can deepen the citrus notes. These tips will help you create truffles that are bursting with flavor. Here are some common mistakes to watch out for: - Overheating the cream: If the cream boils, it can ruin the truffle texture. Heat it just to a simmer. - Not cooling enough: Don't rush the chilling step. If the mixture is too warm, the truffles won’t hold their shape. - Too much coating: When rolling the truffles, don’t use too much cocoa or nuts. A light dusting works best. Avoiding these mistakes will lead to perfect truffles every time. Coating your truffles well is key to their look and taste. Follow these best practices: - Chill before coating: Make sure the truffles are firm before rolling them. This helps with easier handling. - Roll evenly: Use your hands to roll the truffles gently in cocoa or nuts. Aim for an even coat. - Experiment with coatings: Try using shredded coconut, powdered sugar, or even sprinkles for a twist. These practices will make your truffles not only tasty but also stunning! Pro Tips Use Quality Chocolate: The flavor of your truffles heavily depends on the quality of the chocolate you choose. Opt for high-quality dark chocolate with at least 70% cacao for a rich and intense taste. Chill for Perfect Texture: Allow the chocolate mixture to cool completely before refrigerating. This helps achieve the right consistency for rolling into truffles without melting in your hands. Experiment with Coatings: While cocoa powder and nuts are classic choices, feel free to get creative! Try rolling the truffles in shredded coconut, crushed freeze-dried fruit, or even edible glitter for a festive touch. Store Properly: To maintain freshness, store truffles in an airtight container in the refrigerator. They can last up to two weeks, but they are best enjoyed within the first week. {{image_4}} You can add more fun to your chocolate orange truffles. Try using liqueurs like Grand Marnier or Amaretto. Just add 1 to 2 tablespoons when mixing. This will give your truffles a unique twist. You can also add spices like cinnamon or nutmeg. A pinch can enhance the flavor and warmth. Experimenting brings new life to the classic taste. Coating your truffles can be a fun way to change things up. Instead of cocoa powder, roll them in finely shredded coconut. This adds a tropical flair. You can also use colorful sprinkles or crushed nuts. This not only makes them look great but adds texture, too. Choose a coating that matches your mood or theme. If you want a vegan option, swap the heavy cream for coconut cream. Use dairy-free chocolate with at least 70% cacao. This keeps the rich flavor without animal products. You can still enjoy the zest of orange and vanilla. These changes make the truffles fit for everyone. To keep your chocolate orange truffles fresh, store them in an airtight container. Place parchment paper between layers if you stack them. This prevents sticking and keeps them nice. Keep the container in the fridge, where the cool air helps maintain their shape and flavor. When stored properly, chocolate orange truffles last about two weeks in the fridge. After that, they may lose their great taste and texture. If you want to enjoy them longer, consider freezing them. To freeze your truffles, first chill them in the fridge until firm. Then, place them in a single layer on a baking sheet and freeze until solid. Once frozen, transfer them to a freezer-safe bag or container. They can last up to three months in the freezer. When ready to eat, let them thaw in the fridge for a few hours before serving. This way, you can enjoy that rich chocolate and zesty orange flavor even longer! To make chocolate orange truffles, start with dark chocolate and heavy cream. Heat the cream in a pan until it simmers. Don't let it boil. Then, remove it from heat and add finely chopped chocolate. Stir until it melts. Next, mix in orange zest, juice, and vanilla. Let it cool, then chill it in the fridge for two hours. After that, scoop out the mixture and roll it into balls. Finally, coat them in cocoa powder or nuts, and chill again. Enjoy the rich flavor! Yes, you can use milk chocolate. It will make the truffles sweeter and creamier. However, milk chocolate has less cocoa than dark chocolate. This change may alter the truffle's texture and flavor. If you choose milk chocolate, consider reducing the cream slightly. This will keep the truffles firm. Experiment with the taste to find your favorite style! You can find high-quality chocolate at specialty stores or online. Look for brands that use fine ingredients and have a high cocoa percentage. Local gourmet shops often have a good selection. You can also check farmers' markets. Buying from these places ensures fresh chocolate with rich flavor. Avoid standard grocery store brands, as they may lack quality. In this blog post, I shared how to make chocolate orange truffles. We covered the key ingredients and explained each one. You also learned step-by-step instructions for making the truffles, from melting chocolate to chilling. I gave expert tips and tricks to avoid common mistakes and enhance flavor. Plus, we explored variations and storage tips. Making these treats can bring joy to any occasion. Start your truffle-making adventure today!
    Chocolate Orange Truffles Delightful and Easy Treat
  • - 1 cup coconut milk - ¼ cup chia seeds - 2 tablespoons honey or maple syrup - 1 teaspoon vanilla extract - 1 cup mixed berries (strawberries, blueberries, raspberries) - ¼ cup granola - 2 tablespoons shredded coconut - Fresh mint leaves for garnish (optional) - Coconut milk: This creamy milk is rich in healthy fats. It offers energy and helps keep you full longer. - Chia seeds: These tiny seeds are packed with fiber. They aid digestion and help you stay satisfied. - Honey or maple syrup: Both are natural sweeteners. They provide quick energy and have antioxidants. - Vanilla extract: This adds flavor and can have calming effects. It makes the parfait taste wonderful. - Mixed berries: Berries are high in vitamins and low in calories. They support heart health and are full of antioxidants. - Granola: This crunchy topping gives energy and can contain oats and nuts. It adds texture and helps keep you full. - Shredded coconut: It adds flavor and healthy fats. Coconut also brings a delightful chewiness. - Fresh mint leaves: These are optional but refreshing. They can enhance the taste and look of your parfait. - Coconut milk: Use almond milk or oat milk for a nut-free option. - Chia seeds: You can swap them with flax seeds, but adjust the liquid. - Honey: For a vegan option, use agave syrup or more maple syrup. - Granola: Choose gluten-free granola if needed, or use oats. - Mixed berries: Any seasonal fruit works well. Try peaches or apples for a change. {{ingredient_image_2}} To start, gather your ingredients. You will need 1 cup of coconut milk, ¼ cup of chia seeds, 2 tablespoons of honey or maple syrup, and 1 teaspoon of vanilla extract. 1. In a medium bowl, pour in the coconut milk. 2. Add the chia seeds, honey, and vanilla extract. 3. Whisk until everything mixes well. 4. Cover the bowl with plastic wrap or a lid. 5. Place it in the fridge for at least 4 hours or overnight. This waiting time lets the chia seeds absorb the milk. They will turn into a creamy pudding. Once your chia pudding is ready, it’s time to layer your parfait. You will need 1 cup of mixed berries, ¼ cup of granola, and 2 tablespoons of shredded coconut. 1. Take your serving glasses or mason jars. 2. Spoon a layer of chia pudding into each glass. Fill about ¼ of the glass. 3. Add a layer of mixed berries on top. Use a mix of strawberries, blueberries, and raspberries for color. 4. Sprinkle some granola over the berries for a nice crunch. 5. Repeat the layers: more chia pudding, more berries, and more granola. 6. Finish with a vibrant layer of berries on top. 7. Sprinkle shredded coconut over the final layer. This adds flavor and makes the parfait look even better. For the best presentation, serve your parfaits in clear glasses. This lets everyone see the colorful layers. You can add fresh mint leaves on top for a pop of color. If you want extra sweetness, drizzle a little honey over the top just before serving. Enjoy your tasty and healthy parfait! To get that ideal chia texture, start with the right ratio. Use ¼ cup of chia seeds for every cup of coconut milk. Mix them well. Let the mix rest for at least four hours. This allows the chia seeds to soak up the milk and thicken. If you want it creamier, try letting it chill overnight. This step is key for a smooth, pudding-like consistency. To make your parfait look beautiful, use clear glasses or mason jars. This way, you can show off the layers. Start with a layer of chia pudding, then add mixed berries. Next, sprinkle on granola for crunch. Repeat this layering until the glass is full. Finish with a top layer of colorful berries. For extra flair, add shredded coconut and fresh mint leaves. These touches make your parfait pop and look inviting. You can sweeten your parfait with honey or maple syrup. Each option brings a unique flavor. Honey gives a floral note, while maple syrup adds a rich, earthy taste. If you prefer a vegan option, stick with maple syrup. Both sweeteners work well, so choose what you like best. Just use two tablespoons for the right sweetness without overpowering the dish. Pro Tips Chill Time is Key: Allowing the chia pudding to chill overnight ensures it reaches the perfect creamy consistency, making each bite delightful. Berry Variety: Using a mix of berries not only adds flavor but also contributes to a beautiful and colorful presentation. Granola Texture: Choose a granola with a mix of nuts and seeds for added crunch and nutrition, enhancing the overall texture of the parfait. Garnish for Appeal: Fresh mint leaves not only add a pop of color but also a refreshing aroma, elevating the visual and taste experience of your parfait. {{image_4}} You can change the berries based on the season. In spring or summer, use fresh strawberries and blueberries. Fall brings sweet raspberries and cranberries. In winter, consider frozen berries. They still taste great and add color. Mixing different berries also boosts flavor and nutrition. Experiment to find your favorite berry blend. Coconut milk is creamy and delicious, but you can try others. Almond milk offers a light taste. Oat milk adds a hint of sweetness. Soy milk gives a protein boost. Each milk changes the flavor and texture. Pick one that suits your taste or diet. This way, you can enjoy the parfait your way. You can add more to the parfait to make it unique. Consider nuts like almonds or walnuts for crunch. Seeds such as pumpkin or sunflower add nutrition. You might enjoy spices like cinnamon or nutmeg for warmth. A spoonful of peanut or almond butter gives creaminess. These add-ins enhance both taste and texture, making each bite exciting. Store your Berry Coconut Chia Parfait in the fridge. Use airtight containers to keep it fresh. The cool air helps maintain its creamy texture and flavor. Avoid sunlight, as it can affect taste and color. You can keep the chia pudding for up to five days. After that, the texture may change and lose its quality. Always check for any off smells or changes before eating. If you notice any, it’s best to throw it away. To keep your parfait layers fresh, store them separately if possible. This way, the granola stays crunchy. If you layer and store together, the granola might get soggy. Serve the parfait within a day for the best taste. Enjoy your treat while it's fresh! Yes, you can make this parfait ahead of time. In fact, it's great to prepare it the night before. The chia seeds need time to soak in the coconut milk. A few hours in the fridge works, but overnight is best. This way, the pudding gets thick and creamy. You can layer it and keep it in the fridge for up to three days. Just wait to add the granola until you're ready to eat. This keeps it crunchy. Chia seeds are tiny black seeds from the Salvia hispanica plant. They are packed with nutrients. Here are some key benefits: - High in Fiber: Helps with digestion and keeps you full. - Rich in Omega-3 Fatty Acids: Good for heart health. - Good Source of Protein: Supports muscle health. - Full of Antioxidants: Helps fight free radicals. - Minerals: Contains calcium, magnesium, and iron. These seeds absorb liquid and expand, making them perfect for puddings. They create a fun texture in your parfait. Yes, you can use frozen berries! They work well in this parfait. Just remember: - Thaw Them: Let them sit at room temperature or microwave them for a few seconds. - Flavor: Frozen berries may be sweeter since they are picked at peak ripeness. - Texture: They can be softer, but they still taste great. Using frozen berries is a smart choice. It allows you to enjoy this treat all year round! This blog covered how to make a delicious Berry Coconut Chia Parfait. We looked at the key ingredients and their health benefits. I shared step-by-step instructions to prepare the pudding and layer it nicely. You learned tips for perfect texture and stunning presentation. Plus, we explored tasty variations and storage tips to keep it fresh. In the end, making this parfait is fun and rewarding. You can customize it to suit your taste and needs. Enjoy your healthy treat!
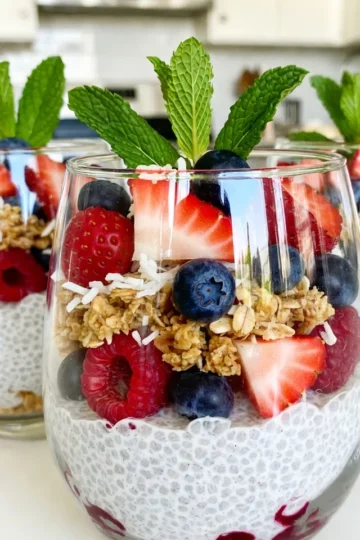
    Berry Coconut Chia Parfait Healthy and Tasty Treat
  • - 2 ripe bananas, thoroughly mashed - 1 cup rolled oats - ½ cup almond butter (or any nut butter of your choice) - ¼ cup honey or maple syrup - ½ teaspoon pure vanilla extract - ½ teaspoon ground cinnamon - ¼ teaspoon sea salt - ¼ cup dark chocolate chips - ¼ cup of your favorite chopped nuts or seeds (such as walnuts or chia seeds) These ingredients create a simple yet tasty snack. The ripe bananas add natural sweetness. Their soft texture mixes well with oats and nut butter, giving these bars a chewy feel. Rolled oats bring fiber, making these bars filling. Almond butter, or any nut butter, gives healthy fats and protein. Honey or maple syrup adds sweetness and binds the bars together. Pure vanilla extract enhances the flavor, making every bite enjoyable. Optional add-ins let you customize your bars. Ground cinnamon adds warmth and spice. A bit of sea salt balances the sweetness. Dark chocolate chips can make the snack feel like a treat. Nuts or seeds add crunch and extra nutrients. These bars are great for breakfast or an afternoon snack. You can even share them with friends. Enjoy creating your own version! {{ingredient_image_2}} - Preheat the Oven: Start by setting your oven to 350°F (175°C). This step warms the oven for even baking. - Line an 8x8 inch baking pan: Grab your 8x8 inch pan and line it with parchment paper. Let the paper hang over the sides. This helps you lift the bars out easily later. - Combine Wet Ingredients: In a large bowl, mash 2 ripe bananas well. Add ½ cup almond butter, ¼ cup honey (or maple syrup), and ½ teaspoon vanilla extract. Mix until smooth and combined. - Incorporate Dry Ingredients: Now, add 1 cup rolled oats, ½ teaspoon ground cinnamon, and ¼ teaspoon sea salt to the bowl. Stir well. If you like, fold in ¼ cup dark chocolate chips and ¼ cup chopped nuts or seeds for extra flavor. - Pour Mixture into the Pan: Pour the mixture into your prepared baking pan. Use a spatula to spread it out evenly and flatten the top. - Bake to Perfection: Place the pan in the oven. Bake for 20-25 minutes. You know the bars are done when the edges turn golden brown. Test with a toothpick; it should come out clean. - Cool Before Cutting: After baking, take the pan out and let it cool for about 10 minutes. Then, lift the bars out using the parchment paper and place them on a wire rack to cool completely. - Slice and Serve: Once cooled, cut the bars into squares or rectangles. They are ready to enjoy as a snack! - Presentation Tips: For a nice touch, stack the bars on a pretty plate. Drizzle some honey on top, and add banana slices or a sprinkle of nuts for garnish. - Choosing Ripe Bananas: Use bananas with brown spots. They are sweeter and softer. The more ripe they are, the better your bars will taste. - Adjusting Baking Time: Keep an eye on your bars. Bake them until the edges turn golden brown. A toothpick should come out clean from the center. - Adding Spices: Try adding a pinch of nutmeg or ginger. They can give your bars a nice kick. Ground cinnamon is a classic choice that works well, too. - Incorporating Nut Butters: Almond butter is great, but feel free to use peanut butter or cashew butter. Each nut butter adds its own unique flavor to the bars. - Drizzling Options: You can drizzle honey or maple syrup on top for extra sweetness. A chocolate drizzle also makes them look fancy. - Garnishing Suggestions: Add banana slices, chopped nuts, or seeds as a garnish. This not only looks good but adds texture, too. Pro Tips Use Overripe Bananas: The riper the bananas, the sweeter and more flavorful your bars will be. Look for bananas with plenty of brown spots for the best results. Nut Butter Variations: Feel free to experiment with different nut butters like cashew or peanut butter to customize the flavor of your bars. Chilling for Firmness: For firmer bars, refrigerate the cut pieces for an hour before serving. This will help them hold their shape better. Customize Add-Ins: Get creative by adding dried fruits, seeds, or spices to the mixture for extra texture and flavor. Think raisins, cranberries, or even a pinch of nutmeg! {{image_4}} - Use sunflower seed butter instead of almond butter. This keeps the bars creamy. - You can also omit all nuts entirely. The bars will still taste great and stay healthy. - For gluten-free bars, choose certified gluten-free oats. This keeps the recipe safe for everyone. - If you want a vegan option, use maple syrup instead of honey. This keeps it plant-based. - You can add different fruits like blueberries or diced apples. This adds new flavors and textures. - Try using other extracts, like almond or coconut. These can enhance the taste of your bars. Store your banana oatmeal bars at room temperature for a quick snack. Keep them in an airtight container to maintain freshness. If it’s hot, put them in the fridge. Refrigeration helps prevent spoilage. To freeze the bars, cut them into squares first. Wrap each bar in plastic wrap. Then, place them in a freezer-safe bag. This helps keep them fresh for a longer time. When you want to eat one, take it out and let it thaw on the counter for about 30 minutes. You can also microwave it for a few seconds. Banana oatmeal bars last about a week at room temperature. In the fridge, they can last up to two weeks. If you freeze them, they can last for three months. Look for signs of spoilage like a change in smell or color. If they feel mushy or have mold, it’s best to toss them. Banana oatmeal bars are a tasty snack made mainly from ripe bananas and oats. They are chewy and sweet, perfect for a quick bite. These bars are easy to make and use simple ingredients. You can enjoy them for breakfast, as a snack, or even dessert. Yes, you can swap almond butter for other nut butters. Peanut butter works well and gives a nice flavor. Sunflower seed butter is a good choice too if you want a nut-free option. Any creamy nut butter will mix well with the bananas and oats. Yes, these bars are a healthy choice! They contain whole grains from oats and natural sweetness from bananas. Almond butter adds healthy fats and protein. Dark chocolate chips can add a bit of fun without too much guilt. Each bar gives you energy and satisfies your hunger. To lower the sugar, reduce the honey or maple syrup. You can also try using mashed bananas to sweeten more. If you are using chocolate chips, pick a lower-sugar option or skip them. Adding spices like cinnamon can also enhance flavor without extra sugar. Absolutely! You can mix in protein powder for an extra boost. Adding seeds like chia or hemp seeds also increases protein content. Mixing nuts into the batter can add crunch and protein too. This way, you make your bars even more filling and nutritious. These banana oatmeal bars are simple and tasty. You start with ripe bananas and oats. Then, mix in almond butter and sweeteners. Optional add-ins like chocolate chips add fun flavor. With tips on texture and flavor, you can tailor these bars to your liking. Store them well and freeze extras for later. Enjoy making these easy snacks, and feel free to get creative with the ingredients!
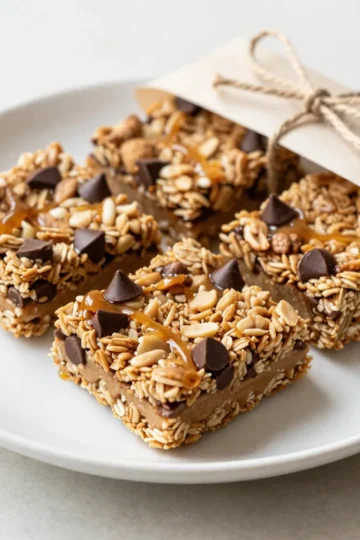
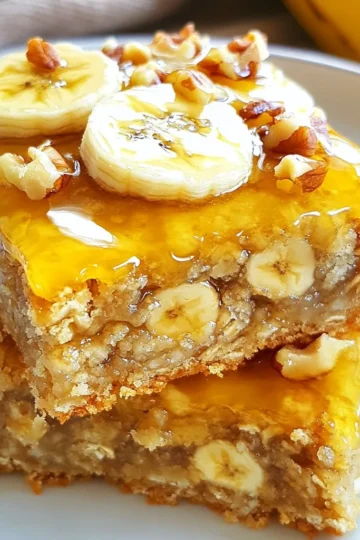
    Savory Banana Oatmeal Bars Healthy Snack Option
  • Fresh strawberries are the star of this recipe. Use about 2 cups, hulled and sliced. They add natural sweetness and a vibrant color. Strawberries are juicy and fragrant, giving your popsicles a fresh taste. Choose ripe strawberries for the best flavor. Look for deep red color and a sweet scent. For sweetness, you can use either honey or maple syrup. Both add a nice touch. Honey gives a floral note and is thicker. Maple syrup has a rich flavor and is slightly thinner. Use ½ cup of your choice. Adjust the amount to match your taste. If you like it sweeter, add more. Greek yogurt is key for creaminess. You'll need 1 cup for the recipe. It adds a smooth texture and pairs well with the tart lemon juice. Greek yogurt is also a good source of protein and calcium. This makes your popsicles not just tasty, but also nutritious. It helps balance the sweetness and adds depth to each bite. To make the strawberry puree, start with fresh strawberries. Hull and slice them into smaller pieces. Place these slices in a blender. Add honey or maple syrup for sweetness. Blend the mix until smooth. You want it to be creamy but keep some small chunks of strawberry. This gives your popsicles a nice texture. Set this puree aside for later. In a separate bowl, gather your plain Greek yogurt. Squeeze in fresh lemon juice for a tangy kick. Add lemon zest to brighten the flavor. Pour in a little vanilla extract for depth. Don’t forget a pinch of salt to enhance all the tastes. Whisk these ingredients well until creamy and smooth. This yogurt mix adds a rich layer to your popsicles. Now, it’s time to layer your popsicle mold. Start with a spoonful of the strawberry puree. Fill the mold about halfway. Next, add a layer of the yogurt mixture. Repeat this process, alternating between the strawberry and yogurt layers. Keep layering until your molds are full. Carefully insert the popsicle sticks into each mold. Tap the mold gently on the counter to remove any air pockets. Finally, place the molds in the freezer. Let them freeze for at least 4 to 6 hours. They should be solid and hold their shape. Enjoy your homemade popsicles! To get the right texture, blend the strawberries until they are smooth but still have small chunks. This gives a nice bite when you eat the popsicles. Make sure the yogurt mixture is creamy but not too thick. A balanced mix leads to a fun, refreshing treat. To easily remove the popsicles, run warm water over the outside of the mold for a few seconds. This warms the sides just enough to loosen the pops. Pull them out gently from the bottom. If a popsicle sticks, try twisting it a little as you pull. For a bright and tasty display, arrange the popsicles on a colorful platter. You can add fresh strawberries and lemon wedges around them. This not only looks great but also hints at the flavors inside. It makes the popsicles even more inviting! {{image_4}} You can mix in other fruits to change the taste. Try using blueberries, raspberries, or mango. Simply blend them with the strawberries or layer them in the popsicle mold. Each fruit adds its own flavor. This lets you create fun combinations. You can even use a mix of tropical fruits for a sunny twist! You don't have to stick with Greek yogurt. You can use regular yogurt, dairy-free options, or even flavored yogurt. Each type affects the taste and texture. For creaminess, stick with full-fat yogurt. For a lighter feel, low-fat yogurt works well. Dairy-free yogurts made from almond or coconut are great for those who want a non-dairy option. Adding herbs and spices can boost the flavor. A pinch of fresh mint or basil can add a unique twist. You might also try a bit of cinnamon or nutmeg for warmth. These flavors mix well with the fruit and yogurt. Just a small amount can make a big difference. Experiment to find your favorite combo! To freeze your strawberry lemon yogurt popsicles, follow these steps for the best results: - Use a strong mold: Choose a sturdy popsicle mold. It helps keep the shape. - Fill carefully: Don’t overfill the molds. Leave a little space at the top. This allows for expansion as they freeze. - Layer right: Alternate layers of strawberry puree and yogurt mixture. This gives a beautiful look. - Use sticks: Insert popsicle sticks straight. They help you remove the popsicles later. If you have leftover popsicles, here’s how to store them: - Keep in the mold: If you plan to eat them soon, keep them in the mold. - Wrap individually: For long-term storage, wrap each popsicle in plastic wrap. This keeps them fresh. - Use a container: Place wrapped popsicles in an airtight container. This prevents freezer burn. Your popsicles can last a while if stored right: - Shelf life: They stay good for about 2 months in the freezer. - Check for ice crystals: If you see large ice crystals, they may not taste fresh. - Look for changes: If the color or smell changes, it’s best to toss them. Following these tips can help you enjoy your strawberry lemon yogurt popsicles for longer! Yes, you can use frozen strawberries. Just let them thaw first. This helps them blend well. Thawed strawberries may be softer, which can change the texture. You might want to adjust the sweetness too. You can change the sweetness by adding more or less honey or maple syrup. Start with half a cup. Taste the mixture before you freeze it. If it's not sweet enough, add more. You can also add a bit of sugar if you like. No popsicle mold? No problem! Use small cups or ice cube trays instead. Pour the mixture into these. Just make sure to insert sticks after a bit of freezing. This way, you still get tasty popsicles without a mold. We’ve explored how to make refreshing strawberry popsicles with simple steps. Fresh strawberries, sweeteners like honey and maple syrup, and creamy Greek yogurt create a tasty treat. Remember to layer carefully for the best texture. You can try different fruits, yogurt types, and flavors to mix things up. Store your popsicles correctly for fresh enjoyment later. Now, with your knowledge, you can impress family and friends with these delicious, homemade popsicles. Dive in and enjoy every bite!
    Strawberry Lemon Yogurt Popsicles Easy and Refreshing
  • - 1 cup strawberries, hulled and quartered - 1 cup blueberries, rinsed and drained - 1 cup raspberries, rinsed and drained - ½ cup granulated sugar - 1 tablespoon fresh lemon juice - 1 teaspoon pure vanilla extract - 1 cup rolled oats - ½ cup all-purpose flour - ½ cup packed light brown sugar - ½ teaspoon ground cinnamon - ¼ teaspoon kosher salt - ½ cup unsalted butter, melted and slightly cooled Gathering the right ingredients is key. I love using fresh berries. They add vibrant flavor and color. Strawberries, blueberries, and raspberries are perfect for this recipe. The mix of sweet and tart makes a great combination. For sweeteners, I use granulated sugar. It helps bring out the berry flavors. A splash of fresh lemon juice adds brightness. Pure vanilla extract gives a warm, sweet note. The topping is where it gets exciting. Rolled oats provide a nice crunch. I mix them with all-purpose flour and brown sugar for sweetness. Ground cinnamon adds spice, while kosher salt balances everything. Finally, melted butter binds it all. It creates a crumbly texture that is hard to resist. You can find all these ingredients at your local grocery store. Make sure to pick ripe berries for the best taste. Enjoy the process of measuring and mixing—each step brings you closer to a delightful dessert. {{ingredient_image_2}} - Preheat the oven to 350°F (175°C). This helps the crisp bake evenly. - In a large bowl, mix the strawberries, blueberries, and raspberries. - Add the sugar, lemon juice, and vanilla extract. Stir gently, so you do not mash the berries. - In another bowl, whisk together the rolled oats, flour, brown sugar, cinnamon, and salt. - Pour in the melted butter. Stir well until the mix looks crumbly. - Grease a 9x9-inch baking dish with some butter or oil. - Spread the berry mix evenly on the bottom of the dish. - Sprinkle the oat topping over the berries. Make sure to cover all the fruit. - Bake in the oven for 30-35 minutes. Look for a golden brown color on the topping. Bubbles around the edges mean it is ready! To get the best crisp, mix the melted butter with the dry ingredients well. This step is key. You want everything combined evenly. If the butter is not mixed in well, the crisp may not bake properly. Keep an eye on the baking time. Bake for 30 to 35 minutes until the top is golden brown. This gives you a nice crunch. If you bake it too long, it can get tough. I love serving this warm with vanilla ice cream. The cold ice cream melts slightly and creates a creamy topping. You can also drizzle honey on top for extra sweetness. Adding fresh mint leaves makes it look pretty and adds a fresh taste. Mixing in other fruits can be fun. Blackberries or peaches work well with the berries. They add different flavors and textures. You might also try using different spices. Nutmeg or cardamom can add warmth and depth to your crisp. Just a pinch can change the whole dish! Pro Tips Choose Fresh Berries: Always opt for the freshest berries available; they will enhance the flavor and texture of your crisp. Experiment with Sweetness: Adjust the amount of sugar based on the sweetness of the berries; some may require less sugar than others. Use Parchment Paper: Line your baking dish with parchment paper for an easier cleanup and to prevent sticking. Customization Options: Feel free to mix in nuts or coconut flakes into the topping for added texture and flavor! {{image_4}} You can easily make this dessert gluten-free. Just substitute the all-purpose flour with gluten-free flour. This simple swap does not change the taste. Your crisp will still be delicious and satisfying. If you want a vegan version, I've got you covered. Replace the butter with coconut oil or vegan butter. Both options work well and keep the crisp rich. For sweetening, use maple syrup instead of granulated sugar. This adds a lovely flavor while keeping it plant-based. To make your crisp even better, consider adding toppings. Chopped nuts like almonds or walnuts give a nice crunch. You can also mix in shredded coconut for extra flavor. Both options add texture and taste, making your dessert even more delightful. Store leftovers in the refrigerator for up to 3 days. Make sure to cover the dish with plastic wrap or use an airtight container. This keeps your crisp fresh and tasty. If you want to save your Triple Berry Crisp for later, freeze it. Use an airtight container and freeze for up to 3 months. When you're ready to enjoy, just thaw it in the fridge overnight. To reheat, the oven works best. Preheat your oven to 350°F (175°C) and place the crisp inside. Heat for about 10-15 minutes until it gets warm and crispy again. You can also use a microwave, but be careful not to overheat it. Just a minute or two should do the trick. Yes, you can use frozen berries. They work well in this dish. Just remember, frozen berries may need a bit more baking time. Keep an eye on the crisp while it cooks. You want it to be bubbly and warm all the way through. To tell if your crisp is done, look for a golden-brown topping. The edges should bubble with juices from the berries. This bubbling means the fruit is hot and ready to eat. If you see this, it's time to take it out of the oven! Yes, you can make this crisp ahead of time. Prepare the berry layer and topping, then store them separately. When you're ready, just assemble and bake it fresh. This way, you can enjoy the warm crisp right before serving. This blog post covers how to make a delicious Triple Berry Crisp. We explored the fresh berries you need, like strawberries, blueberries, and raspberries. You learned about sweeteners and toppings that create a perfect texture. I shared step-by-step instructions for easy baking. Remember, baking time is key for crunch. You can store leftovers or freeze for later. This dessert is great with ice cream or fruit twists. Enjoy your baking, and make it your own!
    Triple Berry Crisp Delightful and Easy Dessert Recipe
  • To make Brown Butter Pumpkin Blondies, you need these ingredients: - 1 cup unsalted butter - 1 cup brown sugar, packed - ½ cup granulated sugar - 2 large eggs, at room temperature - 1 teaspoon pure vanilla extract - 1 cup pumpkin puree - 2 cups all-purpose flour - 1 teaspoon baking powder - ½ teaspoon baking soda - 1 teaspoon ground cinnamon - ½ teaspoon ground nutmeg - ¼ teaspoon salt - 1 cup chocolate chips or chopped nuts (optional) These ingredients come together to create a soft and tasty treat. The unsalted butter gives the blondies richness. Brown sugar adds deep flavor while granulated sugar balances the sweetness. Eggs bind everything, making them moist. Vanilla extract enhances the taste, while pumpkin puree brings a lovely fall flavor. The flour gives structure, and baking powder and baking soda help them rise. Cinnamon and nutmeg add warmth and spice. You can mix in chocolate chips or nuts to add texture. This blend of flavors makes these blondies hard to resist. - Set your oven to 350°F (175°C). - Grease a 9x13 inch baking pan or line it with parchment paper. - Melt the unsalted butter in a medium saucepan over medium heat. - Stir the butter continuously. Watch for it to bubble and foam. - After about 5-7 minutes, the butter will turn golden brown. - You’ll smell a nutty aroma when it’s ready. - In a large bowl, mix the warm browned butter with brown sugar and granulated sugar. - Whisk until smooth and combined. - Let the mixture cool for a few minutes. - Add two large eggs one at a time. Whisk well after each egg. - Stir in one teaspoon of pure vanilla extract until well blended. - Gently fold in one cup of pumpkin puree. - Make sure there are no lumps in the batter for a smooth texture. - In a separate bowl, whisk together flour, baking powder, baking soda, cinnamon, nutmeg, and salt. - Proper mixing helps distribute the leavening agents evenly. - Gradually add the dry mixture to the pumpkin mixture. - Stir gently until just combined. Don’t overmix. - If you want, fold in one cup of chocolate chips or chopped nuts. - Pour the batter into the prepared pan. Smooth the top with a spatula. - Bake for 25-30 minutes. - To check if they’re done, insert a toothpick into the center. It should come out clean with a few moist crumbs. - Let the blondies cool in the pan for about 10 minutes. - Carefully move them to a wire rack to cool completely. - Slice into squares for serving. If you want to change up the butter, try coconut oil or vegan butter. Both options will give you a rich flavor. For sugars, you can use coconut sugar or maple syrup. These alternatives will change the taste slightly but keep it delicious. If you need gluten-free options, use almond flour or a gluten-free all-purpose blend. Just make sure it has xanthan gum for the right texture. This will help keep your blondies soft and chewy. Do not overmix your batter. Stir just until the flour disappears. This keeps your blondies soft and tender. Overmixing can make them tough, and nobody wants that! To perfect the texture, watch the baking time closely. Check them around 25 minutes. A toothpick should come out with a few moist crumbs. This means they are done but still soft. Serve the blondies on a rustic wooden board for a cozy look. Dust them with powdered sugar or a sprinkle of cinnamon on top. This adds a nice touch and makes them look fancy. For an extra treat, add a dollop of whipped cream or a scoop of vanilla ice cream. This makes your dessert even more tempting. Warm blondies with ice cream create a perfect fall treat! {{image_4}} You can change the flavor of your blondies easily. Adding spices or extracts can make a big difference. Try adding a pinch of ginger for a spicy kick. You can also use almond extract instead of vanilla for a unique twist. A bit of allspice can give your blondies a warm, cozy flavor. Mix-ins add texture and extra taste. You might want to add chocolate chips or nuts. Chocolate chips provide a sweet surprise in each bite. Walnuts or pecans can add a nice crunch. You can also try butterscotch chips or white chocolate for a fun twist. Seasonal ingredients can make your blondies special. Adding cranberries brings a tart flavor that pairs well with pumpkin. Chopped pecans add a nice crunch and a hint of nuttiness. You could even mix in some dried apples for a fall feel. These twists keep your blondies fresh and exciting. To keep your Brown Butter Pumpkin Blondies fresh, store them in an airtight container. This keeps moisture out and helps them stay soft. You can also layer them with parchment paper to avoid sticking. If you like, you can sprinkle some powdered sugar on top before covering. This adds a nice touch and keeps them pretty. Freezing blondies is super easy. First, let them cool completely. Cut them into squares. Wrap each square in plastic wrap tightly. Then place them in a freezer bag or container. This prevents freezer burn and keeps them tasty. When you want to enjoy one, just take it out and let it thaw at room temperature. You can also warm it in the microwave for a few seconds for a fresh-baked taste. Brown Butter Pumpkin Blondies can last for about 3-4 days at room temperature. Just make sure to keep them in an airtight container. If you store them in the fridge, they can last up to a week. The cool air helps preserve their flavor and texture. Always check for any signs of spoilage before eating. Enjoy these delicious treats while they’re at their best! You can use mashed bananas or applesauce. Both options add moisture. They also bring a hint of sweetness. You can even try butternut squash puree for a similar flavor. Yes, you can use coconut oil or a dairy-free butter substitute. Both work well in this recipe. Just ensure your chocolate chips are dairy-free too. Check for a toothpick inserted in the center. If it comes out clean or with a few moist crumbs, they are ready. The edges will look set and slightly golden. Absolutely! Cream cheese frosting pairs well with the pumpkin flavor. You can also use a simple glaze for added sweetness. Not quite! Blondies are richer and denser than brownies. They have a lighter flavor due to the brown sugar and pumpkin. Yes, you can! They stay fresh for up to three days at room temperature. You can also freeze them for later enjoyment. Just wrap them well before freezing. You learned how to make tasty Brown Butter Pumpkin Blondies with simple steps. We covered key ingredients, important mixing methods, and tips for great results. Use my tips for fun twists and perfect texture. Remember to store them right so they stay fresh. Enjoy your baking and share your delicious results with friends and family. This treat will surely impress!
    Brown Butter Pumpkin Blondies Irresistible Fall Treat
  • To make Pumpkin Cheesecake Swirl Muffins, gather these key ingredients. They create a rich, flavorful treat. - 1 cup all-purpose flour - 1 teaspoon baking powder - 1 teaspoon baking soda - 1 teaspoon pumpkin pie spice - ½ teaspoon salt - 1 cup canned pumpkin puree - ½ cup granulated sugar - ½ cup brown sugar, packed - ½ cup vegetable oil - 2 large eggs - 1 teaspoon vanilla extract - 4 ounces cream cheese, softened - 1 large egg (for cheesecake swirl) - ¼ cup powdered sugar (for cheesecake swirl) - 1 teaspoon vanilla extract (for cheesecake swirl) These ingredients combine to create muffins with a warm pumpkin flavor and a creamy cheesecake twist. The canned pumpkin puree adds moisture and depth. The blend of sugars gives a lovely sweetness. Don't forget the spices! They bring warmth and a hint of autumn to every bite. The cream cheese adds smoothness to the swirl. Using fresh, quality ingredients makes a big difference in taste. For best results, use room temperature eggs and cream cheese. This helps them mix well. Each ingredient plays a role in creating this delightful treat. Enjoy the process of gathering and preparing these ingredients. They will help you bake something truly special! First, you need to preheat your oven to 350°F (175°C). This step is key for baking the muffins evenly. While the oven warms up, prepare your muffin tin. You can use paper liners or a non-stick spray to keep the muffins from sticking. Next, sift together your dry ingredients. In a medium bowl, mix the all-purpose flour, baking powder, baking soda, pumpkin pie spice, and salt. Sifting helps to aerate the flour and ensures your muffins rise well. In a larger bowl, combine the wet ingredients. Add the canned pumpkin puree, granulated sugar, brown sugar, vegetable oil, two large eggs, and one teaspoon of vanilla extract. Mix until the batter is smooth. This step adds moisture and flavor to your muffins. Now, it’s time to combine the mixtures. Gradually add the dry ingredients to the wet pumpkin mix. Stir gently until just combined. Be careful not to overmix, as this can make your muffins tough and dense. For the cheesecake swirl, beat the softened cream cheese in a separate bowl. Use an electric mixer to make it creamy. Then, add one egg, powdered sugar, and one teaspoon of vanilla extract. Mix until you have a smooth and fluffy batter. To fill the muffin liners, spoon the pumpkin batter halfway up each liner. Then, add dollops of the cheesecake batter on top. With a toothpick or skewer, create a swirl by gently mixing the two batters. This gives your muffins a beautiful marbled look. Now, place the muffin tin in the preheated oven and bake for 20 to 25 minutes. Check doneness by inserting a toothpick into the center. If it comes out clean, your muffins are ready! After baking, let them cool in the pan for five minutes before transferring them to a wire rack. This allows them to cool completely and helps keep them fluffy. To create the best pumpkin cheesecake swirl muffins, avoid overmixing the batter. If you stir too much, the muffins can turn out tough. Mix just until you see no dry flour. Also, use room temperature ingredients. This helps everything blend smoothly, giving you a light and fluffy muffin. For a lovely finish, dust the muffins with powdered sugar and a sprinkle of cinnamon. This not only adds sweetness but also enhances the autumn vibe. You can place small decorative pumpkins around the muffins for a charming display. This makes your treats look even more inviting! These muffins pair great with coffee or a warm drink. The rich flavors complement each other perfectly. To store the muffins, keep them in an airtight container. They stay fresh for three days at room temperature. If you want to enjoy them later, you can freeze them. Just warm them in the oven when you're ready to eat! {{image_4}} You can make these muffins even more fun! Try adding chocolate chips or nuts. These add crunch and depth. Chocolate pairs well with pumpkin. Nuts give a nice texture. You can also switch up the spices. Instead of pumpkin pie spice, try cinnamon or nutmeg. Use almond or maple extract for a unique twist. Each change gives a new flavor to your muffins. If you need gluten-free muffins, swap the all-purpose flour with a gluten-free blend. Make sure the blend has a binding agent, like xanthan gum. This keeps the muffins from being too crumbly. For vegan muffins, use flax eggs instead of regular eggs. Mix one tablespoon of flaxseed meal with three tablespoons of water. Let it sit until it thickens. You can also replace cream cheese with a vegan cream cheese. These changes keep the muffins tasty while fitting your diet. To keep your pumpkin cheesecake swirl muffins fresh, store them in an airtight container. This helps prevent moisture from getting in. If you leave them out, they can last about two days at room temperature. In the fridge, they stay good for up to a week. Make sure to keep them covered to avoid drying out. Freezing is a great way to enjoy muffins later. First, let them cool completely. Then, wrap each muffin in plastic wrap. Place the wrapped muffins in a freezer bag or container. Label it with the date for easy tracking. Muffins can freeze well for up to three months. When you’re ready to eat one, thaw it in the fridge overnight or warm it in the microwave. Enjoy your treat anytime! You can use fresh pumpkin puree instead. Cook and mash a small pumpkin until smooth. You can also use butternut squash puree for a similar flavor. Both options work well in this recipe. Check the muffins with a toothpick. Insert it into the center of one muffin. If it comes out clean, the muffins are ready. They should also feel firm to the touch. Yes, you can prepare the batter a day in advance. Store it in the fridge until you are ready to bake. Just remember to stir it gently before filling the muffin tin. If the cheesecake mix is too runny, add more powdered sugar. This will help thicken the mixture. You can also chill it in the fridge for a bit before swirling it into the muffins. You can create delicious pumpkin cheesecake muffins with simple steps and fresh ingredients. Start by mixing your dry and wet components carefully, then swirl in the cheesecake mix for a tasty blend. Remember to avoid overmixing for the best texture. You can customize with add-ins like chocolate chips or nuts. Store them right to keep them fresh, and feel free to freeze extras for later. Enjoy these treats with coffee and share them with friends for a cozy snack!
    Pumpkin Cheesecake Swirl Muffins Irresistible Treat
  • - 1 pound potato gnocchi - 2 tablespoons olive oil - 1 medium onion, finely chopped - 3 cloves garlic, minced - 8 ounces mushrooms, sliced - 5 ounces fresh spinach, roughly chopped - 1 cup heavy cream - ½ cup grated Parmesan cheese - 1 teaspoon Italian seasoning - Salt and freshly cracked black pepper to taste - Fresh parsley, chopped, for garnish For this creamy spinach mushroom gnocchi, you need simple yet flavorful ingredients. Start with one pound of potato gnocchi, which gives a nice, soft texture. Olive oil adds richness. Use two tablespoons to sauté your onions and garlic. A medium onion, finely chopped, will sweeten the dish. Add three minced garlic cloves for a robust flavor. Next, pick eight ounces of fresh mushrooms. I like cremini or button mushrooms for their taste. You will also need five ounces of fresh spinach. This will add a lovely color and nutrition to your meal. For the creamy sauce, grab one cup of heavy cream and half a cup of grated Parmesan cheese. The cheese adds saltiness and creaminess. A teaspoon of Italian seasoning brings warmth and depth. Don't forget salt and freshly cracked black pepper to taste. Lastly, sprinkle fresh parsley on top for a pop of color and freshness. Use these ingredients to create a comforting meal. Each one plays a key role in building flavor. Bringing the water to a boil: Start with a large pot. Fill it with water and add salt. Set the pot on high heat. Wait for the water to bubble and boil. Cooking the gnocchi: Once boiling, add the potato gnocchi. Cook them until they float to the top. This usually takes just a few minutes. When they rise, they are ready. Drain the gnocchi and set them aside. Sautéing onions and garlic: In a large skillet, pour in the olive oil. Heat it over medium heat. Add the chopped onion. Cook until soft, about 4-5 minutes. Next, add the minced garlic. Stir for about a minute until it smells amazing. Adding mushrooms and spinach: Toss in the sliced mushrooms. Keep cooking for 5-7 minutes. The mushrooms will soften and release their juices. Then, add the chopped spinach. Cook for another 2 minutes. You want the spinach to wilt down nicely. Incorporating the cream and Parmesan: Lower the heat. Carefully pour in the heavy cream. Stir well to mix everything together. Let the sauce simmer for 3-4 minutes. It will thicken and become rich. Now, add the grated Parmesan cheese and Italian seasoning. Stir until the cheese melts. Taste your sauce and add salt and pepper to your liking. Folding in the cooked gnocchi: Gently add the cooked gnocchi to the sauce. Use a spatula to fold them in. Make sure each gnocchi is well-coated with the sauce. Adjusting seasoning and thickness: Remove the skillet from heat. Let it sit for a minute. This helps the sauce thicken slightly. Taste again and adjust the seasoning if needed. To get the best texture in your gnocchi, follow these steps: - Boil salted water in a large pot. - Add the gnocchi when the water is boiling. - Cook until they float, which usually takes about 2-3 minutes. - Drain them gently to avoid breaking. Avoid overcooking by watching them closely. If you leave them too long, they become mushy. For a richer taste, try these seasoning tips: - Add a pinch of red pepper flakes for heat. - Mix in a bit more Italian seasoning for depth. The best mushrooms for this dish are cremini or button mushrooms. They have a nice, earthy flavor that pairs well with the cream. To make your dish look as good as it tastes, serve it in shallow bowls. Here are some garnishing ideas: - Sprinkle freshly chopped parsley on top. - Add a dusting of Parmesan cheese. - Drizzle a little olive oil for shine and flavor. These small touches make your creamy spinach mushroom gnocchi inviting and beautiful! {{image_4}} You can make this dish even better by adding proteins. Chicken or shrimp work well. Simply cook them before adding to the sauce. This adds flavor and makes it heartier. You can also mix in different vegetables. Try bell peppers, zucchini, or sun-dried tomatoes. Each adds unique taste and texture. Plus, it’s a great way to use up what you have at home. If you need a gluten-free option, use gluten-free gnocchi. Many brands offer this now, and it tastes great. Always check the label to be sure. For vegan alternatives, swap the heavy cream for coconut cream or cashew cream. Nutritional yeast can replace Parmesan cheese. This gives a cheesy flavor without dairy. These swaps make the dish plant-based and still tasty. To explore lighter cream options, use half-and-half or low-fat milk. You may need to add a bit more cheese to keep it creamy. Just stir as you cook to ensure it mixes well. If you want a dairy-free sauce, try almond or oat milk with a bit of cornstarch to thicken. Blend it well and add your seasonings. This keeps the dish creamy and plant-based without losing flavor. To keep your creamy spinach mushroom gnocchi fresh, store leftovers right away. Place the dish in an airtight container. Glass or plastic containers work great. Let it cool down first, then seal it. This helps keep the flavors intact. Use it within three days for the best taste. When you’re ready to enjoy leftovers, choose the right method. The stove-top is best for keeping creaminess. Heat a skillet over low heat and add a splash of cream or water. Stir often to prevent sticking. You can also use a microwave. Heat it in short bursts. Stir in between to keep it creamy. If you want to save it for later, freezing is an option. Pack the dish in a freezer-safe container. Leave some space for expansion. Use it within three months for the best flavor. To thaw, place it in the fridge overnight. Reheat it gently as mentioned before to restore that creamy goodness. You can use both store-bought and homemade gnocchi. Store-bought gnocchi is quick and easy. It cooks fast and tastes great. Homemade gnocchi has a fresh, soft texture that many love. If you have time, making it from scratch adds a personal touch. Yes, you can use frozen spinach. It saves time and is easy to find. However, fresh spinach has a brighter flavor and better texture. Frozen spinach may become mushy when cooked. If using frozen, make sure to drain it well before adding. You can make creamy spinach mushroom gnocchi healthier with a few swaps. Use low-fat cream or a plant-based milk for fewer calories. Add extra veggies like zucchini or bell peppers for more nutrients. You can also reduce the cheese or use a lighter cheese. This dish pairs well with a side salad. A simple green salad with lemon dressing works nicely. For a heartier option, serve garlic bread on the side. As for wine, a crisp white like Sauvignon Blanc enhances the flavors beautifully. This blog post covered a delicious creamy spinach mushroom gnocchi recipe. We explored key ingredients, easy steps, and useful tips for perfecting the dish. Remember, you can mix it up with proteins and vegetables to fit your taste. Store leftovers properly and enjoy them later. With these insights, you can impress your family and friends with your cooking. Now, grab your ingredients and start making something tasty!
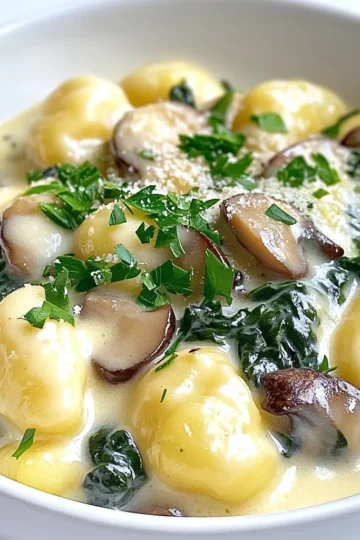
    Creamy Spinach Mushroom Gnocchi Flavorful Dinner Idea
  • Here are the ingredients you need for pumpkin chocolate chip scones: - 2 cups all-purpose flour - ⅓ cup granulated sugar - 1 tablespoon baking powder - ½ teaspoon baking soda - ½ teaspoon salt - 1 teaspoon ground cinnamon - ½ teaspoon ground nutmeg - ¼ cup cold unsalted butter, cubed - ½ cup pumpkin puree - ¼ cup heavy cream - 1 large egg - 1 teaspoon vanilla extract - ½ cup semi-sweet chocolate chips - Extra sugar for sprinkling Each ingredient plays a key role in making these scones tasty. The flour gives structure, while the sugar adds sweetness. Baking powder and baking soda help the scones rise. The spices like cinnamon and nutmeg bring warmth and comfort, perfect for fall. Using cold butter is vital. It creates flaky layers in your scones. The pumpkin puree provides moisture and flavor, while the heavy cream adds richness. The egg binds everything together, and vanilla enhances the overall taste. Lastly, the chocolate chips offer delightful bursts of sweetness. Gather these items before starting. Having everything ready makes the process smooth and fun. Enjoy the delightful aroma as you bake these scones, filling your kitchen with the essence of fall! - Preheat the oven to 400°F (200°C) and line a baking sheet with parchment paper. - In a large mixing bowl, whisk together: - 2 cups all-purpose flour - ⅓ cup granulated sugar - 1 tablespoon baking powder - ½ teaspoon baking soda - ½ teaspoon salt - 1 teaspoon ground cinnamon - ½ teaspoon ground nutmeg - Add ¼ cup of cold unsalted butter, cubed, to the dry mix. Blend until it looks like coarse crumbs. - In a separate bowl, whisk together: - ½ cup pumpkin puree - ¼ cup heavy cream - 1 large egg - 1 teaspoon vanilla extract - Pour the pumpkin mixture into the dry mix. Stir gently until just moistened. Avoid overmixing to keep the scones tender. - Fold in ½ cup of semi-sweet chocolate chips until evenly mixed. - Turn the dough out onto a floured surface. Pat it down into a round disc, about 1-inch thick. - Use a sharp knife to slice the dough into 8 wedges. Place them on the prepared baking sheet. - Sprinkle some extra sugar on top of each scone for added sweetness. - Bake for 15-18 minutes, until golden brown. A toothpick should come out clean from the center. - Let the scones cool for a few minutes before transferring them to a wire rack. To get the best texture in your scones, follow these tips: - Use cold butter: Cold butter helps create flaky layers. Cut it into small cubes and mix it well. - Do not overmix: When you combine wet and dry ingredients, mix until just combined. Overmixing makes scones tough. When folding in chocolate chips, be gentle. Here’s how: - Add chips last: After you mix the wet and dry ingredients, fold in the chocolate chips. - Use a spatula: Gently fold until chips are evenly spread. This way, they won’t break apart. For a beautiful presentation, serve your scones warm. Here are some ideas: - Use a platter: Arrange scones on a rustic wooden platter. This adds charm to your table. - Garnish: Add a few cinnamon sticks or decorative leaves around the scones. Pair your pumpkin chocolate chip scones with these drinks: - Coffee or tea: A warm cup of coffee or spiced chai works great. - Hot cocoa: For a sweet treat, serve with a rich hot cocoa. These tips will help you enjoy your scones to the fullest! {{image_4}} You can boost the flavor of your pumpkin chocolate chip scones with fun additions. Try adding spices like ginger or allspice. These spices give a warm, cozy taste. You can also use extracts like almond or maple. A splash of these will surprise your taste buds. If you want to change the chocolate chips, go for different mix-ins. Dried cranberries or walnuts can add a nice crunch and tang. For a twist, use white chocolate chips or butterscotch chips. These small changes can make your scones unique. If you need gluten-free scones, swap all-purpose flour with a gluten-free blend. Many brands work great in baking. Just check that it has a good binding agent, like xanthan gum. This will help keep your scones fluffy and light. For vegan options, you can replace butter with coconut oil or vegan butter. Use a flax egg instead of a regular egg. To make a flax egg, mix one tablespoon of ground flaxseed with three tablespoons of water. Let it sit until it thickens. These simple swaps make it easy to enjoy tasty scones while keeping your diet in mind. To keep your pumpkin chocolate chip scones fresh, store them in an airtight container. Place a piece of wax paper between layers to prevent sticking. They will stay fresh for about three days at room temperature. If you want to enjoy them warm, reheat them in the oven. Set your oven to 350°F (175°C) and heat for about 5-7 minutes. This will make them taste fresh and warm again. If you want to save scones for later, freezing is a great option. Wrap each scone in plastic wrap, then place them in a freezer bag. They will last up to three months in the freezer. When you are ready to eat, take them out and let them thaw at room temperature. For a warm treat, reheat them in the oven as mentioned before. Enjoy these delightful scones whenever you crave a taste of fall! Can I use fresh pumpkin instead of canned? Yes, you can use fresh pumpkin. Just make sure to roast it and puree it well. Fresh pumpkin may have a different moisture level. This can affect the texture of your scones. Adjust other wet ingredients as needed for balance. How can I prevent scones from being dry? To keep scones moist, don’t overmix the dough. Mix until just combined. Cold butter is key; it helps create steam during baking. Also, consider adding more pumpkin puree or cream for extra moisture. What can I substitute for heavy cream? You can use milk or a non-dairy milk. If you want a richer flavor, blend milk with a little butter. This gives you a cream-like texture. How do I know when my scones are done baking? Your scones are done when they turn golden brown. A toothpick inserted should come out clean. If it's wet, bake a few more minutes. Keep an eye on them! Can I make the dough ahead of time? Absolutely! You can chill the dough for up to 24 hours. Wrap it tightly and store it in the fridge. When ready to bake, just slice and bake as usual. You learned how to make delicious scones with simple steps. We covered the key ingredients, mixing methods, and baking times. I shared tips for perfecting texture and serving ideas. You can even explore fun variations for dietary needs. Remember to store leftover scones properly to keep them fresh. Enjoy your baking and impress your friends with these tasty treats! Happy baking!
    Pumpkin Chocolate Chip Scones Perfect for Fall Baking
  • To make a rich and tasty Triple Chocolate Fudge Cake, you need the following ingredients: - 1 cup all-purpose flour - 1 cup granulated sugar - ½ cup unsweetened cocoa powder - 1 teaspoon baking powder - ½ teaspoon baking soda - ½ teaspoon salt - ½ cup unsalted butter, melted - 2 large eggs - 1 teaspoon vanilla extract - ½ cup buttermilk - 1 cup semi-sweet chocolate chips - 1 cup dark chocolate chunks - ¼ cup milk chocolate shavings (for garnish) Each item plays a key role in making the cake moist and fudgy. The flour gives structure. Sugar adds sweetness. Cocoa powder brings deep chocolate flavor. Baking powder and soda help the cake rise. Salt enhances all the flavors. Melted butter makes the cake rich. Eggs bind everything together and add moisture. Vanilla extract adds warmth. Buttermilk makes the cake tender and adds a slight tang. The semi-sweet chocolate chips and dark chocolate chunks make every bite a chocolate dream. Finally, the milk chocolate shavings on top are a sweet touch that looks beautiful. Using high-quality chocolate will make a big difference. Fresh ingredients also improve the taste. Always measure carefully for the best results. Enjoy the process; baking is a joy! {{ingredient_image_2}} - Preheat your oven to 350°F (175°C). - Grease and flour a 9-inch round cake pan or line it with parchment paper. - In a large bowl, whisk together: - 1 cup all-purpose flour - 1 cup granulated sugar - ½ cup unsweetened cocoa powder - 1 teaspoon baking powder - ½ teaspoon baking soda - ½ teaspoon salt - Ensure the dry ingredients mix well for a smooth cake. - In another bowl, mix: - ½ cup unsalted butter, melted - 2 large eggs - 1 teaspoon vanilla extract - ½ cup buttermilk - Blend these wet ingredients until smooth and creamy. - Pour the wet mixture into the dry ingredients. - Stir gently until just combined. It's okay if the batter has a few lumps. - Carefully fold in: - 1 cup semi-sweet chocolate chips - 1 cup dark chocolate chunks - Make sure the chocolate pieces spread evenly throughout the batter. - Transfer the batter to the prepared pan and smooth the top. - Bake in the preheated oven for 30-35 minutes. - Check for doneness by inserting a toothpick in the center. It should come out clean or with a few moist crumbs. - Remove the cake from the oven and let it cool in the pan for about 10 minutes. - Carefully transfer the cake to a wire rack to cool completely. - Once cooled, sprinkle the top with ¼ cup milk chocolate shavings for decoration. - Serve slices on their own, or add whipped cream or ice cream for a special treat. How to check for doneness To check if your cake is done, insert a toothpick into the center. If it comes out clean or with a few crumbs, your cake is ready. If it has wet batter, bake for a few more minutes. This helps you avoid an undercooked center. Ensuring even baking To ensure even baking, make sure your oven is preheated. Place the cake pan in the center of the oven. Use an oven thermometer if you have one. This keeps the heat steady and helps the cake rise evenly. Best practices for storing leftover cake Store leftover cake in an airtight container. You can also wrap it in plastic wrap. This keeps it fresh for several days. If you plan to keep it longer, consider freezing it. How to keep the cake moist To keep the cake moist, place a slice of bread in the container. The bread will absorb moisture, keeping the cake soft. You can also brush the cake with a little syrup before storage. Pairing with whipped cream or ice cream Serve slices with whipped cream or ice cream for a treat. The creaminess balances the rich chocolate. You can also sprinkle some chocolate shavings on top for extra flair. Ideal occasions for serving This cake is great for birthdays, parties, or any special event. Its rich flavor makes it a crowd-pleaser. You can also serve it at a cozy dinner with friends, making any night special. Pro Tips Use Room Temperature Ingredients: Allow your eggs and buttermilk to come to room temperature before mixing to help create a smoother batter and a more even bake. Don't Overmix the Batter: Mix until just combined to keep the cake light and fudgy. Overmixing can lead to a denser texture. Check for Doneness: Use a toothpick to check the center of the cake; it should come out clean or with a few moist crumbs, not wet batter. Storing the Cake: Keep any leftover cake in an airtight container at room temperature for up to 3 days or in the refrigerator for up to a week. {{image_4}} You can change up the chocolate in this cake. Use white chocolate for a sweet twist. Melted white chocolate adds a creamy layer that pairs well with dark flavors. You can also mix in different types of chocolate. Try using milk chocolate chunks for a sweeter bite. Each chocolate type brings a unique taste, making your cake even more special. Want to take it up a notch? Add a splash of coffee or mint extract. Coffee boosts the chocolate flavor and adds depth. Just a teaspoon can make a big difference. If you prefer a minty kick, add mint extract. It pairs well with chocolate and gives a fresh vibe. You can also stir in nuts or fruit. Chopped walnuts or pecans add crunch. Ripe cherries or raspberries bring a fruity burst. These additions make each slice unique. You can adjust the cake size based on your needs. For round pans, follow the recipe as is. If you use square pans, bake for the same time. The shape does not change the taste. Want to make mini cakes or cupcakes? Just pour the batter into smaller cups. Bake for about 15-20 minutes. Check for doneness with a toothpick. This way, everyone can enjoy their own little cake! Can I use cocoa powder instead of chocolate? Yes, you can use cocoa powder. It adds a rich chocolate flavor. However, you will miss some of the texture and richness found in real chocolate. For the best taste, use both cocoa powder and chocolate. What substitutes can be used for buttermilk? You can make homemade buttermilk. Mix one cup of milk with one tablespoon of lemon juice or vinegar. Let it sit for five minutes. This will give you a similar tangy taste and acidity. Why is my cake too dense? A dense cake may be due to overmixing the batter. Mixing too much causes the gluten in the flour to develop. This results in a heavy texture. Always mix gently until just combined to keep it light and fluffy. How can I fix an overbaked cake? If your cake is overbaked, it might dry out. You can brush it with a simple syrup made of sugar and water. This adds moisture back into the cake. Cover it with frosting or whipped cream to help, too. How long does the cake last? Triple chocolate fudge cake lasts about three to four days at room temperature. Store it in an airtight container to keep it fresh. If you want to keep it longer, refrigerate it for about a week. Can I freeze this cake? Yes, you can freeze this cake. Wrap it tightly in plastic wrap, then place it in an airtight container. It can last for up to three months in the freezer. Thaw it in the fridge before serving for the best taste. Each slice of this Triple Chocolate Fudge Cake has about 350 calories. This number can change based on portion size and toppings. - Fat: Around 20 grams - Protein: About 5 grams - Carbohydrates: Roughly 40 grams This cake is rich in fat due to the butter and chocolate, making it a treat. The protein comes mainly from the eggs and buttermilk. The carbs mainly come from sugar and flour. - Gluten-free options: You can use a gluten-free flour blend instead of all-purpose flour. This will help make the cake gluten-free without losing taste. - Vegan alternatives for ingredients: Swap the eggs for flaxseed meal mixed with water. Use coconut oil instead of butter. Choose almond milk with vinegar for buttermilk. These changes will keep the cake delicious and vegan. In this blog post, we discussed the ingredients and steps to make a Triple Chocolate Fudge Cake. We covered baking tips, storage methods, and serving ideas to enhance your cake experience. Remember, using high-quality chocolate makes a big difference. Feel free to try different flavors or cake sizes to find your favorite. With the right techniques and a bit of creativity, you can bake the perfect cake every time. Enjoy your baking journey!
    Triple Chocolate Fudge Cake Rich and Decadent Delight
- 2 cups all-purpose flour - 1 cup granulated sugar - 1 tablespoon baking powder - ½ teaspoon baking soda - ½ teaspoon salt - ½ cup unsalted butter, softened to room temperature - 1 cup buttermilk (or milk with 1 tablespoon lemon juice mixed in) - 2 large eggs, at room temperature - 2 teaspoons vanilla extract - 1 tablespoon instant coffee granules, dissolved in 1 tablespoon hot water For the Crumb Topping: - ½ cup all-purpose flour - ¼ cup brown sugar, packed firmly - ½ teaspoon ground cinnamon - 3 tablespoons unsalted butter, melted - 1 cup = 240 ml - 1 tablespoon = 15 ml - ½ teaspoon = 2.5 ml - ½ cup = 120 ml - ¼ cup = 60 ml Knowing these conversions helps you adjust recipes easily. - Use fresh ingredients. Fresh baking powder and butter yield the best muffins. - For fluffier muffins, let eggs and buttermilk sit at room temperature. - Dissolving coffee granules in hot water enhances the coffee flavor. - The crumb topping should feel like wet sand. It adds texture and flavor. These tips make your Coffee Crumb Cake Muffins more tasty. Enjoy every bite! You can find the Full Recipe to get started. Set your oven to 350°F (175°C). This temperature helps the muffins rise well. Prepare a muffin tin by lining it with paper liners or greasing each cup with butter or spray. In a large bowl, whisk together the dry ingredients. You will need 2 cups of flour, 1 cup of sugar, 1 tablespoon of baking powder, ½ teaspoon of baking soda, and ½ teaspoon of salt. Mix them well until they are all combined. In a medium bowl, cream ½ cup of softened butter until light. This should take around 2-3 minutes. Then, add 1 cup of buttermilk, 2 large eggs, 2 teaspoons of vanilla extract, and the hot water with 1 tablespoon of dissolved coffee granules. Mix until smooth and fully blended. Slowly pour the wet mixture into the dry ingredients. Stir gently with a spatula until just combined. A few lumps are okay; avoid overmixing. Spoon the batter into the muffin cups, filling each about two-thirds full. Top them with the crumb mixture. Place the muffin tin in the oven and bake for 18-20 minutes. Check doneness with a toothpick; it should come out clean or with a few crumbs. Once baked, let them cool in the pan for 5 minutes, then transfer them to a wire rack to cool completely. For the full recipe, you can refer to the recipe section. To get an amazing crumb topping, use cold butter. Cut it into small pieces. Mix it with flour and sugar until it looks like sand. This helps create a nice crunch. Don’t skip the cinnamon; it adds a warm flavor. Make sure to sprinkle the crumbs evenly on the muffins. This way, each bite is delicious. One common mistake is overmixing the batter. Mix just until the dry and wet ingredients blend. This keeps your muffins light and fluffy. Another mistake is not checking the oven temperature. An oven that is too hot can burn the muffins. Always use an oven thermometer for accuracy. Lastly, let the muffins cool before serving. This helps the flavors develop and makes them easier to eat. For a lovely display, use a wooden board. Place the muffins in a circle or line. Dust them with powdered sugar for a nice touch. You can also add fresh berries or sprigs of mint for color. Serve the muffins with coffee or tea. This creates a perfect breakfast or snack time moment. If you want, pair them with a small bowl of whipped cream for extra fun. {{image_4}} You can enhance your muffins by adding nuts or chocolate chips. Walnuts or pecans add a nice crunch. Just mix in about ½ cup of chopped nuts when you combine the wet and dry ingredients. For a sweet twist, add ½ cup of chocolate chips. They melt slightly and create a rich flavor. You can make these muffins even more special with spices or citrus zests. Consider adding a teaspoon of nutmeg or cardamom for warmth. A tablespoon of lemon or orange zest brightens the taste. These flavors blend well with coffee and make each bite exciting. If you need gluten-free muffins, you can use gluten-free flour. Replace the all-purpose flour with a 1:1 gluten-free blend. Make sure the blend contains xanthan gum for better texture. The muffins will still be soft and delicious, perfect for all to enjoy. To keep your Coffee Crumb Cake Muffins fresh, store them in an airtight container. This helps lock in moisture and flavor. Place a paper towel at the bottom of the container to absorb any excess moisture. You can keep them at room temperature for up to three days. For longer storage, consider the next steps. Freezing muffins is a great way to save them for later. First, let the muffins cool completely. Wrap each muffin tightly in plastic wrap or aluminum foil. Then, place them in a freezer-safe bag or container. They can last for up to three months in the freezer. When you’re ready to enjoy, simply thaw them at room temperature. Reheating your Coffee Crumb Cake Muffins is easy. If they are at room temperature, place them in a preheated oven at 350°F (175°C) for about 5-10 minutes. This warms them and keeps the crumb topping crunchy. You can also microwave them for 15-20 seconds if you’re short on time, but the oven method gives better results. Coffee Crumb Cake Muffins are special because they mix cake and muffin traits. The crumb topping adds a crunchy texture. The coffee flavor gives it a rich taste. These muffins are perfect for breakfast or snacks. They are soft inside and have a sweet, crumbly top. Yes, you can swap some ingredients if needed. Use whole wheat flour for a healthier option. Almond milk works well if you don’t have buttermilk. You can try coconut butter instead of regular butter. Just keep in mind, these changes may alter the taste or texture a bit. These muffins can stay fresh for about 3 days at room temperature. Store them in an airtight container to keep them moist. If you want to keep them longer, freeze them. They can last up to 3 months in the freezer. Just make sure to wrap them well. These muffins pair well with fresh fruit or yogurt. A cup of coffee or tea enhances the flavor. You can also serve them with a dollop of whipped cream for a treat. They make a great addition to brunch spreads too. You can find the full recipe for Coffee Crumb Cake Muffins in the recipe section above. This will give you all the details you need for making these delightful muffins. You learned about the key ingredients and tips for perfect Coffee Crumb Cake Muffins. I shared how to mix, bake, and store them to keep them fresh. Remember, small changes can make a big difference. Enjoy experimenting with flavors and presentation. Make these muffins yours and watch them disappear! With the right techniques, your baking can impress anyone. Keep practicing, and you'll master these muffins in no time!

Highlight a specific post, call to action, or category here that you want to display in a small, yet visual way.

FULL RECIPE

Welcome!

This is an introduction to me and my site to establish E-E-A-T. Keep this short and simple.

More about me

Popular

  • - 1 cup pumpkin puree - 8 oz cream cheese, softened to room temperature - ½ cup granulated sugar - ¼ cup packed brown sugar - 1 teaspoon pure vanilla extract - 1 teaspoon ground cinnamon - ½ teaspoon ground nutmeg - ¼ teaspoon ground ginger - ¼ teaspoon salt - 1 package refrigerated pie crust (or homemade if preferred) - 1 egg, beaten (for egg wash) - Whipped cream and a sprinkle of ground cinnamon for garnish I love using simple, fresh ingredients for these bites. Pumpkin puree brings a warm flavor. Cream cheese gives a rich, creamy texture. Try to buy high-quality cream cheese for the best results. Granulated sugar and brown sugar balance the flavors well. Vanilla extract adds a lovely aroma. The spices—cinnamon, nutmeg, and ginger—make every bite taste like fall. Salt enhances the sweetness, giving the dessert depth. You can use a store-bought pie crust, but making your own is a fun option. A beaten egg wash helps the crust turn golden brown and shiny. Finally, serve these bites with whipped cream and a dash of cinnamon on top. It adds a nice touch to the presentation! 1. In a large bowl, combine 8 oz of softened cream cheese, ½ cup granulated sugar, and ¼ cup brown sugar. 2. Stir in 1 teaspoon of pure vanilla extract and 1 cup of pumpkin puree. 3. Blend this mix until it is smooth and creamy. 4. Next, add 1 teaspoon of ground cinnamon, ½ teaspoon ground nutmeg, ¼ teaspoon ground ginger, and ¼ teaspoon salt. 5. Mix thoroughly until all spices are well blended. Set the filling aside. 1. Roll out the refrigerated pie crust on a floured surface until it’s smooth. 2. Using a cookie cutter or glass, cut out circles that are about 3-4 inches wide. 3. You should get around 24 circles, which is enough for 12 bites. 1. Preheat your air fryer to 330°F (165°C). 2. Take a pie crust circle and place a tablespoon of the filling in the center. 3. Fold the edges of the crust over the filling to make a pocket. 4. Crimp the edges with a fork to seal each bite well. 5. Brush the tops with a beaten egg for a golden finish. 6. Place the bites in a single layer in the air fryer basket. 7. Air fry for 10-12 minutes until golden brown and flaky. 8. Check halfway through to ensure even cooking. 9. Once done, let them cool slightly on a wire rack. 10. Serve warm with whipped cream on top and a sprinkle of cinnamon. To avoid cracks in the crust, use a light touch. Do not stretch the dough too much when cutting and sealing. If you see cracks, gently press them together with your fingers. This helps keep your filling inside. For even cooking in the air fryer, make sure the bites are not touching. Place them in a single layer in the basket. Air needs room to flow around each bite. This helps them cook evenly and turn golden brown. For spice variations, try adding a bit of allspice or cardamom. These spices can add warmth and depth to your bites. You can mix and match to find your perfect flavor. Adding a dash of nutmeg or cloves can elevate the taste. Nutmeg brings a warm, nutty flavor. Cloves add a sweet and slightly spicy kick. Just a pinch goes a long way! Serve your pumpkin pie cheesecake bites with whipped cream on top. This adds a creamy texture that balances the flavor. A dollop of cream also looks nice. For garnishing, sprinkle a little ground cinnamon on top. You can also add a few pecans or walnuts for crunch. This not only makes the bites look pretty but adds a nice touch to the bite. {{image_4}} You can switch pumpkin with sweet potato for a twist. Sweet potato gives a creamy texture and rich taste. It also adds a nice orange color. Try different spices to change the flavor. Instead of cinnamon, use allspice or cardamom for warmth. You can also add a hint of cloves for depth. Each spice brings a new vibe to the bites. For a gluten-free option, look for gluten-free pie crust. Many stores carry these, or you can make your own. Just ensure it is sturdy enough to hold your filling. If you're going vegan, substitute cream cheese with a plant-based option. Look for brands that mimic cream cheese well. This way, everyone can enjoy these tasty bites. Pair your bites with sauces for added flavor. A drizzle of caramel or chocolate can make them extra special. You can also serve them with a side of whipped cream for dipping. These bites work well as a festive appetizer or dessert. They are perfect for holiday gatherings or special occasions. Just place them on a nice platter, and watch them disappear! To store your pumpkin pie cheesecake bites, let them cool completely first. Place them in an airtight container. This keeps them fresh and tasty. You should enjoy them within 3 to 5 days. If you want to keep them longer, freezing is a better option. For freezing, wrap each bite in plastic wrap. Then place them in a freezer-safe bag or container. This will help prevent freezer burn. You can freeze them for up to 3 months. When you're ready to eat, take them out and let them thaw in the fridge. To reheat, air fry them at 330°F for about 5 to 7 minutes. This keeps them crispy and delicious. Before serving, reheat the bites if you stored them in the fridge or freezer. Warm bites taste best. You can serve them with a dollop of whipped cream and a sprinkle of cinnamon. This adds a nice touch and makes them look pretty. Enjoy them as a sweet treat anytime! Yes, you can use homemade pie crust. Making your own crust gives you control over the flavor and texture. A homemade crust can taste fresher and more flaky than store-bought options. To get the best texture, use cold butter in your dough. This helps create a flaky crust. Chill the dough before rolling it out, and avoid overworking it. This keeps the crust tender. You can prep these bites ahead. Make the filling and store it in the fridge for up to three days. Roll out and cut the pie crust ahead of time too. For storage, keep the bites in an airtight container. If you freeze them, place parchment paper between layers. This prevents sticking. To reheat, place them in a preheated air fryer at 330°F for 5-7 minutes. This will keep them crispy. I recommend serving these bites warm. They taste best when fresh out of the air fryer. You can add whipped cream on top for extra flavor. Pair them with a sprinkle of ground cinnamon for a nice touch. These bites also go well with caramel sauce. Enjoy them as a dessert or a fun snack! These pumpkin cheesecake bites are easy and fun to make. We covered the ingredients needed, how to prepare the filling and crust, and tips for perfecting your bites. You can try different flavors and dietary options too. With proper storage, they stay tasty for days. Enjoy experimenting and making these delights for any gathering. Your friends and family will love them. Happy cooking, and may your kitchen be filled with delicious aromas!
    Pumpkin Pie Cheesecake Bites Air Fryer Delight
  • - Butternut squash - Red bell pepper - Brussels sprouts - Corn tortillas - Green cabbage - Carrot - Jalapeño pepper - Lime juice, honey/agave syrup, chili powder - Extra-virgin olive oil - Smoked paprika - Ground cumin - Salt and pepper The main ingredients for these Fall Veggie Tacos are simple yet flavorful. The butternut squash adds a sweet, nutty taste. The red bell pepper brings a hint of sweetness and crunch. Brussels sprouts provide a hearty texture and earthy flavor. I love using corn tortillas for their soft, warm embrace, which adds a nice touch to each bite. For the chili lime slaw, green cabbage is essential. It has a nice crunch and balances the taco's richness. The grated carrot adds a pop of color and sweetness. I slice a jalapeño pepper for a little heat. To bring it all together, I use lime juice, honey or agave syrup, and chili powder. This mix gives the slaw a zesty kick that pairs perfectly with the roasted veggies. For seasoning, I always reach for extra-virgin olive oil. It helps roast the veggies nicely. Smoked paprika gives a subtle smokiness. Ground cumin adds warmth and depth. Don't forget salt and pepper! They enhance all the flavors in these delightful tacos. To peel and dice butternut squash, start by cutting off both ends. Place the squash upright on a cutting board. Use a sharp knife to slice down the sides, removing the skin. Cut it in half, scoop out the seeds, and then dice the flesh into 1-inch cubes. Next, slice the red bell pepper. Cut it in half, remove the seeds, and slice it into thin strips. For the Brussels sprouts, trim off the stem end and remove any yellow leaves. Slice them thinly from top to bottom. This gives a nice texture for your tacos. Preheat your oven to 400°F (200°C). This temperature helps to caramelize the veggies. Spread the diced butternut squash, sliced bell pepper, and Brussels sprouts on a baking sheet lined with parchment paper. Stir them halfway to ensure even cooking. Roast for 25-30 minutes. Look for a golden color and tenderness for the best results. In a large bowl, combine 2 cups of finely shredded green cabbage, 1 grated medium carrot, and 1 finely sliced jalapeño. For the dressing, whisk together 3 tablespoons of lime juice, 1 tablespoon of honey or agave syrup, and 1 teaspoon of chili powder in a small bowl. Mix in a pinch of salt. Pour this dressing over the slaw and toss until everything is well-coated. Warm 8 small corn tortillas in a skillet over medium heat for about 30 seconds on each side. This makes them soft and tasty. On each tortilla, add a generous amount of the roasted veggie mixture. Top with a handful of the chili lime slaw for a nice crunch. Finally, sprinkle fresh cilantro on top for extra flavor. To achieve great caramelization, roast your veggies at 400°F (200°C). This high heat helps them brown nicely. When you spread the veggies on the baking sheet, leave space between them. This allows the hot air to circulate, making them crispier. Stir them halfway through cooking for even browning. If you want to change the flavor, you can substitute spices. Instead of smoked paprika, try chili powder for a different taste. You can also adjust the salt and pepper to fit your taste. Don't be afraid to experiment! To adjust the spice in your slaw, add more jalapeño. If you want it milder, remove the seeds. You can also use less jalapeño for a gentler kick. For sweeteners, honey works well, but agave syrup is a great choice too. You may also try maple syrup for a unique flavor. Each option adds its own twist to the slaw. For a beautiful display, serve your tacos on a colorful platter. Layer the tacos high for a fun look. Place lime wedges on the side. Guests can squeeze fresh lime juice over their tacos, adding a zesty punch. Adding some fresh cilantro on top gives a nice touch. It adds color and a burst of flavor. Enjoy serving these vibrant tacos! {{image_4}} You can boost the protein in your tacos easily. Try adding black beans or pinto beans. They add a nice texture and flavor. You can also grill chicken if you want a heartier meal. For those who follow a plant-based diet, tofu or tempeh works well. Both options soak up flavors nicely. Just marinate them in lime juice and spices before cooking. Feel free to swap in other fall veggies. Sweet potatoes bring a sweet taste that pairs well with the spices. Carrots add crunch and color too. If you want summer flavors, use zucchini or bell peppers. They add brightness to your dish. Simply roast them just like the butternut squash. You can have fun with the slaw. Try using red cabbage for a color twist. Napa cabbage is another great option for a milder taste. For extra sweetness, add fruits like mango or apples. They give a fresh contrast to the spicy slaw. Just chop them small and mix them in for a delightful surprise. To keep your leftover tacos fresh, store them in an airtight container. Make sure the container is sealed tightly to avoid moisture. Place the tacos in the fridge within two hours after cooking. This helps stop bacteria growth. Leftover tacos will last about 2 to 3 days in the fridge. If you want to save your tacos for later, consider freezing the roasted veggies and slaw separately. This keeps the texture nice when you reheat them. For freezing, place the veggies and slaw in freezer-safe bags. Remove as much air as you can to avoid freezer burn. To reheat, thaw the roasted veggies in the fridge overnight. Warm them in the oven at 350°F (175°C) for about 15 minutes. For the slaw, you can serve it cold straight from the fridge. This way, it stays crunchy and fresh. Enjoy your delicious fall veggie tacos anytime! To add heat to your tacos, consider these tips: - Spicy Veggies: Toss in a diced serrano pepper with the butternut squash. This gives a nice kick. - Extra Jalapeño: Use more jalapeño in the slaw. Keep the seeds for added heat. - Hot Sauce: Drizzle your favorite hot sauce over the tacos before serving. This is an easy way to spice things up. You can also mix chili powder into the roasted veggies. Adjust the amount based on your heat level preference. Remember, a little spice can go a long way! Yes, you can use flour tortillas instead of corn. Here are some key differences: - Texture: Flour tortillas are softer and chewier. They can hold more filling without breaking. - Flavor: Corn tortillas have a distinct, earthy flavor. They complement the veggies well. - Dietary Needs: If you have gluten allergies, stick with corn tortillas. They are naturally gluten-free. Choose what you like best. Both options work well with the roasted veggies and slaw. If you can’t find butternut squash, try these alternatives: - Sweet Potatoes: They roast well and add a sweet flavor. - Carrots: Thinly sliced carrots can add sweetness and color. - Zucchini: Cut into cubes; it cooks fast and has a mild taste. These alternatives will keep the dish colorful and tasty. Feel free to mix and match! The total time for this recipe is about 45 minutes. Here’s a quick breakdown: - Prep Time: 15 minutes. This includes chopping veggies and making the slaw. - Cook Time: 30 minutes. Roasting the veggies takes about 25-30 minutes. You can easily make these tacos on a busy weeknight. Enjoy a healthy meal in no time! This article covered how to make tasty veggie tacos. We started with fresh ingredients, including butternut squash, Brussels sprouts, and red bell peppers. I shared steps for prepping and roasting veggies, plus tips for a zesty chili lime slaw. We explored variations like adding protein and alternative veggies. You learned how to store or freeze leftovers for later. Using these tips, make your tacos fun and flavorful. Enjoy creating your delicious meals and share them with others!
    Fall Veggie Tacos with Chili Lime Slaw Delight
  • To make these Peanut Butter Pumpkin Energy Bites, you need simple and healthy ingredients. Here’s the list: - 1 cup rolled oats - ½ cup creamy peanut butter - ½ cup canned pumpkin puree - ¼ cup honey or maple syrup - 1 teaspoon vanilla extract - 1 teaspoon pumpkin pie spice - Optional: ¼ cup mini chocolate chips - Optional: ¼ cup chopped nuts (such as almonds or walnuts) Each ingredient plays a key role. The oats provide fiber and help bind the bites. Peanut butter gives protein and healthy fats. Pumpkin puree adds moisture and a nice flavor. Honey or maple syrup sweetens the mix naturally. Vanilla extract adds a lovely aroma. Pumpkin pie spice brings warmth and depth to the bites. If you want a touch of sweetness and crunch, add mini chocolate chips or nuts. These optional ingredients can make the bites even more fun! Feel free to mix and match according to your taste. The beauty of these energy bites is their flexibility. You can create a version that fits your cravings perfectly! - Mixing the Ingredients Start by gathering a large mixing bowl. Add 1 cup of rolled oats, ½ cup of creamy peanut butter, and ½ cup of canned pumpkin puree. Next, pour in ¼ cup of honey or maple syrup, and add 1 teaspoon of vanilla extract. Finally, sprinkle in 1 teaspoon of pumpkin pie spice. Use a sturdy spatula to mix everything together. Make sure the ingredients are well blended. The mixture should feel sticky and hold together nicely. - Achieving the Right Texture If you want a sweeter bite, fold in ¼ cup of mini chocolate chips and ¼ cup of chopped nuts. Mix gently to distribute them evenly. The final texture should be thick, sticky, and easy to shape. If it feels too dry, add a tiny bit more peanut butter to help it stick together. - Rolling into Balls Once your mixture is ready, wash your hands. Scoop out small portions, about 1 inch in diameter, and roll them into balls. This step is fun and lets you create perfect bite-sized snacks. Keep your hands slightly damp to prevent sticking. - Arranging on Baking Sheet Take a baking sheet lined with parchment paper. Carefully place each rolled ball on the sheet. Make sure to leave space between them. This will help them chill evenly in the fridge. - Refrigerating for Firmness Once all your energy bites are arranged, place the baking sheet in the refrigerator. Let them chill for at least 30 minutes. This time allows them to firm up. If you rush this step, they may not hold their shape well. - Storing in an Airtight Container After chilling, transfer the energy bites to an airtight container. They will stay fresh in the fridge for up to a week. You can enjoy these bites as a quick snack or a healthy treat anytime! Ensuring the Right Consistency To get the right texture, mix the oats, peanut butter, and pumpkin well. You want a sticky dough. If it feels too dry, add a bit more peanut butter or pumpkin. If it’s too wet, add more oats. This balance is key for great energy bites. Adjusting Sweetness Levels Taste is important! If you want your energy bites sweeter, add more honey or maple syrup. Start with a small amount. Mix well, then taste again. This way, you control the sweetness without going overboard. Suggestions for Additional Ingredients You can boost the flavor with fun extras. Try adding chia seeds or flaxseeds for extra nutrition. Dried fruit like cranberries or raisins adds a chewy texture. Nuts like almonds or walnuts give a nice crunch. Feel free to mix and match based on your taste! Flavor Variations to Try Change things up by playing with spices. Swap pumpkin pie spice for cinnamon or nutmeg. You can also add cocoa powder for a chocolate twist. Or, try a pinch of sea salt to enhance all the flavors. Each variation makes a unique snack! {{image_4}} Substituting Peanut Butter If you're allergic to nuts, you can still enjoy these bites! Use sun butter or soy nut butter instead of peanut butter. Both options offer a creamy texture and a nutty flavor without the allergens. Sun butter gives a slight sweetness, making it a great choice. Alternative Sweeteners For a healthier touch, you can swap honey or maple syrup with agave nectar or date syrup. These sweeteners blend well and keep the bites moist. If you want less sugar, try using mashed bananas or unsweetened applesauce. These will change the taste a bit but keep the bites tasty. Adding Different Spices Spices can change the whole flavor of your energy bites. Try adding a pinch of cinnamon or nutmeg for extra warmth. You could also use cayenne pepper for a hint of heat. Even a dash of cocoa powder can give a rich taste, perfect for chocolate lovers! Incorporating Superfoods Boost the nutrition level by adding superfoods. Chia seeds or flaxseeds give a nice crunch and pack a nutrient punch. You could also mix in some hemp hearts for extra protein. These tiny additions make your bites even healthier without changing the main flavor. To keep your Peanut Butter Pumpkin Energy Bites fresh, store them in the refrigerator. Use an airtight container. This helps maintain their taste and texture. Place a piece of parchment paper between layers if stacking them. If you want to keep them longer, you can freeze the bites. First, place them on a baking sheet and freeze for about an hour. Once they are firm, transfer them to a sealable plastic bag or a container. This way, they won’t stick together. When stored in the fridge, these energy bites last about a week. You’ll still enjoy their yummy flavor and chewy texture. If you freeze the bites, they can last up to three months. To enjoy them, just take out the number you need. Let them sit at room temperature for about 15 to 20 minutes to thaw. Enjoy them as a quick snack whenever you need a boost! Can I make these energy bites vegan? Yes, you can easily make these energy bites vegan. Simply swap honey for maple syrup. Use any plant-based nut butter to replace the creamy peanut butter. This way, you keep the same great taste without any animal products. How can I make them gluten-free? To make these bites gluten-free, use certified gluten-free oats. Regular oats may contain gluten due to cross-contamination. Check the label to ensure they meet gluten-free standards. This small change keeps your snack safe and delicious. What are the best ways to customize this recipe? You can customize these energy bites in many fun ways. Add dried fruits like cranberries or raisins for extra sweetness. Use different nuts or seeds to change the texture. You can also try various spices, like cinnamon or nutmeg, for a new flavor twist. Overview of Caloric Content Each energy bite contains about 80 calories. This makes them a smart choice for a quick snack. The actual calories may vary based on your ingredient choices. Keep track of what you add for the best results. Health Benefits of Key Ingredients - Rolled oats: Great source of fiber. They help keep you full longer. - Peanut butter: Packed with protein and healthy fats. It supports muscle health. - Pumpkin puree: Full of vitamins A and C. It boosts your immune system. - Honey or maple syrup: Natural sweeteners that provide quick energy. - Nuts: Add crunch and healthy fats, along with more protein. These ingredients work together to fuel your body and keep you satisfied. Enjoy knowing you're snacking smart! These energy bites are simple to make and packed with flavor. We explored key ingredients, step-by-step instructions, and helpful tips. You can adjust sweetness and even try different flavors. Variations ensure that everyone can enjoy them, whether you're nut-free or vegan. For best storage, keep them in the fridge or freeze for later. With a good shelf life and many customization options, these bites are perfect for any snack lover. Enjoy the process, and savor these easy, healthy treats!
    Peanut Butter Pumpkin Energy Bites Healthy Fuel Snack
  • - 1 cup unsalted butter (2 sticks), browned - 1 ½ cups granulated sugar - 3 large eggs, at room temperature - 1 teaspoon pure vanilla extract - 2 cups all-purpose flour, sifted - 1 teaspoon baking powder - ½ teaspoon baking soda - ½ teaspoon salt - 1 teaspoon ground cinnamon - 2 cups apples, peeled and diced (approximately 2 medium apples) - 1 cup pecans, chopped - ½ cup sour cream or Greek yogurt, at room temperature Brown butter gives this cake a rich taste. You will need unsalted butter to control salt levels. Use granulated sugar for sweetness. Eggs help bind the cake, while vanilla adds flavor. Sifted all-purpose flour is key for a light texture. Baking powder and baking soda help the cake rise. Salt and cinnamon bring out the flavors. Fresh apples add moisture and sweetness, while pecans give crunch. Sour cream or Greek yogurt keeps the cake moist. If you need alternatives, here are some ideas: - Use salted butter if you don’t have unsalted butter. Just cut back on added salt. - Brown sugar can replace granulated sugar for a deeper flavor. - You can swap eggs for ¼ cup of unsweetened applesauce for a vegan option. - For a gluten-free version, use a gluten-free flour blend. - Plain yogurt can stand in for sour cream if needed. These swaps can help you adapt the recipe based on what you have at home. When picking apples, look for firm, shiny skins. Avoid any with bruises or soft spots. Varieties like Granny Smith or Honeycrisp work well for baking. For pecans, choose ones that smell fresh and nutty. Check for any signs of mold or rancidity. You can also toast pecans to enhance their flavor before adding them to the batter. This step adds a lovely crunch and nutty taste to your cake. To make brown butter, start with unsalted butter. Place one cup of butter in a medium saucepan. Heat it over medium heat. Watch closely as it melts. Stir regularly until it turns a deep golden brown. This will take about 5-7 minutes. The rich, nutty smell means it is ready. Once browned, take it off the heat and let it cool slightly. In a large bowl, mix the cooled brown butter with granulated sugar. Whisk them until smooth. Add three large eggs, one at a time. Make sure to mix well after each egg. Then, add one teaspoon of pure vanilla extract. In another bowl, combine two cups of sifted flour, baking powder, baking soda, salt, and ground cinnamon. Mix these dry ingredients well. Gradually add the dry mix to the wet mix. Alternate with half a cup of sour cream or Greek yogurt. Start and end with the dry mix. Gently stir until just combined. Be careful not to overmix. Finally, fold in two cups of diced apples and one cup of chopped pecans. Once your batter is ready, pour it into a greased and floured 9x5 inch loaf pan. Use a spatula to smooth the top. Preheat your oven to 350°F (175°C). Bake the cake for 50-60 minutes. Check for doneness by inserting a toothpick in the center. If it comes out clean, it is done. If the top browns too fast, cover it lightly with foil. After baking, let the cake cool in the pan for about 15 minutes. Then, transfer it to a wire rack to cool completely. To make brown butter, heat unsalted butter in a pan. Stir it often. Watch for a golden color and nutty smell. This takes about 5-7 minutes. If it smokes, lower the heat. Remove it from the heat when ready. Let it cool slightly before mixing it with sugar. This step adds a rich flavor to your cake. To keep your cake moist, use room temperature eggs and sour cream. This helps blend the ingredients better. Also, don’t overmix the batter. Fold in the apples and pecans gently. This keeps the cake light and fluffy. Bake it until a toothpick comes out clean. If it’s dry, you overbaked it. Avoid common pitfalls to ensure success. Here are a few: - Not measuring ingredients: Use proper measuring cups. This matters for the cake’s texture. - Skipping the sifting step: Sifting flour helps keep the cake light. - Not preheating the oven: Always preheat for even baking. - Overmixing the batter: This can lead to a dense cake. - Not checking for doneness: Use a toothpick to test. If it comes out clean, it’s done. By following these tips, you'll create a delightful Brown Butter Apple Pecan Pound Cake. Enjoy the process and the tasty outcome! {{image_4}} You can change up the flavor of your pound cake easily. Try adding dried cranberries or raisins for a sweet twist. Chopped chocolate or toffee bits can add a rich touch. For a nutty flavor, consider walnuts or almonds instead of pecans. You can use pears instead of apples for a unique taste. The possibilities are endless; just keep the texture in mind. To make this cake gluten-free, use a 1:1 gluten-free flour blend. This will keep the cake soft and moist. For a dairy-free option, swap the butter for coconut oil and use almond milk in place of sour cream. This change will still give you a tasty cake. Just ensure your baking powder is gluten-free as well. Serving is just as important as baking. Dust the top with powdered sugar for a pretty look. You can dress it up with apple slices and extra pecans for fun. Serve it warm with whipped cream or vanilla ice cream for a special treat. Drizzle some caramel sauce on top for added sweetness. Each of these ideas can make your pound cake shine! To keep your Brown Butter Apple Pecan Pound Cake fresh, wrap it well. Use plastic wrap or aluminum foil. This helps keep moisture in and air out. Store it in a cool, dry place. If you want it to last longer, consider refrigerating it. Just remember to wrap it tightly to avoid dryness. This cake will last about 3-4 days at room temperature. In the fridge, it can last up to a week. If you want to freeze it, slice it first. Wrap each slice in plastic wrap and place them in a zip-top bag. It can stay good in the freezer for about 2-3 months. When you're ready to eat, just thaw it in the fridge overnight. For the best taste, reheat your pound cake gently. Use the microwave for 10-15 seconds per slice. This warms it without drying it out. You can also warm it in the oven at 350°F for about 5-10 minutes. Serve it warm for a cozy treat, and maybe add a scoop of ice cream on top! Yes, you can use other nuts. Walnuts or almonds work well. They add a nice crunch. Just chop them up like pecans and fold them in. You can use natural sweeteners like honey or agave. They will change the texture a bit. Start with less and taste as you mix. The cake is done when a toothpick comes out clean. Check around the 50-minute mark. If it is still wet, bake a bit longer. Yes, you can make cupcakes! Just fill each cupcake liner with batter. Bake for about 20-25 minutes. Watch them closely to avoid overbaking. Slice the pound cake and serve it warm or at room temp. Dust it with powdered sugar for style. Add fresh apple slices or whipped cream for a treat. This blog post covered making a delicious Brown Butter Apple Pecan Pound Cake. We explored key ingredients, helpful substitutions, and tips for choosing fresh apples and pecans. You learned step-by-step instructions for preparing and baking the cake, along with tips for perfect results. We also discussed variations, storage methods, and answers to common questions. Baking is a fun way to show your creativity. Enjoy making this cake and sharing it with others!
    Brown Butter Apple Pecan Pound Cake Delight

Seasonal

  • - ⅓ cup unsweetened cocoa powder - ½ cup all-purpose flour - ¼ teaspoon baking powder - ¼ teaspoon salt - ½ cup unsalted butter - 1 cup granulated sugar - 2 large eggs - 1 teaspoon vanilla extract - 1 cup canned pumpkin puree - 1 teaspoon pumpkin pie spice - ¼ teaspoon ground cinnamon - ½ cup semi-sweet chocolate chips To create these bakery-style chocolate pumpkin swirl brownies, you need both dry and wet ingredients. First, gather your dry ingredients. Cocoa powder gives the brownies their rich, chocolatey taste. All-purpose flour provides the structure. Baking powder helps them rise, while salt enhances the flavors. For the wet ingredients, start with melted unsalted butter. This makes the brownies rich. Granulated sugar adds sweetness. The eggs keep the brownies moist and give them a nice texture. Vanilla extract brings warmth, while pumpkin puree adds moisture and flavor. Pumpkin pie spice and ground cinnamon give a hint of fall with every bite. Lastly, don’t forget the add-ins! Semi-sweet chocolate chips melt into the brownies, adding extra chocolate goodness. Mixing these ingredients well creates a batter that is both tasty and satisfying. - Preheat your oven to 350°F (175°C). - Grease an 8x8 inch baking pan. Line it with parchment paper, letting some hang over the edges. This helps with easy removal later. - In a medium bowl, mix melted butter and sugar. Whisk until smooth and fully blended. - Add the eggs, one at a time. Whisk well after each one. - Pour in the vanilla extract and mix until combined. - In another bowl, sift together cocoa powder, flour, baking powder, and salt. Gradually fold this into the wet mix. Stir until just combined. Avoid overmixing. - Gently fold in the semi-sweet chocolate chips. Make sure they're evenly mixed. - In a separate bowl, combine pumpkin puree, pumpkin pie spice, and ground cinnamon. Mix until smooth. - Pour half of the chocolate batter into the prepared pan. Spread it evenly across the bottom. - Add spoonfuls of the pumpkin mixture on top of the brownie batter. Then, follow with the remaining brownie batter. Spread it over the pumpkin layer. - Use a knife or skewer to gently swirl the layers together. - Bake in the preheated oven for 25-30 minutes. Check with a toothpick; it should come out with a few moist crumbs but not wet batter. - Let the brownies cool in the pan for at least 15 minutes. - Use the parchment overhang to lift them out of the pan. Place them on a wire rack to cool completely before slicing. To create a lovely swirl in your brownies, use a knife or skewer. Start at one edge and gently drag it through the batter. Make simple, back-and-forth motions. This will blend the chocolate and pumpkin layers without mixing them too much. Remember, less is more! Overmixing can lead to a muddy look. Aim for a beautiful marbled effect. Oven calibration is key for perfect brownies. Always preheat your oven to 350°F (175°C). This helps the brownies cook evenly. To check if they are done, insert a toothpick into the center. If it comes out with a few moist crumbs, they are ready. If wet batter sticks to the toothpick, bake for a few more minutes. After baking, let the brownies cool in the pan for about 15 minutes. Use the parchment paper to lift them out. Place them on a wire rack to cool completely. This helps them set and makes cutting easier. For clean slices, wipe your knife between cuts. A sprinkle of powdered sugar adds a nice touch. You can dust it over the top just before serving. For an extra treat, add whipped cream or vanilla ice cream on the side. This makes your brownies feel more special. Serve them warm for a tasty, gooey delight! {{image_4}} You can change the taste of your brownies easily. Adding nuts gives a nice crunch. I recommend walnuts or pecans for a rich flavor. You can also mix in white chocolate chips for a sweet twist. For spices, try cardamom or nutmeg. These can add warmth and depth to the pumpkin flavor. If you want a lighter version, swap out some ingredients. Use applesauce instead of butter for a moist brownie. You can also use coconut oil or a plant-based butter for a dairy-free option. For a gluten-free treat, replace all-purpose flour with almond flour or oat flour. These swaps keep the brownies tasty while making them healthier. To make your brownies extra special, serve them warm. Add a scoop of vanilla ice cream on top for a creamy contrast. A dollop of whipped cream also pairs well. Enjoy these brownies with a cup of coffee or tea. The flavors balance nicely and make for a delightful treat. To keep your brownies fresh, store them in an airtight container. This prevents them from drying out. A glass or plastic container with a tight lid works well. Place a piece of parchment paper between layers to avoid sticking. Store them at room temperature for up to four days. If you want them to last longer, refrigeration is an option. Just know that cold can change their texture slightly. You can freeze these brownies for later enjoyment. First, let them cool completely. Then, wrap them tightly in plastic wrap. After that, place them in a freezer-safe bag or container. Make sure to label the container with the date. They can last up to three months in the freezer. To defrost, move them to the fridge overnight. If you want them warm, heat them in the microwave for a few seconds. Enjoy them fresh! You can use applesauce or mashed banana. Both add moisture and sweetness. If you try applesauce, use the same amount as pumpkin. For mashed banana, use a bit less since it's thicker. Cocoa powder is not a good swap for chocolate chips. Cocoa powder is dry and lacks sweetness. Instead, you can add more cocoa powder to the batter if you want a richer flavor. Check with a toothpick. Insert it into the center of the brownies. If it comes out with a few moist crumbs, they are done. If the toothpick is wet, bake for a few more minutes. Yes, you can! Bake the brownies and let them cool completely. Store them in an airtight container. They will stay fresh for about three days. Use a sharp knife for clean edges. To get neat slices, wipe the knife with a damp cloth between cuts. This will help prevent sticking and give you perfect squares. This guide took you through each step of making delicious pumpkin brownies. You learned about the key ingredients, from cocoa powder to pumpkin puree, and how they come together. I shared tips for achieving a perfect swirl and baking them just right. Remember, you can customize these brownies with different add-ins or healthier swaps. Store them well to keep them fresh or freeze them for later. With these steps and tips, you can make yummy brownies that everyone will love. Enjoy your baking adventure!
    Bakery-Style Chocolate Pumpkin Swirl Brownies Delight
  • To make these tasty chocolate peanut butter cheesecake cups, you'll need: - 1 cup chocolate cookie crumbs - ¼ cup unsalted butter, melted - 8 oz cream cheese, softened - ½ cup creamy peanut butter - ½ cup powdered sugar - 1 teaspoon pure vanilla extract - 1 cup heavy whipping cream, chilled - Chocolate shavings and/or cocoa powder for garnish You can swap out some ingredients if needed: - For chocolate cookie crumbs, use graham cracker crumbs. - If you want a healthier option, try using low-fat cream cheese. - You can replace creamy peanut butter with crunchy peanut butter for more texture. - For a vegan version, use plant-based cream cheese and coconut cream instead of heavy cream. Choosing the right ingredients makes a big difference: - Use fresh cream cheese. It should feel smooth and free of lumps. - Pick high-quality peanut butter. Look for brands with only peanuts and salt. - Select unsweetened cocoa powder for a deeper chocolate flavor. - When buying heavy cream, check for a high fat content (at least 36%). - For chocolate shavings, use a good quality dark chocolate for rich taste. Making these cups with quality ingredients will bring out the best flavors. To start, grab a medium bowl. Add 1 cup of chocolate cookie crumbs and ¼ cup of melted butter. Mix these two until the crumbs are well coated. This step is key for a tasty crust. Next, use a tablespoon to scoop the mixture into serving cups. Press it down firmly to make a solid base. This helps the crust hold its shape. Once you finish, set the cups aside. Let them firm up while you prepare the filling. Now, take a large bowl. Beat 8 ounces of softened cream cheese with an electric mixer. Go on medium speed until it’s smooth and creamy. No lumps should remain! Gradually mix in ½ cup of creamy peanut butter, ½ cup of powdered sugar, and 1 teaspoon of vanilla extract. Keep mixing until everything is mixed well. The mixture should be thick and smooth. In another bowl, whip 1 cup of chilled heavy cream. Use high speed until stiff peaks form. Be careful not to over-whip it! Gently fold the whipped cream into the peanut butter mixture. Use a spatula to keep it airy. Spoon the peanut butter cheesecake filling into each cup. Fill them generously over the chocolate crust. Smooth the tops with a spoon for a neat look. Once filled, cover the cups with plastic wrap. Refrigerate for at least 4 hours. This time lets the filling set and become firm. The final result will be creamy and delicious cheesecake cups. Enjoy! To make great whipped cream, start with cold cream. Use heavy whipping cream for best results. Beat it in a clean bowl until stiff peaks form. This means the cream holds its shape. Avoid over-beating, as it can turn grainy. If it does, you can add a bit of fresh cream to fix it. Remember, the goal is a light and fluffy texture. This whipped cream will make your cheesecake cups extra special. A smooth cheesecake filling is key to great flavor. Begin with room temperature cream cheese. This helps it mix well without lumps. Use an electric mixer on medium speed when blending. Gradually add peanut butter, powdered sugar, and vanilla. Mix until everything is combined and creamy. When you fold in the whipped cream, do it gently. This keeps the filling light and airy. The perfect filling is rich and smooth, making each bite a delight. Presentation matters, especially for dessert. Use clear cups or small glasses to show off layers. Arrange them on a pretty platter for a nice touch. Before serving, drizzle warm peanut butter and chocolate sauce on top. Add chocolate shavings or a dusting of cocoa powder for flair. These small details make your cheesecake cups look gourmet. Guests will love the taste and the look of this treat! {{image_4}} You can jazz up your Chocolate Peanut Butter Cheesecake Cups with fun add-ins. Try adding chocolate chips for extra texture and sweetness. You can mix in chopped nuts for a crunchy bite. If you love fruit, consider folding in some mashed bananas or a splash of raspberry puree. These flavors will blend well with the rich peanut butter and chocolate. If you need a gluten-free option, swap chocolate cookie crumbs for gluten-free cookies or almond flour. You can use dairy-free cream cheese and heavy cream for a vegan version. Just ensure your peanut butter is also free from added sugars. These swaps keep the dessert tasty while meeting your dietary needs. Toppings can take your cheesecake cups to a new level. Drizzle warm peanut butter or chocolate sauce on top for a rich finish. You can also sprinkle crushed graham crackers or nuts for crunch. Try adding fresh berries or a mint leaf for color. These simple touches make your dessert look gourmet and inviting. Store your chocolate peanut butter cheesecake cups in the fridge. Use an airtight container to keep them fresh. Covering each cup with plastic wrap also works well. This keeps moisture out and flavors in. These cheesecake cups last up to five days in the fridge. If you want to freeze them, wrap each cup tightly. Use plastic wrap and then foil to protect them. They can last in the freezer for up to three months. When you’re ready to eat, thaw them in the fridge overnight. You do not need to reheat these cheesecake cups. They taste best when served cold. If you want to enhance the flavor, drizzle warm peanut butter or chocolate sauce on top. Enjoy these creamy treats straight from the fridge! Yes, you can make these cheesecake cups a day or two ahead. They taste great after chilling. Just cover them well with plastic wrap. Keep them in the fridge until you are ready to serve. This will save you time on the day of your event. If your filling is too runny, try these steps. First, make sure you whip the cream until stiff peaks form. This adds volume and helps set the mixture. If it’s still runny, you can add a bit more powdered sugar. This will help thicken it up. Lastly, make sure to chill the cups long enough. The filling needs time to set properly. Yes, you can use low-fat cream cheese if you prefer. It will still work well in the recipe. The texture may be a bit different but it will taste great. Just remember that it may not be as rich as the full-fat version. If you use low-fat, watch the mixing time. Overmixing can make it watery. You now have all the details for making delicious peanut butter cheesecake cups. From choosing quality ingredients to mastering the crust, each step is key. Remember, small tricks can make a big difference in taste and look. Variations let you adapt the cups to your needs or flavor likes. Store them right, and they’ll stay fresh for days. With all this info, you'll create amazing dessert cups that everyone will love. Enjoy every bite and share your results!
    Chocolate Peanut Butter Cheesecake Cups Easy No Bake
  • - 1 ½ cups all-purpose flour - 1 cup rolled oats - 1 cup packed brown sugar - 2 teaspoons baking powder - 1 teaspoon baking soda - ½ teaspoon salt - ½ teaspoon ground cinnamon - 1 cup buttermilk - ½ cup vegetable oil - 2 large eggs - 1 teaspoon pure vanilla extract - 2 medium apples, peeled and diced - ½ cup chopped walnuts or pecans (optional) - 1 tablespoon fresh lemon juice For the Crisp Topping: - ½ cup packed brown sugar - ½ cup all-purpose flour - ½ cup rolled oats - ½ teaspoon ground cinnamon - ¼ cup cold butter, cut into cubes When measuring flour, spoon it into the cup and level it off. This gives you the right amount without packing it down. For brown sugar, pack it firmly in the cup for accurate measurement. Use fresh, room-temperature eggs for better mixing. Dice apples into small, even pieces for consistent baking. If using nuts, chop them finely to blend well in the batter. I recommend using Granny Smith or Honeycrisp apples. Granny Smith adds a nice tartness, while Honeycrisp is sweet and juicy. Both types hold their shape well during baking, ensuring you get lovely apple bites in every muffin. You can also mix different kinds for a fun flavor twist. To start, preheat your oven to 375°F (190°C). This is key for getting those muffins to rise well. Next, prepare your muffin tin. Line each cup with paper liners or spray them with non-stick cooking spray. This will help the muffins come out easily without sticking. First, grab a large bowl. In it, mix together the dry ingredients. Whisk together 1 ½ cups of flour, 1 cup of rolled oats, 1 cup of brown sugar, 2 teaspoons of baking powder, 1 teaspoon of baking soda, ½ teaspoon of salt, and ½ teaspoon of ground cinnamon. Make sure it’s all well combined. In a separate bowl, combine the wet ingredients. Whisk together 1 cup of buttermilk, ½ cup of vegetable oil, 2 large eggs, and 1 teaspoon of pure vanilla extract. Mix until it is smooth. Now, slowly pour the wet mixture into the dry ingredients. Use a spoon or spatula to stir gently. Stop mixing when just combined. Overmixing can make your muffins tough. Now, it’s time to add flavor! Fold in 2 medium diced apples and, if you want, ½ cup of chopped nuts. Add 1 tablespoon of fresh lemon juice for a zesty kick. This will help keep the apples fresh and bright. In a small bowl, prepare the crisp topping. Mix together ½ cup of brown sugar, ½ cup of flour, ½ cup of rolled oats, and ½ teaspoon of ground cinnamon. Add ¼ cup of cold butter cut into cubes. Use your fingers or a fork to mix until the texture is like coarse crumbs. Now, spoon the muffin batter into each muffin cup, filling them about ¾ full. This allows room for rising. Top each muffin with the crisp mixture for extra crunch. Place your muffin tin in the preheated oven. Bake for 20-25 minutes. Check for doneness by inserting a toothpick into the center of a muffin. It should come out clean or with a few moist crumbs. Once baked, let the muffins cool in the pan for about 5 minutes. Then, transfer them to a wire rack to cool completely. Enjoy their warm, sweet aroma filling your kitchen! To make your apple crisp muffins bakery-style, focus on the texture. Use fresh ingredients. Make sure your baking powder and baking soda are not expired. This helps the muffins rise beautifully. Mix the wet and dry ingredients gently. Overmixing can lead to dense muffins. Aim for just combined; some lumps are okay. This keeps the muffins light and fluffy. For a nice dome shape, fill the muffin cups about three-quarters full. This will give you that bakery look. Don't forget to sprinkle the crisp topping evenly. It adds a sweet crunch that everyone loves. One common mistake is using cold ingredients. Always bring your eggs and buttermilk to room temperature first. Cold ingredients can lead to uneven baking. Another mistake is forgetting to line your muffin tin properly. Use paper liners or spray with non-stick spray. This prevents sticking and makes cleanup easier. Also, avoid skipping the lemon juice. It brightens the flavor of the apples. If you leave it out, the muffins may taste flat. Serve your muffins warm for the best taste. You can dust them with powdered sugar for a lovely finish. Consider adding a dollop of whipped cream on top. It gives a rich touch that pairs well with the muffins. For a fun twist, serve these muffins with a scoop of vanilla ice cream. It turns a simple treat into a dessert everyone will enjoy. {{image_4}} You can easily change the flavor of your muffins. Add more spices for warmth. Consider increasing cinnamon to one tablespoon for a stronger taste. A pinch of nutmeg can also enhance the flavor. For a cozy twist, try adding some ground ginger. Each spice adds a unique note to your muffins. If you need gluten-free muffins, switch the flour. Use a gluten-free all-purpose blend instead. It works well in this recipe. You can also use dairy-free milk in place of buttermilk. Almond milk or oat milk are great options. This way, everyone can enjoy these tasty treats. Get creative with your toppings and mix-ins. Instead of walnuts or pecans, try chocolate chips for a sweet twist. Dried cranberries or raisins can add a chewy texture. For the topping, consider adding shredded coconut or chopped pecans for a crunchy layer. Each addition brings new flavors to your muffins. To keep your apple crisp muffins fresh, store them in an airtight container. This prevents moisture loss and keeps them soft. Place a paper towel at the bottom of the container to absorb excess moisture. You can also add another paper towel on top of the muffins. This helps keep them fresh longer. Store them at room temperature for up to three days. If you want to keep them longer, consider freezing them. Freezing muffins is easy and a great way to save them for later. Allow the muffins to cool completely first. Then, wrap each muffin tightly in plastic wrap. After that, place the wrapped muffins in a freezer bag. Remove as much air as possible before sealing. You can freeze them for up to three months. When you're ready to enjoy a muffin, just thaw it at room temperature or heat it in the microwave. Reheating muffins is simple. If you want a warm, soft muffin, use the microwave. Heat each muffin for about 10 to 15 seconds. If you prefer a crispy top, use the oven. Preheat the oven to 350°F (175°C) and heat the muffins for about 5 to 10 minutes. This way, you get the best of both worlds: warm and crispy! To make your muffins light and fluffy, start by using fresh baking powder and baking soda. These ingredients help the muffins rise. Also, mix the wet and dry ingredients gently. Overmixing can make the muffins dense. Lastly, adding buttermilk gives a nice lift and moisture. Yes, you can use alternative sweeteners. Options like coconut sugar or maple syrup work well. Just remember to adjust the liquid in your batter if using a liquid sweetener. This keeps your muffins moist and tasty. You can tell your muffins are ready when they are golden brown and spring back when touched. A toothpick inserted into the center should come out clean or with a few moist crumbs. This ensures they are baked just right, not undercooked or dry. You now know how to make tasty apple crisp muffins. We covered key ingredients, the best tips for mixing, and baking steps. You learned how to store muffins well and discovered tasty variations. Remember, practice makes perfect. Keep these tips in mind to avoid common mistakes. With your skills in hand, enjoy sharing these muffins with friends and family. Happy baking!
    Apple Crisp Muffins Bakery Style Fresh and Tasty Treat
  • - 4 boneless, skinless chicken breasts - ½ cup unsalted butter (1 stick) - 6 cloves garlic, finely minced - Zest of 1 fresh lemon - ¼ cup freshly squeezed lemon juice - 1 teaspoon dried oregano - 1 teaspoon dried thyme - Salt and freshly ground black pepper, to taste - Fresh parsley, finely chopped (for garnish) - Lemon slices (for garnish) - 1 stick of butter = ½ cup - ¼ cup = 4 tablespoons - 1 teaspoon = 5 milliliters - 1 clove garlic = about 1 teaspoon minced - Chicken Breasts: Look for firm, pink meat. Avoid any that look dull or have dark spots. - Garlic: Choose garlic that is firm and free of mold. Avoid any soft or sprouted cloves. - Lemons: Pick lemons that feel heavy for their size, with a smooth skin. They should be bright yellow and firm. - Herbs: Fresh herbs should be vibrant and fragrant. Look for bright green parsley and keep it cool until use. - Butter: Use unsalted butter for better flavor control. Check the date for freshness. Selecting the best ingredients makes your lemon garlic butter chicken shine. Enjoy cooking! {{ingredient_image_2}} Start with four boneless, skinless chicken breasts. Pat them dry with paper towels. Season both sides with salt and black pepper. Add a pinch of dried oregano and thyme. Let the chicken sit for a few minutes. This helps the flavors soak in. Take a large skillet and set it over medium heat. Add half a cup of unsalted butter to the skillet. Watch it as it melts. Swirl the skillet gently for even melting. Once the butter is melted, add six cloves of finely minced garlic. Sauté the garlic for about one to two minutes. Stir it well to avoid burning. You want it fragrant but not brown. Now, place the seasoned chicken breasts in the skillet. Cook each side for six to seven minutes. Look for a golden-brown color. While cooking, baste the chicken with the butter-garlic sauce. This adds flavor and keeps it moist. To check doneness, use a meat thermometer. The chicken should reach an internal temperature of 165°F (75°C). Once done, take the chicken out and let it rest for a few minutes. Drizzle some of the lemon garlic butter sauce over the chicken before serving. To make your lemon garlic butter chicken even better, try adding more herbs. Fresh rosemary or basil can bring a nice touch. You can also add a pinch of red pepper flakes for some heat. Experiment with flavors to find what you love best. One common mistake is overcooking the chicken. Always check the internal temperature. It should be 165°F (75°C) for safe and juicy chicken. Also, avoid skipping the resting time. Letting the chicken rest for a few minutes keeps it moist. Basting is key for moist chicken. Use a spoon to drizzle the melted butter and garlic mixture over the chicken while it cooks. This adds flavor and keeps the chicken juicy. Try to baste every few minutes for the best results. Pro Tips Rest the Chicken: Allow the seasoned chicken breasts to sit for about 15 minutes before cooking. This helps the flavors penetrate the meat, resulting in a juicier and more flavorful dish. Use Fresh Ingredients: For the best flavor, use fresh garlic and lemons. Fresh ingredients will enhance the overall taste of the dish significantly. Baste for Flavor: As the chicken cooks, regularly baste it with the lemon garlic butter sauce. This not only adds flavor but also keeps the chicken moist and tender. Pairing Suggestions: This dish pairs wonderfully with a side of steamed vegetables or a light salad. Consider serving it with a crisp white wine for a complete meal experience. {{image_4}} You can add vegetables to make this dish a full meal. Think about using broccoli, green beans, or bell peppers. Chop the veggies into small pieces. Sauté them in the butter before adding the chicken. This way, they soak up that rich flavor. Plus, they add color and nutrition. If you want to switch things up, try using fish or shrimp. Salmon works well with lemon and garlic. Cook it for about 4-5 minutes on each side. Shrimp cooks faster, so just 2-3 minutes per side will do. Both options will still taste amazing with the lemon garlic butter. Feel free to get creative with herbs. You can use fresh rosemary or basil instead of oregano and thyme. These herbs will give the dish a different taste. You might also add a pinch of red pepper flakes for some heat. Mixing flavors keeps the meal exciting and fresh! After enjoying your meal, it's important to store leftovers properly. Place any leftover chicken in an airtight container. Make sure to cover it well to keep it fresh. You can store it in the fridge for up to three days. Always label the container with the date. This helps you keep track of how long it has been there. When you are ready to enjoy the leftovers, use gentle heat for reheating. The best way is to use the oven. Preheat your oven to 350°F (175°C). Place the chicken in an oven-safe dish. Cover it with foil to keep it moist. Heat for about 15-20 minutes or until it reaches 165°F (75°C). You can also reheat it on the stove. Just add a bit of butter or oil to a skillet and warm it gently. If you want to save some chicken for later, freezing is a great option. Before freezing, let the chicken cool completely. Cut it into smaller pieces for easy thawing. Place the pieces in freezer-safe bags or containers. Remove as much air as possible to prevent freezer burn. You can freeze it for up to three months. When ready to eat, thaw the chicken in the fridge overnight before reheating. You should cook lemon garlic butter chicken for 12 to 14 minutes. This includes about 6 to 7 minutes on each side. Use a meat thermometer to check if it reaches 165°F. This ensures the chicken is safe to eat and juicy. Yes, you can use skin-on chicken for this recipe. Skin-on chicken adds extra flavor and moisture. Just be aware that skin-on chicken may require a few extra minutes of cooking. Adjust your cooking time to ensure the chicken cooks through. Lemon garlic butter chicken pairs well with many sides. Here are some great options: - Steamed rice - Roasted vegetables - Mashed potatoes - A fresh green salad - Garlic bread These sides balance the rich flavors of the chicken nicely. Enjoy mixing and matching for your perfect meal! Lemon garlic butter chicken is easy and tasty. You learned about the right ingredients, how to cook it, and tips for success. I shared ways to add flavor, how to avoid problems, and ideas for variations. Storing leftovers and reheating them is simple too. With these instructions, you can impress your family and friends. Now, you have the tools to make this dish your own. Enjoy your cooking and have fun!
    Lemon Garlic Butter Chicken Mouthwatering Dinner Idea

Footer

↑ back to top

About

  • Privacy Policy
  • Disclaimer
  • Terms & Conditions
  • Accessibility Policy

Contact

  • Contact
  • Services
  • Media Kit
  • FAQ

Copyright © 2024 Tastytaleskitchen